14
NQ Wireless systems
Navigation diagram description
1.
Press the center button four times on a linked in NQ Remote control to access the
configuration menu.
2.
Once in the configuration, the display will show the first of the configurable options WSN
(workstation number). Press the up and down buttons on the NQ Remote to cycle through
the menu options.
3.
Once the display shows the menu option you want to change, press the forward button to
access that option.
4.
You will be shown the current value of that option. Again, use the up and down buttons to
change the value of the option.
5.
Once you’re content, press the back button to return to the menu.
6.
When you are done configuring, press the center button twice to exit the configuration. The
display will ask you if you want to discard your changes (N) or save them before exiting (Y).
Use the back button for NO and forward button for YES.
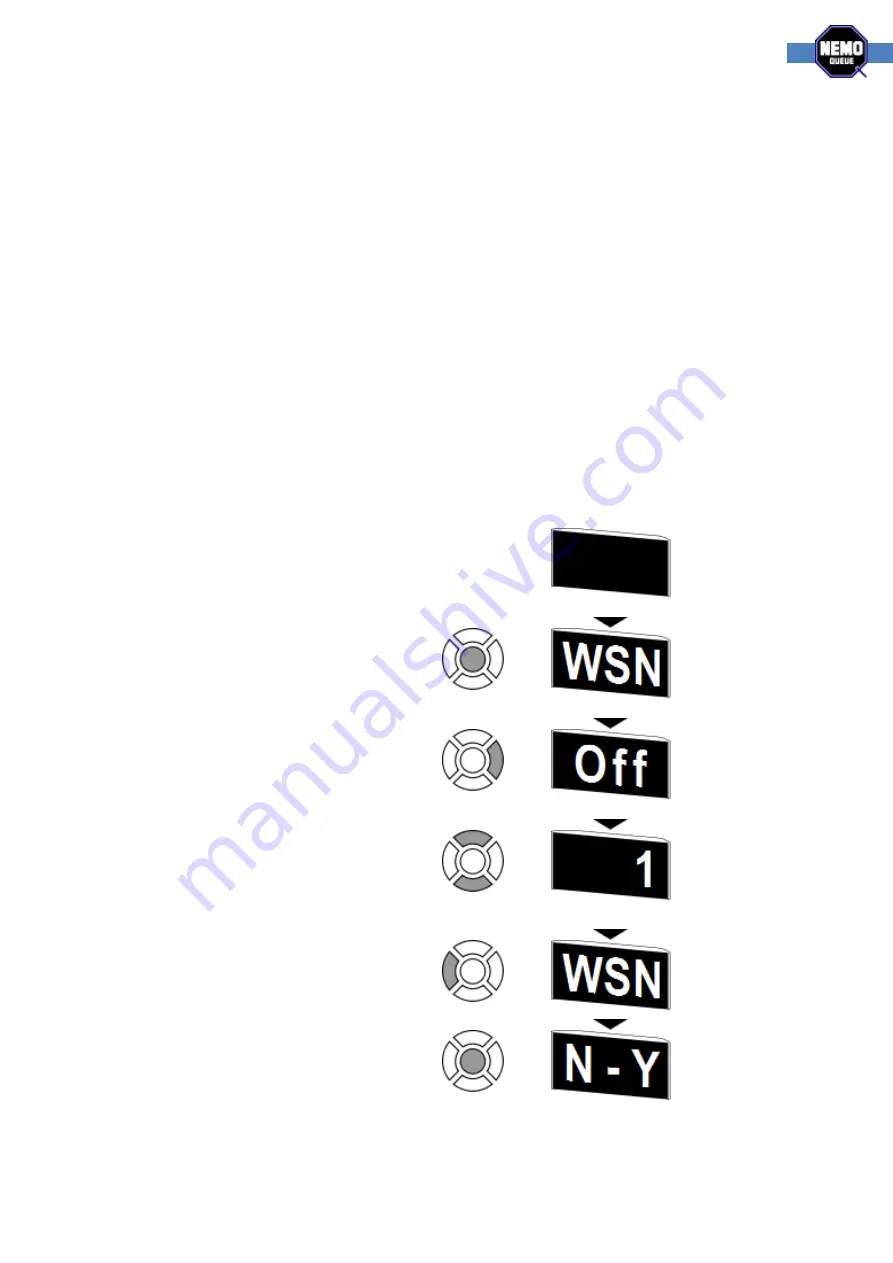
Configuration example
Below is an example of accessing the menu and changing the workstation number associated with
the NQ Remote control;
Starting out, the main display is
dark and the small LCD display on
the NQ Receiver is showing the
software version.
Press the center button four times.
The main display will show the
configuration menu. WSN stands
for workstation number.
The forward button accesses the
selected option and displays this
remote controls current setting.
Default is off.
Using the up and down buttons
you select what workstation
number to associate with this
remote control.
The back button takes you back to
the menu.
To exit, press the center button
twice. Press the back button to
discard changes or the forward
button to save and exit.