background image

4

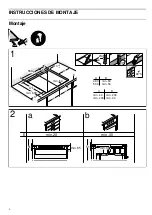
INSTRUCCIONES DE MONTAJE

Montaje

PLQ

PLQ


5

$

%

(

&

'

$


%

PLQ
PLQ

&

'

PLQ
PLQ

PLQ
PLQ

‘

[

ƒ

ƒ&

PLQ

PLQ

PLQ 

PLQ 

(

D

E

Summary of Contents for T B10 Series

Page 1: ...es Instrucciones de uso y montaje 3 en Instructions for installation and use 21 el 38 T B10 Placa de cocci n Hob...

Page 2: ...2 cm T B10...

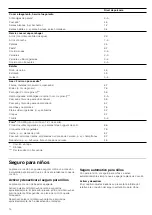
Page 3: ...es 11 Presentaci n del aparato 12 El panel de mando 12 Las zonas de cocci n 12 Indicador de calor residual 12 Programar la placa de cocci n 13 Encender y apagar la placa de cocci n 13 Ajustar la zona...

Page 4: ...4 INSTRUCCIONES DE MONTAJE Montaje PLQ PLQ 5 PLQ PLQ PLQ PLQ PLQ PLQ PLQ PLQ PLQ PLQ D E...

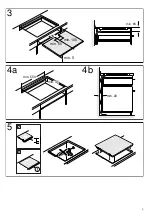
Page 5: ...5 PLQ PLQ PLQ PLQ D E PLQ PLQ PLQ...

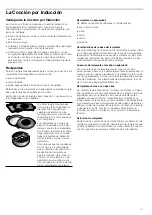
Page 6: ...arlo por bordes afilados Si hay un horno montado debajo pasar el cable por las esquinas traseras del horno hasta la caja de conexi n Debe colocarse de manera que no toque partes calientes de la placa...

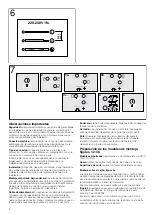
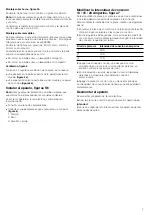
Page 7: ...arato a la red el ctrica y comprobar su funcionamiento Tensi n ver placa de caracter sticas Conectar exclusivamente seg n el esquema de conexi n figura 6 1 Marr n 2 Azul 3 Amarillo y verde Modificar l...

Page 8: ...rezcan de experiencia y conocimientos siempre y cuando sea bajo la supervisi n de una persona responsable de su seguridad o que le haya instruido en el uso correcto del aparato siendo consciente de lo...

Page 9: ...de fusibles Avisar al Servicio de Asistencia T cnica Peligro de descarga el ctrica Las fisuras o roturas en la vitrocer mica conllevan riesgo de electrocuci n Desconectar el fusible de la caja de fusi...

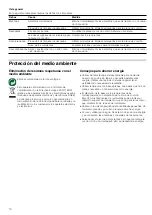
Page 10: ...mantenga la cocci n Con uno demasiado alto se desperdicia energ a Da os Causa Medida Manchas Alimentos derramados Eliminar inmediatamente los alimentos que se derramen con un rasca dor para vidrio Pr...

Page 11: ...zona de cocci n seleccionada o ste no es del material o tama o adecuado el nivel de cocci n que se visualiza en el indicador de la zona de cocci n parpadear Colocar el recipiente adecuado para que de...

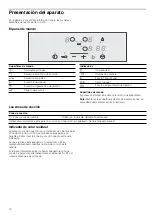
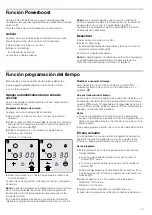
Page 12: ...e esta indicaci n Aunque la placa est apagada el indicador o se mantendr iluminado mientras la zona de cocci n est caliente Al retirar el recipiente antes de haber apagado la zona de cocci n aparecer...

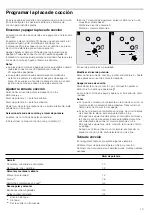
Page 13: ...n con el s mbolo 2 En los 10 segundos siguientes pulsar el s mbolo Se muestra el ajuste b sico S mbolo nivel de potencia 9 S mbolo nivel de potencia 4 El nivel de potencia se ha ajustado Modificar el...

Page 14: ...as p ej bechamel 1 2 Salsas batidas p ej salsa bernesa salsa holandesa 3 4 Hervir cocer al vapor rehogar Arroz con doble cantidad de agua 2 3 Arroz con leche 1 2 Patatas 4 5 Pasta 6 7 Cocido sopas 3 4...

Page 15: ...os s mbolo hasta que aparezca el tiempo de cocci n deseado Al cabo de unos segundos el tiempo de cocci n comienza a transcurrir Nota Se puede programar autom ticamente el mismo tiempo de cocci n para...

Page 16: ...esenta diversos ajustes b sicos Estos ajustes pueden adaptarse a las necesidades propias del usuario Indicador Funci n Seguro autom tico para ni os Desactivado Activado Se ales ac sticas Se al de conf...

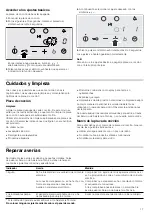
Page 17: ...a presi n o m quinas de limpieza a vapor La mejor manera de eliminar la suciedad resistente es utilizando un rascador para vidrio Observar las indicaciones del fabricante Se puede adquirir rascadores...

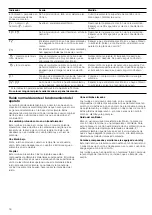
Page 18: ...s agujas de un reloj Este ruido s lo se presenta cuando est n en funcionamiento 3 m s zonas de cocci n y desaparece o se reduce cuando se apaga alguna zona de cocci n Los ruidos que se han descrito so...

Page 19: ...a nuestros recipientes accesorios de Schulte Ufer bater a de cocina de 4 piezas para placa de inducci n Z9442X0 con las siguientes dimensiones Cazo 16 cm 1 2 l para zonas de cocci n de 14 5 cm Olla 1...

Page 20: ...una pizca de sal 14 5 cm 9 aprox 2 30 S 2 S Ingredientes 250 g de arroz de grano redondo 600 g de agua y una pizca de sal 18 cm 9 aprox 2 30 S 2 S Fre r solomillo de cerdo Recipiente Sart n 18 cm 9 1...

Page 21: ...oking 28 Advantages of induction cooking 28 Cookware 28 Getting to know your appliance 29 The control panel 29 The hotplates 29 Residual heat indicator 29 Programming the hob 30 Turning the hob on and...

Page 22: ...22 INSTALLATION INSTRUCTIONS Assembly PLQ PLQ 5 PLQ PLQ PLQ PLQ PLQ PLQ PLQ PLQ PLQ PLQ D E...

Page 23: ...23 PLQ PLQ PLQ PLQ D E PLQ PLQ PLQ...

Page 24: ...o not tie the power cable or pass it along sharp edges If there is an oven installed below pass the cable along the rear corners of the oven to the connection box It must be positioned so that it does...

Page 25: ...e surfaces may have sharp edges Connect the appliance to the mains to check its working Voltage see specifications plate Connect only according to the connection drawing figure 6 1 Brown 2 Blue 3 Yell...

Page 26: ...ppliance safely and have understood the associated hazards Children must not play with on or around the appliance Children must not clean the appliance or carry out general maintenance unless they are...

Page 27: ...n cooking in a bain marie the hob and cooking container could shatter due to overheating The cooking container in the bain marie must not directly touch the bottom of the water filled pot Only use hea...

Page 28: ...cs of the pan base The characteristics of the pan base may affect the uniformity of the cooking results Pans made from materials which help diffuse heat such as stainless steel sandwich pans distribut...

Page 29: ...when this indicator is lit Although the hob is switched off the indicator or will remain on for as long as the hotplate is hot If the pan is removed before the hotplate is turned off the indicator or...

Page 30: ...n the following 10 seconds press the or symbol The basic setting appears symbol power level 9 symbol power level 4 The power level has been set Changing the power level Select the hotplate and press t...

Page 31: ...4 5 White sauces e g bechamel 1 2 Whipped sauces e g Bearnaise Hollandaise 3 4 Boiling steaming saut ing Rice with a double amount of water 2 3 Rice pudding 1 2 Potatoes 4 5 Pasta 6 7 Soups 3 4 Vegeta...

Page 32: ...r the all the hotplates The programmed time passes independently for each of the hotplates The Basic settings chapter provides information on automatically programming the cooking time Changing or can...

Page 33: ...signals deactivated Only error signal activated Only confirmation signal activated All signals activated Automatic programming of cooking time Switched off Automatic shut off time Duration of the tim...

Page 34: ...to use a glass scraper Follow the manufacturer s instructions Suitable glass scrapers can be obtained through the Technical Assistance Service or from our online shop Hob frame In order to avoid dama...

Page 35: ...essary call out E number and FD number Please quote the E number product number and the FD number production number of your appliance when contacting the after sales service The rating plate bearing t...

Page 36: ...1 00 Yes 1 Yes Making bechamel sauce Cookware Saucepan Milk temperature 7 C Ingredients 40 g of butter 40 g of flour 0 5 l of milk 3 5 fat and a pinch of salt 14 5 cm 1 Melt butter mix in flour and s...

Page 37: ...30 No 7 No 55 ml of cr pe batter Frying frozen potato chips Cookware Pot 18 cm 9 Until the tempera ture of the oil reaches 180 C No 9 No Ingredients 1 8 kg of sunflower oil for cooking 200 g of froze...

Page 38: ...38 el 39 39 41 1 2 3 4 41 5 6 42 13 16 20 7 42 42 43 43 44 45 45 45 45 45 45 46 46 46 46 47 47 47 47 48 48 48 Powerboost 49 49 49 49 49 49 50 50 51 51 51 51 51 52 52 53...

Page 39: ...39 PLQ PLQ 5 PLQ PLQ PLQ PLQ PLQ PLQ PLQ PLQ PLQ PLQ D E...

Page 40: ...40 PLQ PLQ PLQ PLQ D E PLQ PLQ PLQ...

Page 41: ...41 I 1 2 3 4 90 C 2a 9 9 9 1a 1 D E F...

Page 42: ...42 3 686002 20 65 2b 30 5 mm 686002 20 40 60 65 4 4a 4b 5 6 6 1 2 3 13 16 20 7 1 2 60 3 4 5 20 A 16 A 13 A...

Page 43: ...43 Produktinfo Internet www neff international com online shop www neff eshop com 8 8 8...

Page 44: ...44 2 cm...

Page 45: ...45 sandwich 90 2012 19 E waste electrical and electronic equipment WEEE...

Page 46: ...46 2 A Powerboost 3 Powerboost...

Page 47: ...47 20 4 1 9 1 2 10 9 4 20 20 9 1 1 1 2 1 2 1 2 3 4 3 4 3 4...

Page 48: ...48 4 10 4 4 5 4 5 1 2 bernesa 3 4 2 3 1 2 4 5 6 7 3 4 2 3 3 4 4 5 4 5 4 5 3 4 6 7 3 7 8 2 5 6 Hamburger 3 4 5 5 6 6 7 7 8 6 7 6 7 3 4 150 200 1 2 l nuggets 8 9 7 8 6 7 6 7 4 5...

Page 49: ...49 Powerboost Powerboost 1 2 Powerboost Powerboost 1 2 Powerboost 1 2 3 3 30 10 4 3 10 3 99 99 1 3 2 3 W 2 10 05 3 3 W 10 3...

Page 50: ...50 1 10 10 30 1 Power Management 1000 W 1500 W 2000 W 10...

Page 51: ...51 1 2 10 4 3 4 5 4...

Page 52: ...52 3 E FD E FD 30 30 GR 18 182...

Page 53: ...r 55 150 g 20 C 450 g 14 5 cm 9 1 30 1 800 g 18 cm 9 2 30 1 Erasco 500 g 14 5 cm 9 1 30 1 00 1 1 kg 18 cm 9 2 30 1 00 1 bechamel 7 C 40 g 40 g 0 5 l 3 5 14 5 cm 1 1 3 00 2 7 5 20 3 bechamel 2 1 7 C 19...

Page 54: ...54 20 C 125 g 300 g 14 5 cm 9 2 30 2 250 g 600 g 18 cm 9 2 30 2 18 cm 9 1 30 7 7 C 2 200 g 1 cm 18 cm 9 1 30 7 55 ml 18 cm 9 180 C 9 1 8 kg 200 g McCain 123 Frites Original DIN 44550 DIN EN 60350 2...

Page 55: ......

Page 56: ...02 940512 9000884147 9000884147 Constructa Neff Vertriebs GmbH Carl Wery Stra e 34 D 81739 M nchen...

Reviews: