background image

en

    Cleaning agent

22

D

Cleaning agent

Cleaning 

agent

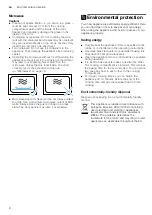
With good care and cleaning, your appliance will retain 

its appearance and remain fully functioning for a long 

time to come. We will explain here how you should 

correctly care for and clean your appliance.

Suitable cleaning agents

To ensure that the different surfaces are not damaged 

by using the wrong cleaning agent, observe the 

information in the table. Depending on the appliance 

model, not all of the areas listed may be on/in your 

appliance.

Caution!

Risk of surface damage

Do not use:

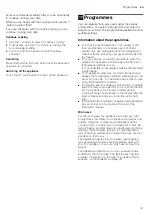
Harsh or abrasive cleaning agents,

Cleaning agents with a high alcohol content,

Hard scouring pads or cleaning sponges,

High-pressure cleaners or steam cleaners,

Special cleaners for cleaning the appliance while it is 

hot.

Wash new sponge cloths thoroughly before use.

Tip: 

Highly recommended cleaning and care products 

can be purchased through the after-sales service. 

Observe the respective manufacturer's instructions.

:

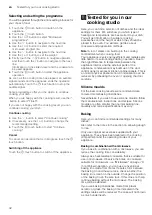
Warning

Risk of burns!

The appliance becomes very hot. Never touch the 

interior surfaces of the cooking compartment or the 

heating elements. Always allow the appliance to cool 

down. Keep children at a safe distance.

--------

Notes

Slight differences in colour on the front of the 

appliance are caused by the use of different 

materials, such as glass, plastic and metal.

Shadows on the door panels, which look like 

streaks, are caused by reflections made by the 

interior lighting.

Area

Cleaning

Appliance exterior

Stainless steel 

front

Hot soapy water: 

Clean with a dish cloth and then dry with a soft 

cloth.
Remove flecks of limescale, grease, starch and 

albumin (e.g. egg white) immediately. Corrosion 

can form under such flecks.
Special stainless steel cleaning products suitable 

for hot surfaces are available from our after-sales 

service or from specialist retailers. Apply a very 

thin layer of the cleaning product with a soft cloth.

Plastic

Hot soapy water: 

Clean with a dish cloth and then dry with a soft 

cloth.
Do not use glass cleaner or a glass scraper.

Painted surfaces Hot soapy water: 

Clean with a dish cloth and then dry with a soft 

cloth.

Control panel

Hot soapy water: 

Clean with a dish cloth and then dry with a soft 

cloth.
Do not use glass cleaner or a glass scraper.

Door panels

Hot soapy water: 

Clean with a dish cloth and then dry with a soft 

cloth.
Do not use a glass scraper or a stainless steel 

scouring pad.

Door handle

Hot soapy water: 

Clean with a dish cloth and then dry with a soft 

cloth.
If descaler comes into contact with the door han-

dle, wipe it off immediately. Otherwise, any stains 

will not be able to be removed.

Appliance interior

Enamel surfaces Hot soapy water or a vinegar solution: 

Clean with a dish cloth and then dry with a soft 

cloth.
Soften baked-on food residues with a damp cloth 

and soapy water. If there are heavy deposits of 

dirt, use a stainless steel scouring pad or oven 

cleaner.
Leave the cooking compartment open to dry after 

cleaning.
It is best to use the cleaning function. 

~

 "Cleaning function" on page 23

Glass cover for 

the interior light-

ing

Hot soapy water: 

Clean with a dish cloth and then dry with a soft 

cloth.
If the cooking compartment is heavily soiled, use 

oven cleaner.

Stainless steel 

door cover

Stainless steel cleaner: 

Observe the manufacturer's instructions.
Do not use stainless steel care products.
Remove the door cover for cleaning.

Stainless steel 

interior door 

frame

Stainless steel cleaner: 

Observe the manufacturer's instructions.
This can be used to remove discolouration.
Do not use stainless steel care products.

Rails

Hot soapy water: 

Soak and clean with a dish cloth or brush.

Pull-out system

Hot soapy water: 

Clean with a dish cloth or a brush.
Do not remove the lubricant while the pull-out rails 

are pulled out – it is best to clean them when they 

are pushed in. Do not clean in the dishwasher.

Accessories

Hot soapy water: 

Soak and clean with a dish cloth or brush.
If there are heavy deposits of dirt, use a stainless 

steel scouring pad.

Summary of Contents for C27MS22.0B

Page 1: ...en INSTRUCTION MANUAL Built in oven C27MS22 0B...

Page 2: ......

Page 3: ...ng options 16 Setting the timer 16 Setting the cooking time 17 Start delay Ready at 17 Checking changing or deleting settings 17 A Childproof lock 17 Automatic childproof lock 17 One time childproof l...

Page 4: ...appliance if it has been damaged in transport Only a licensed professional may connect appliances without plugs Damage caused by incorrect connection is not covered under warranty This appliance is in...

Page 5: ...you open the appliance door hot steam can escape Steam may not be visible depending on its temperature When opening do not stand too close to the appliance Open the appliance door carefully Keep chil...

Page 6: ...shake well after the food has been heated Check the temperature of the food before it is given to the child Risk of burns Heated food gives off heat The ovenware may become hot Always use oven gloves...

Page 7: ...m foil in the cooking compartment must not come into contact with the door glass This could cause permanent discolouration of the door glass Water in a hot cooking compartment do not pour water into t...

Page 8: ...ronmentalprotection Your new appliance is particularly energy efficient Here you can find tips on how to save even more energy when using the appliance and how to dispose of your appliance properly Sa...

Page 9: ...LU Display 0 Touch buttons 8 ShiftControl control Touch button Use on off Switching the appliance on or off Switching the appliance on and off on page 15 0 Main menu Selecting operating modes and set...

Page 10: ...the required type of heating and tempera ture for your dish Switching the appliance on and off on page 15 Microwave You can use the microwave to cook heat up or defrost your dishes more quickly Microw...

Page 11: ...t items such as steaks or sausages for making toast and for au gra tin dishes The whole area below the grill element becomes hot Grill small area 50 290 C For grilling small amounts of steaks or sausa...

Page 12: ...g the cooling fan continues to run for in the basic settings Basic settings on page 18 _Accessories Accessories Your appliance is accompanied by a range of accessories Here you can find an overview of...

Page 13: ...comprehensive range of products for your appliance in our brochures and on the Internet Both availability and whether it is possible to order online differ between countries Please see your sales docu...

Page 14: ...the button repeatedly until Date appears 8 Use the button to apply the settings The initial use is complete Notes You can change these settings at any time in the basic settings Basic settings on page...

Page 15: ...utton to select the temperature Note Additional settings are available depending on the operating mode For each further setting use the button to navigate to the next line Use the or button to select...

Page 16: ...Time settingoptions Your appliance has different time setting options Note If you have set a time setting option the time interval increases if you set a higher value Example You can set a cooking ti...

Page 17: ...essary change the setting using the or button Set 00 00 to delete a time function The setting is applied automatically AChildproof lock Childprooflock Your appliance is equipped with a childproof lock...

Page 18: ...o select MyProfile 4 4 Use the button to navigate to the next line 5 Use the or button to select the setting 6 Use the button to navigate to the selection 7 Use the or button to select the setting 8 T...

Page 19: ...eramic if it has been fully glazed and has no cracks You can also use serving dishes This saves you having to transfer food from one dish to another You should only use cookware with decorative gold o...

Page 20: ...losed The operation continues Cancelling the operation Touch the touch button Starting drying During drying the cooking compartment is heated up so that the moisture in the cooking compartment evapora...

Page 21: ...tinue the operation Opening the appliance door interrupts the operation The operation continues to run automatically when the door is closed Cancelling the operation Touch the touch button FSabbath mo...

Page 22: ...cloth Plastic Hot soapy water Clean with a dish cloth and then dry with a soft cloth Do not use glass cleaner or a glass scraper Painted surfaces Hot soapy water Clean with a dish cloth and then dry...

Page 23: ...dirt has been there the higher the cleaning setting should be A cleaning cycle requires only approx 2 5 4 7 kilowatt hours Note For your safety the cooking compartment door locks automatically It cann...

Page 24: ...asier to clean the cooking compartment Dirt is softened beforehand by vaporizing soapy water It can then be removed more easily Warning Risk of scalding Water in a hot cooking compartment may create h...

Page 25: ...ng your appliance will retain its appearance and remain fully functional for a long time to come This will tell you how to remove the shelves and clean them Detaching and refitting the rails Warning R...

Page 26: ...it at the bottom and straighten it fig 3 Use the hook to attach the rear holder into the upper hole and push it into the lower hole fig Attaching the rails When hanging the rails ensure that the slopi...

Page 27: ...iance door again slightly Put the cover back in place and press on it until it clicks audibly into place fig 5 Close the appliance door Removing and fitting the door panels To facilitate cleaning you...

Page 28: ...he intermediate panel make sure that the arrow is in the top right of the panel and that it aligns with the arrow on the metal panel 1 Insert the intermediate panel into the retainer at the bottom and...

Page 29: ...ver if ever an LED bulb or the bulb s glass cover is defective call the after sales service The lamp cover must not be removed Fault Possible cause Notes remedy The appliance does not work The plug is...

Page 30: ...imal cooking result use food that is in good condition and chilled meat only The baking and roasting assistant helps you to prepare classic cakes bread and roasts The appliance selects the optimal typ...

Page 31: ...is not possible to set weights outside the intended weight range For roasting programmes for which the appliance applies the temperature selection temperatures can be as high as 300 C Therefore ensure...

Page 32: ...be placed in the oven You will also get tips about cookware and preparation methods Note A lot of steam can build up in the cooking compartment when cooking food Your appliance is very energy efficie...

Page 33: ...s cut greaseproof paper to size Recommended setting values You can find the ideal heating type for various pastries in the table The temperature and baking time are dependent on the quantity and compo...

Page 34: ...homemade thin base pizza tray 1 250 270 20 30 Pizza homemade thin base pizza tray 1 210 230 20 30 Multishelf baking Scones 2 levels 2 baking trays 3 1 180 200 12 16 Biscuits 2 levels 2 baking trays 3...

Page 35: ...k Add in a little liquid for roasting if the meat is lean A covering of approx cm depth should be applied to the base of any glass cookware The fruit juice overflows Next time use the universal pan Sm...

Page 36: ...rule applies double the quantity equates to roughly double the cooking time Always use heat resistant cookware that is suitable for use in microwaves Roasting dishes made from metal or R mertopf dishe...

Page 37: ...e uncovered 1 170 180 25 25 Turkey whole 4 8 kg universal pan 1 150 160 12 12 Meat dishes Meat loaf cookware uncovered 1 170 180 20 35 Meat loaf 1 kg cookware uncovered 1 170 190 360 30 40 Casserole D...

Page 38: ...rds In addition slide the universal pan in at the shelf position underneath with the slanted edge facing the appliance door Roasting in cookware It is more convenient to roast and braise meat in cookw...

Page 39: ...ults are also achieved when grilling toast Grilling Keep the appliance door closed when using the grill Never grill with the appliance door open Slide the wire rack in at the indicated shelf position...

Page 40: ...f lamb cookware uncovered 1 190 200 15 25 Pork Steaks height 2 cm wire rack 3 250 1st side 12 14 2nd side 6 8 Chops height 2 3 cm wire rack 2 290 1st side 10 12 2nd side 9 10 Burger height 1 2 cm wire...

Page 41: ...shes made from plastic ceramic or glass the cooking time indicated in the settings tables will be reduced Cooking in combination with a microwave is only possible on one level Take ready to eat meals...

Page 42: ...cated in the table Remove unused accessories from the cooking compartment This will achieve the best possible cooking results and energy savings of up to 20 per cent Types of heating used Hot air Top...

Page 43: ...her 2 3 minutes to compensate for the temperature difference Take ready to eat meals out of the packaging You can cook more quickly and evenly using cookware which is suitable for use in microwaves Cu...

Page 44: ...f heating MW power in watts Cooking time in mins Fish Fish fillet plain braised 400 g cookware covered 1 600 4 360 3 8 Vegetables fresh Vegetable fresh 250 g cookware covered 1 600 8 12 Vegetable fres...

Page 45: ...hes or glass dishes prolong baking time and the cake will not brown so evenly Greaseproof paper Only use greaseproof paper that is suitable for the selected temperature Always cut greaseproof paper to...

Page 46: ...ookware onto the wire rack at level 1 You can find additional information in the tips on slow cooking attached to the settings table Your appliance features the heating type Slow cook Only start opera...

Page 47: ...vered 1 6 8 90 45 60 Chicken breast fillet 200 g each Cookware uncovered 1 5 7 90 45 60 Turkey breast boned 1 kg Cookware uncovered 1 8 10 90 120 150 Pork Pork tenderloin steak 5 6 cm thick 1 5 kg Coo...

Page 48: ...immed sugar solution approx 400 ml for a 1 litre jar For one litre of water Approx 250 g sugar for sweet fruit Approx 500 g sugar for sour fruit Vegetables Fill the jars with the vegetables along with...

Page 49: ...he final fermentation takes place outside the appliance in a warm place Recommended setting values The temperature and proving time are dependent on the type and quantity of the ingredients The values...

Page 50: ...will help double the quantity equates to roughly double the cooking time Type of heating used Microwave Dish Accessories cookware Shelf posi tion Type of heating MW power in watts Cooking time in min...

Page 51: ...reaches boiling temperature without the usual steam bubbles rising to the surface Even if the container only vibrates a little the hot liquid may suddenly boil over and spatter When heating always pla...

Page 52: ...n instead of onto the wire rack Hot water sponge cake Hot water sponge cake on two levels vertically stack springform cake tins in an offset manner on the wire racks Notes The setting values apply to...

Page 53: ...y 1 140 150 25 35 Small cakes Baking tray 1 160 25 35 Small cakes Baking tray 1 150 25 35 Small cakes 2 levels Universal pan baking tray 3 1 140 35 45 Hot water sponge cake Springform cake tin diamete...

Page 54: ...in Cookware uncovered 1 150 170 360 25 30 Cake Cookware uncovered 1 190 210 180 12 18 Chicken Cookware uncovered 1 180 200 360 25 35 Dish Accessories cookware Shelf posi tion Type of heating Tempera t...

Page 55: ...6...

Page 56: ...www neff international com 9001036594 9001036594 950622 Constructa Neff Vertriebs GmbH Carl Wery Stra e 34 D 81739 M nchen Register your product online...

Reviews: