background image

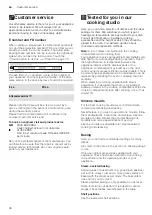
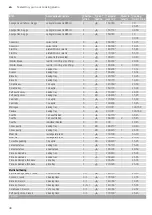
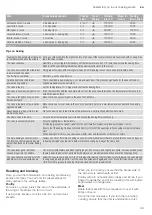
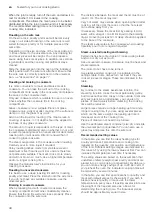
Appliance door    

en

33

5.

Hold reflector 

 in area 

ƒ

 on the left- and right-hand 

side, and carefully lift it upwards (Fig. 

#

).

6.

Lift reflector 

 up and out (Fig. 

$

).

7.

Remove the second reflector in the same way as the 

first.

8.

Push the intermediate glass panel downwards in 

area 

, carefully lift holder 

 until it can be pulled out 

(Fig. 

%

).

9.

Lift the intermediate glass panel from below (Fig. 

&

and remove it in the direction of the arrow.

10.

Clean the glass door panels and reflectors on both 

sides with glass cleaner and a soft cloth.

:

Warning

Risk of injury! 

Scratched glass in the appliance door may crack. 

Do not use a glass scraper or sharp or abrasive 

cleaning aids or detergents.

Caution!

Damage to the lighting. Do not clean or touch LED 


in the appliance door.

11.

Dry and refit the glass door panels.

Fitting

Note: 

When fitting the glass door panels, ensure that 

they are in the original order.

1.

Insert the intermediate glass panel and push it in the 

direction of the arrow until it is fitted in the frame. The 

arrow on the intermediate glass panel must line up 

with the arrow on the frame (Fig. 

!

).

2.

Push the intermediate glass panel downwards in 

area 

, insert holder 

ƒ

 at an angle and push down 

until it locks into place (Fig. 

"

).

The holder is inserted (Fig. 

#

).

Caution!

Do not touch the glass rod with bare fingers. Fatty 

deposits decrease the effect of light transfer. Clean 

the glass rod with glass cleaner once it has been 

inserted.

3.

Select the left-hand reflector (Fig. 

$

).

4.

Insert the left-hand reflector 

 at the top (Fig. 

%

).

2

1

D

D

E

F

G

D

1

2

E

D

F

F

Summary of Contents for B48FT74 0B Series

Page 1: ...en INSTRUCTION MANUAL Built in oven B48FT74 0B...

Page 2: ......

Page 3: ...t setting 17 Reheating 17 Filling the water tank 18 After every steam operation 19 O Time setting options 20 Showing and hiding the time setting options 20 Setting the timer 20 Setting the cooking tim...

Page 4: ...damage after unpacking it Do not connect the appliance if it has been damaged in transport Only a licensed professional may connect appliances without plugs Damage caused by incorrect connection is n...

Page 5: ...you open the appliance door hot steam can escape Steam may not be visible depending on its temperature When opening do not stand too close to the appliance Open the appliance door carefully Keep chil...

Page 6: ...t discolouration of the door glass Water in a hot cooking compartment do not pour water into the cooking compartment when it is hot This will cause steam The temperature change can cause damage to the...

Page 7: ...an the water tank with a soft cloth and standard washing up liquid 7Environmental protection Environmentalprotection Your new appliance is particularly energy efficient Here you can find tips on how t...

Page 8: ...off Switching the appliance on and off on page 14 Steam assisted cook ing Switching on steam assisted cooking VarioSteam Steam assisted cooking on page 16 3 Time setting options Setting the timer coo...

Page 9: ...ring dishes with steam Programmes on page 24 4 MyProfile Individually adjusting the appliance settings Basic settings on page 22 Descale Drying Drying the cooking compartment after a steam opera tion...

Page 10: ...with a water tank The water tank is behind the panel For operations with steam fill the water tank with water Steam on page 16 Grill small area 50 275 C For grilling small amounts of steaks or sausag...

Page 11: ...essories can be pulled out approximately halfway without tipping You can use the pull out rails to pull the accessories out further Ensure that the accessory is placed under the lug on the pull out ra...

Page 12: ...differ between countries Please see your sales documents for more details When purchasing please always quote the exact order number of the optional accessory Note Not all optional accessories are su...

Page 13: ...e current month 6 Touch Year 7 Swipe to the left or right to select the current year 8 Touch the 8 symbol to apply the setting Setting the water hardness 1 Touch Water hardness 2 Touch the bottom line...

Page 14: ...the appliance Operatingtheappliance You have already learnt about the controls and how they work Now we will explain how to set your appliance You will learn about what happens when you switch the ap...

Page 15: ...Operating modes such as the cleaning function cannot be cancelled Heating up the appliance quickly You can use the Rapid heat up and PowerBoost functions to reduce the preheat time Whether the applian...

Page 16: ...cooking time has elapsed an audible signal sounds and the appliance ends the operation automatically Touch the 0 touch button to end the audible signal Cancelling Press and hold the touch button unti...

Page 17: ...l the appliance operation is cancelled Finishing Touch the touch button to switch the appliance off Defrost setting Us the Defrost heating mode to defrost frozen products Note If the water tank runs d...

Page 18: ...ater is very hard we recommend that you use softened water If you use only softened water you can set your appliance to the softened water hardness range If you use mineral water set the water hardnes...

Page 19: ...water tank 4 Empty the water tank clean it with detergent and then rinse it thoroughly with clean water 5 Dry all parts with a soft cloth 6 Rub the seal on the lid until dry 7 Leave to dry with the li...

Page 20: ...the appliance ends the operation automatically Touch the 0 touch button to end the audible signal Start delay Ready at The appliance switches on automatically and switches off at the preset end time...

Page 21: ...uch button until Childproof lock deactivated appears on the display 2 Touch the touch button 3 Switch on the required appliance operation Deactivation 1 Press and hold the 0 touch button until Childpr...

Page 22: ...red type of heating 8 Touch Activated or Deactivated 9 Touch the 0 touch button 10 Touch Save Setting Selection Language Select language Time of day Sets the current time Date Sets the current date Wa...

Page 23: ...food 1 Touch the touch button to switch on the appliance 2 Touch the 0 touch button 3 Swipe to the left or right to select Baking and roasting assistant 4 Touch the bottom line 5 Touch the required c...

Page 24: ...ormation about the steam functions can be found in the relevant sections Steam on page 16 Warning Risk of scalding When you open the appliance door hot steam can escape Steam may not be visible depend...

Page 25: ...fore you can use Sabbath mode you must activate it under Favourites in the basic settings Once the Sabbath mode has been activated you can select it under the menu for the types of heating The applian...

Page 26: ...scraper Painted surfaces Hot soapy water Clean with a dish cloth and then dry with a soft cloth Control panel Hot soapy water Clean with a dish cloth and then dry with a soft cloth Do not use glass c...

Page 27: ...ance works You can remove these residues using lemon juice if required Cleaning self cleaning surfaces The self cleaning surfaces are coated with a porous matte ceramic layer This coating absorbs and...

Page 28: ...to contact with these surfaces dab it off immediately with water and a sponge cloth Please to not rub or use any abrasive cleaning materials Starting Before setting the cleaning function ensure that y...

Page 29: ...rinsing cycle approx 6 9 minutes then empty and refill the water tank Second rinsing cycle approx 6 9 minutes then empty and dry the water tank If the descaling process is interrupted for example due...

Page 30: ...ls With good care and cleaning your appliance will retain its appearance and remain fully functional for a long time to come This will tell you how to remove the shelves and clean them Changing the sh...

Page 31: ...t socket until the rail also rests against the cooking compartment wall here and press it downwards figure qAppliance door Appliancedoor With good care and cleaning your appliance will retain its appe...

Page 32: ...er and then close it Warning Risk of injury from hinge locks which have not been properly closed The appliance door may detach itself You may be injured and the appliance door damaged After refitting...

Page 33: ...ts Caution Damage to the lighting Do not clean or touch LED in the appliance door 11 Dry and refit the glass door panels Fitting Note When fitting the glass door panels ensure that they are in the ori...

Page 34: ...e appli ance door is discoloured This is a normal occurrence as a result of high tem peratures Not possible After switching on an operating mode a message is shown on the display which indicates that...

Page 35: ...on the left and right with your fingers and pull out the panel Steam escapes from the ventilation slots during cooking Normal procedure Not possible When you cook with steam a lot of steam is produced...

Page 36: ...food Your appliance is very energy efficient and radiates very little heat to its surroundings during operation Due to the high difference in temperature between the appliance interior and the extern...

Page 37: ...for the selected temperature Always cut greaseproof paper to size Recommended setting values You can find the ideal heating type for various pastries in the table The temperature and baking time are...

Page 38: ...00 15 25 Meringue baking tray 3 90 100 100 130 Pavlova baking tray 3 90 100 120 180 Souffl 1 2L souffl dish 2 160 170 35 45 Souffl 1 2L souffl dish 2 160 180 2 35 45 Souffl individual moulds 3 100 40...

Page 39: ...prox 2 cm around each item This gives enough space for the baked items to expand well and brown on all sides The cake is too dry Set the temperature 10 C higher and shorten the baking time The cake is...

Page 40: ...with covered cookware the cooking compartment remains considerably cleaner Ensure that the lid fits well and closes properly Place the cookware onto the wire rack The distance between the meat and the...

Page 41: ...5 kg wire rack 2 170 180 1 100 120 Lamb Leg bone in wire rack 2 160 170 25 25 Leg bone in 1 5 kg wire rack 2 180 190 1 80 90 Shoulder bone in wire rack 2 160 170 25 20 Shoulder boned and rolled wire...

Page 42: ...Shelf po sition Type of heating Tempera ture in C Steam in tensity Cooking time in mins Preheat Without fat layer best and neck do not turn Skin side down Bone side down Turn after app 1 hour The cook...

Page 43: ...ake the joint out of the cooking compartment more easily in the cookware and prepare the sauce in the cookware itself Only use cookware which is suitable for use in an oven Check whether the cookware...

Page 44: ...irst You can use a higher setting next time if necessary The setting values are based on the assumption that unstuffed chilled ready to roast poultry meat and fish are placed into a cold cooking compa...

Page 45: ...230 20 30 Chicken drumstick 150 g each wire rack 3 210 220 2 30 40 Chicken breast boned 150 g each wire rack 3 275 1st side 10 15 2nd side 10 15 Chicken breast boned 150 g each wire rack 3 200 210 2 2...

Page 46: ...ay around Wire rack Insert the wire rack with the open side facing the appliance door and the outer rail pointing downwards Universal pan or baking tray Slide the universal pan or the baking tray in c...

Page 47: ...ersal pan wire rack 3 1 190 210 20 25 Pizza thick base wire rack 3 180 200 20 25 Pizza thick base 2 levels universal pan wire rack 3 1 190 210 20 30 Pizza baguette wire rack 3 200 220 15 20 Potatoe pr...

Page 48: ...overall cooking time is extended with menu cooking as a little steam escapes each time the appliance door is opened and has to be reheated Observe the information in the relevant paragraphs of this s...

Page 49: ...r perforated 3 100 43 50 Red cabbage shredded steam container perforated 3 100 30 35 White aspargus whole steam container perforated 3 100 7 15 Spinach steam container perforated 3 100 2 3 Courgette s...

Page 50: ...e reheated Observe the information in the relevant paragraphs of this section The heating up time varies depending on the size and weight of the food The cooking time does not depend on the quantity U...

Page 51: ...or the selected temperature Always cut greaseproof paper to size Recommended setting values Here you can find specifications for the various dishes with CircoTherm Eco and Top bottom heating Eco The t...

Page 52: ...ormation in the tips on slow cooking attached to the settings table Your appliance features the heating type Slow cook Only start operation when the cooking compartment has fully cooled down Allow the...

Page 53: ...6 8 90 45 60 Chicken breast fillet 200 g each Cookware uncovered 2 5 7 90 30 60 Turkey breast boned 1 kg Cookware uncovered 2 8 10 90 150 210 Pork Pork tenderloin steak 5 6 cm thick 1 5 kg Cookware un...

Page 54: ...im Fruit Fill the preserving jars with the fruit along with a hot skimmed sugar solution approx 400 ml for a 1 litre jar For one litre of water Approx 250 g sugar for sweet fruit Approx 500 g sugar fo...

Page 55: ...prove twice Observe the specifications in the settings tables for the 1st and 2nd proving processes dough fermentation and final fermentation Dough fermentation Position the dough bowl on the wire ra...

Page 56: ...ime first and then increase the time if necessary Tip Items which were frozen flat or portioned defrost faster than those frozen in a block Types of heating used CircoTherm hot air Defrost setting Dis...

Page 57: ...eheating is necessary for selected dishes and this is indicated in the table Remove unused accessories from the cooking compartment This will allow you to achieve ideal cooking results and save energy...

Page 58: ...ack Notes The setting values apply to dishes placed into a cold cooking compartment Please note the information in the tables about preheating The setting values are valid without rapid heating up For...

Page 59: ...ll be caught and the cooking compartment stays cleaner Type of heating used Grill large area Dish Accessories Shelf posi tion Type of heating Tempera ture in C Cooking time in mins Steaming Peas froze...

Page 60: ...5HJLVWHU RXU SURGXFW RQOLQH ZZZ QHII LQWHUQDWLRQDO FRP RQVWUXFWD 1HII 9HUWULHEV PE DUO HU 6WUD H 0 QFKHQ 9001042910 9001042910 951110 en...

Reviews: