background image

NEC Versa LX, LXi, and NEC Versa Dock Hard Disk Drive Cradle Pack   3

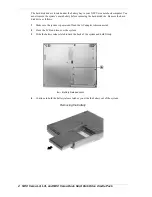
5. 

Remove the disk drive as follows:

„


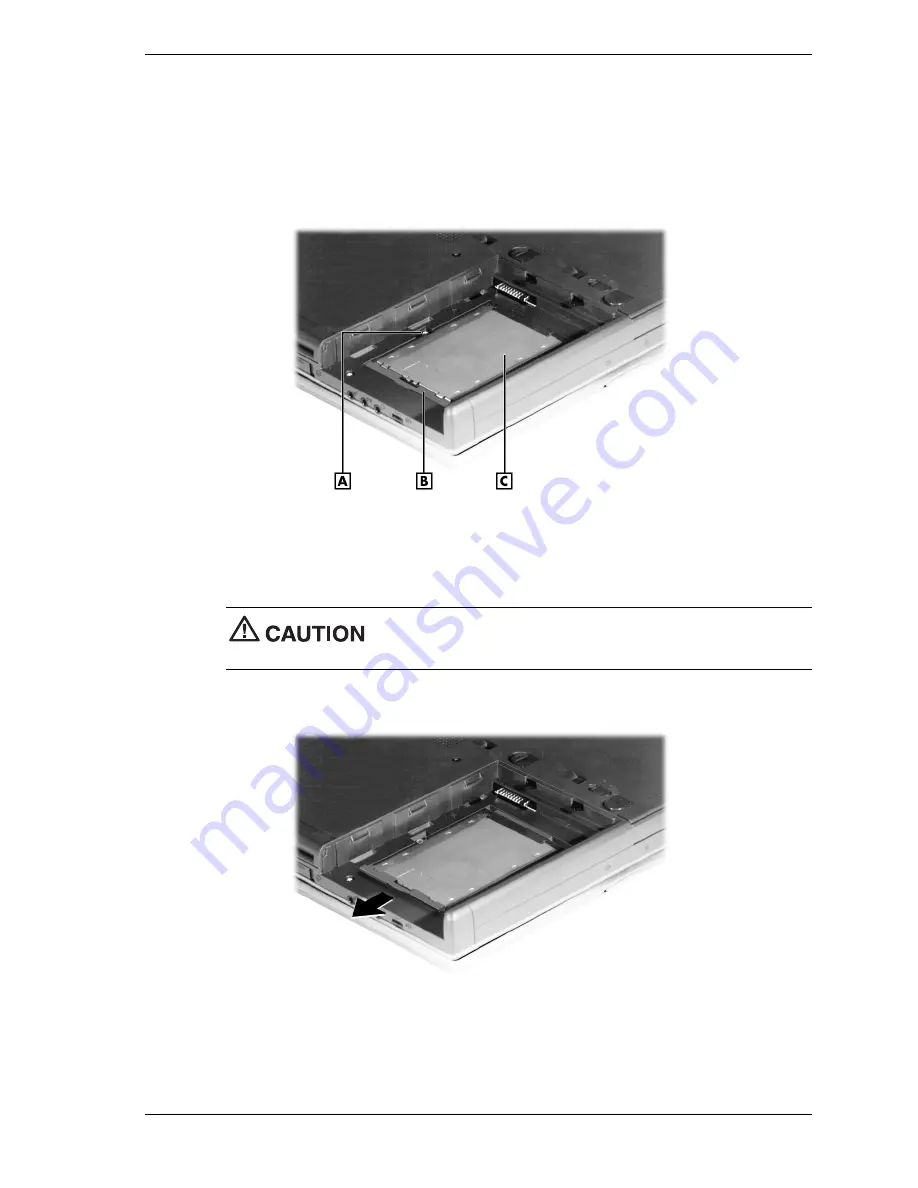
Remove the screw that secures the hard disk drive.

„


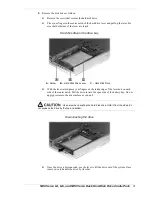
Place your finger in the center notch of the hard drive lever and pull up the lever. Be
sure that both sides of the lever are raised.

Hard disk drive in the drive bay

A – Screw

B – Hard Disk Drive Lever

C – Hard Disk Drive

„


With the lever raised, place your fingers on the inside edge of the lever and on each
side of the center notch. Pull the drive toward the open side of the battery bay. Do not
apply pressure to the drive surface as you pull.

Use care when handling the hard disk drive. Hold it from the sides, do

not squeeze the drive by the top and bottom.

Disconnecting the drive

„


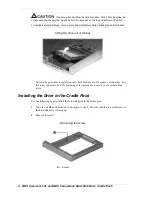
Once the drive is disconnected, use the lever to lift the drive out of the system. Once
removed, only handle the drive by its sides.

Summary of Contents for Versa LX

Page 1: ... remove the system s internal hard disk drive and install it into the cradle pack as well as how to prepare a new hard disk drive using fdisk and format The cradle pack is designed to support the NEC Versa LX systems with user removable hard disk drives only To be sure that you own a unit with a user replaceable hard disk drive check the following Turn over your system Note the label on the back o...

Page 2: ...efore removing the hard disk drive Remove the hard disk drive as follows 1 Make sure the system is powered off and the AC adapter is disconnected 2 Close the LCD and turn over the system 3 Slide the battery release latch toward the back of the system and hold firmly A Battery Release Latch 4 Continue to hold the battery release latch as you slide the battery out of the system Removing the battery ...

Page 3: ... Hard Disk Drive Lever C Hard Disk Drive With the lever raised place your fingers on the inside edge of the lever and on each side of the center notch Pull the drive toward the open side of the battery bay Do not apply pressure to the drive surface as you pull Use care when handling the hard disk drive Hold it from the sides do not squeeze the drive by the top and bottom Disconnecting the drive On...

Page 4: ...isk drive Lifting the drive out of the bay Reverse the procedure to install your new hard disk drive in the system s internal bay Use the screw you removed at the beginning of this procedure to secure your new hard disk drive Installing the Drive in the Cradle Pack Use the following steps to install the hard disk drive in the cradle pack 1 Place the cradle pack as shown in the figure in step 2 The...

Page 5: ...ng the drive into the cradle A Hard Disk Drive Lever B Cradle Pack Connector 4 Slide the drive connector back into the cradle pack connector Press down on both sides of the lever to lock the drive into place Secure the drive to the cradle with the screw Securing the drive A Hard Disk Drive Lever B Screw 5 The cradle with the hard disk drive is ready to be inserted into the system s VersaBay III sl...

Page 6: ... the Product Recovery CD see the section Using the Product Recovery CD in Chapter 7 of your NEC Versa user s guide To load any other operating system do so after running fdisk and format Follow the appropriate instructions provided here for the operating system installed on your NEC Versa Note fdisk and format must be accessed either from another hard disk or from a MS DOS boot diskette Windows 95...

Page 7: ...um available partition size FDISK verifies the drive integrity 13 Press Esc to display the FDISK Options Menu 14 Press Esc twice to exit to the DOS prompt 15 Reboot the system Now that your drive has been partitioned it must be formatted before use If the drive is the primary hard drive boot with an MS DOS boot diskette and format drive c format c If the drive is in the VersaBay III follow steps 1...

Page 8: ...r the FAT 16 or NTFS format FAT 16 can be partitioned using an MS DOS boot diskette with fdisk and format NTFS must be partitioned and formatted using Windows NT 4 0 See the documentation supplied with your operating system for details on hard disk drive formatting under Windows NT 4 0 819 200611 001 12 99 ...

Reviews: