


UT880
Issue 1.0
UT880 Owner’s Guide
3 - 11
1.5
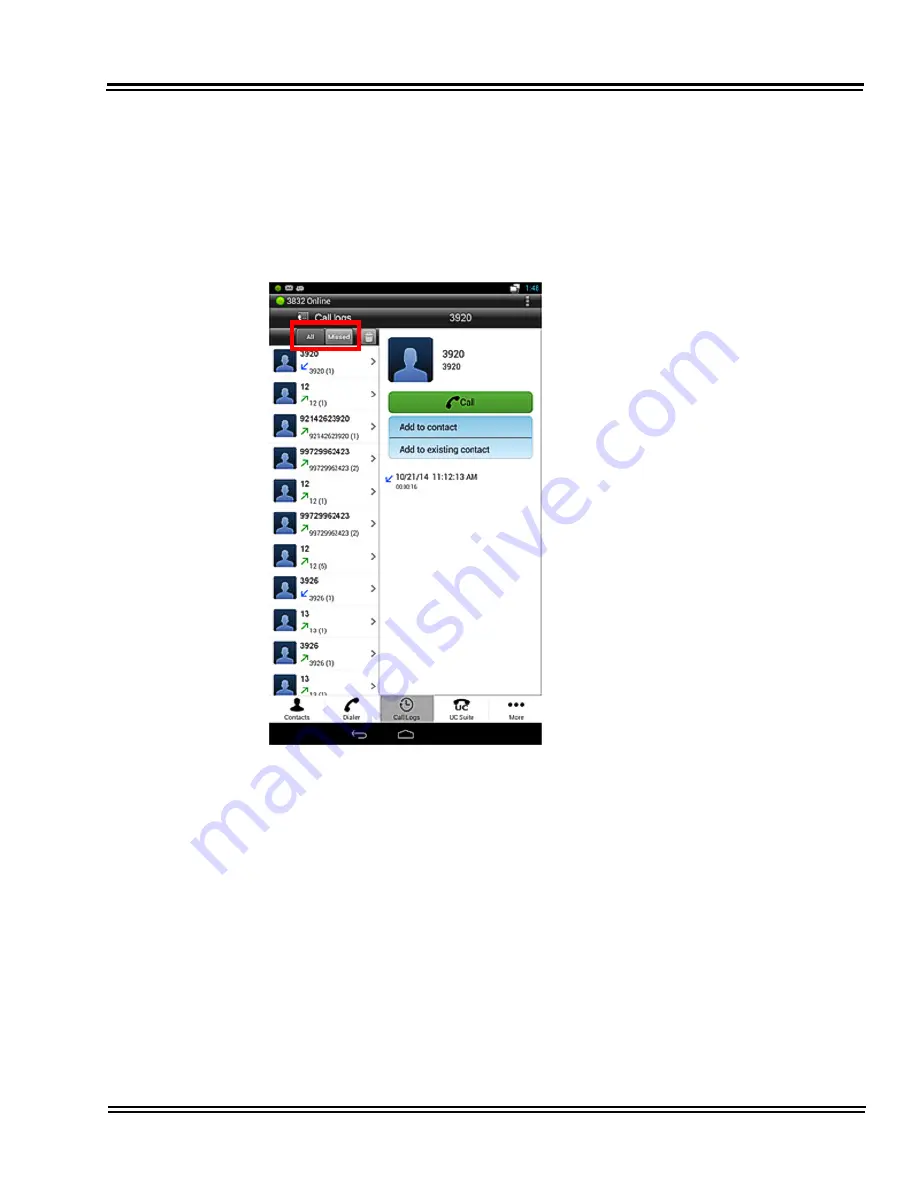
Call Logs
Similar to the Contacts, Call Logs is an added functionality of the OS. The call logs
for both extension calls and external calls are captured in the call logs. Selecting
the
Call
Logs
menu item opens up the call logs as shown in
Figure 3-10 Call Logs
In the UT880 NMLT Dialer App
.
Figure 3-10 Call Logs In the UT880 NMLT Dialer App
The user can select either All calls, or only the
Missed calls to be displayed in the call logs.
The calls have three different icons showing three
different call log types:
• Incoming calls
• Outgoing calls
• Missed calls
The call logs indicated the user information and
number of call records for the user in the bracket. It
also displays the type of log, the time and the
duration of the call.
The UT880 NMLT App also allows the user to call
out from the call logs directly through the dialer.
Summary of Contents for UT880
Page 1: ...NDA 31647 Issue 1 0 UT880 Owner s Guide ...
Page 2: ......
Page 4: ......
Page 12: ...viii List of Figures and Tables Issue 1 0 THIS PAGE INTENTIONALLY LEFT BLANK ...
Page 20: ...Issue 1 0 UT880 1 8 Getting Started THIS PAGE INTENTIONALLY LEFT BLANK ...
Page 32: ...Issue 1 0 UT880 2 12 Basics THIS PAGE INTENTIONALLY LEFT BLANK ...
Page 45: ...UT880 Issue 1 0 UT880 Owner s Guide 3 13 Figure 3 12 UC Suite Dial Screen ...
Page 69: ...UT880 Issue 1 0 UT880 Owner s Guide 4 7 Figure 4 7 Turning Bluetooth On ...
Page 70: ...Issue 1 0 UT880 4 8 Web and Media THIS PAGE INTENTIONALLY LEFT BLANK ...
Page 82: ...Issue 1 0 UT880 5 12 Media THIS PAGE INTENTIONALLY LEFT BLANK ...
Page 94: ...Issue 1 0 UT880 6 12 Utilities THIS PAGE INTENTIONALLY LEFT BLANK ...
Page 99: ......
Page 100: ...NEC Corporation of America Issue 1 0 UT880 Owner s Guide ...


