


Step 5 Understand basic operations
You can perform basic operations on US310e by using the program for connecting to
the virtual PC, which can be launched from a shortcut icon on the desktop, and tools
on Control Panel.
When US310e is turned on, the Start screen appears. From the Start screen you can
open the desktop and connect to a virtual PC from a shortcut icon on the desktop.
To change the settings of US310e, use the tools on Control Panel.
Open Control Panel by clicking
Start
,
Apps
,
Windows System
and then
Control
Panel
.
US310e can be turned off from the Charm Bar.
On the Charm Bar, click
Settings
,
Power
and then
Shut down
.
Automatic logon to a user desktop is enabled on US310e by default.
The default user name is “User”, and the password is “User”.
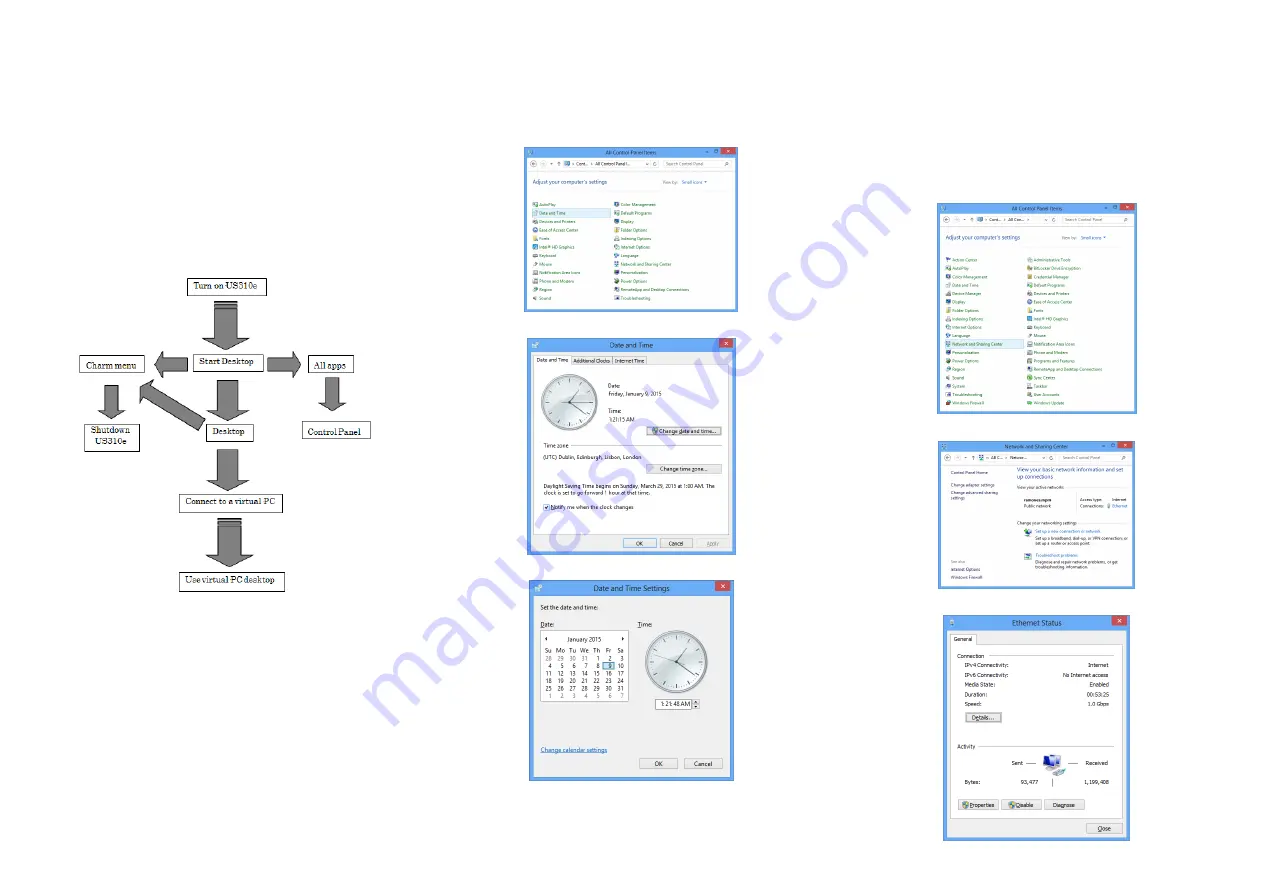
Step 6 Set the date and time
Set the date and time as described below.
* Time server settings cannot be changed from a user account.
1.
Turn on US310e.
2.
Click
Start
,
Apps
,
Windows System
, and then
Control Panel
.
3.
On Control Panel, click
Date and Time
.
4.
Click
Change date and time
.
5.
Set the date and time, and click
OK
.
Step 7 Configure the network
By default, the
Obtain an IP address automatically
option is selected as the network
setting. To change the configuration, perform the following:
1.
Determine the network to which US310e is connected, and connect an
appropriate LAN cable to US310e.
2.
Turn on US310e and log on as an administrator.
* For how to log on as an administrator, see
Chapter 2 , "3.1. Switching the Sign-In
User "
in the User’s Guide.
3.
Click
Start
,
Apps
,
Windows System
, and then
Control Panel
.
4.
On Control Panel, click
Network and Sharing Center
.
5.
Click
Ethernet
.
6.
On the
General
tab, click the
Properties
button.


