49
3. Convenient Features
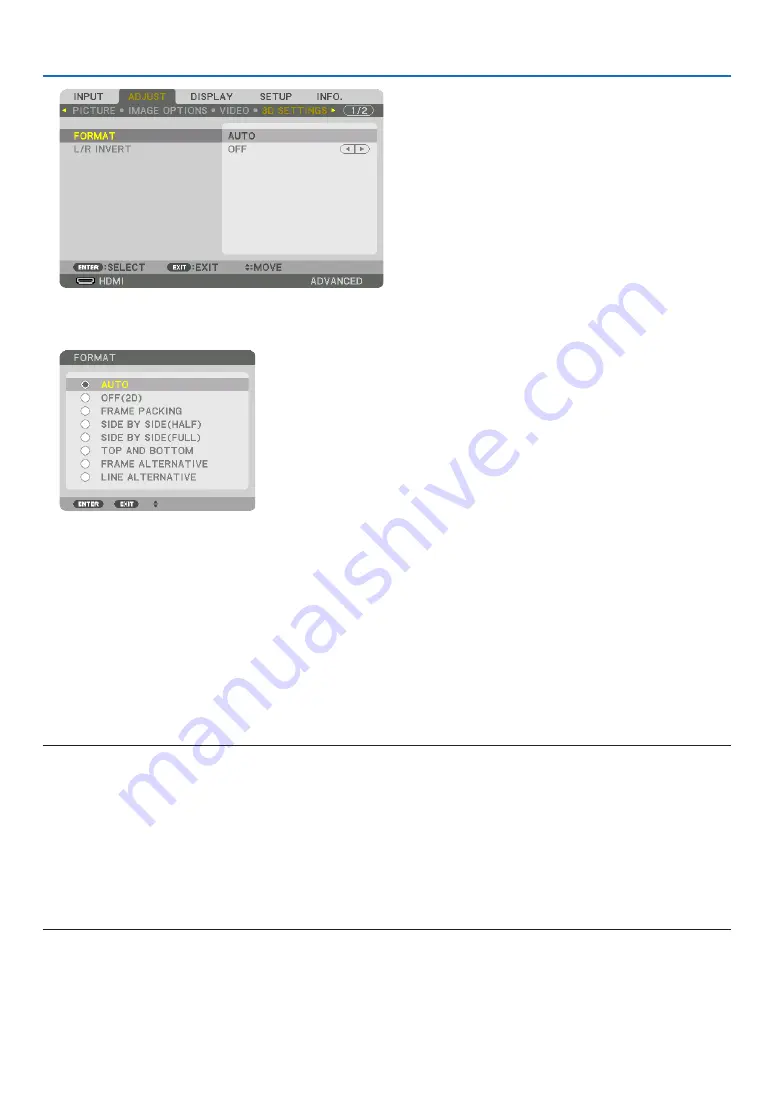
The [3D SETTINGS] screen will be displayed.
(4) Use the
▼
button to align the cursor with [FORMAT], then press ENTER.
The [FORMAT] screen will be displayed.
(5) Use the
▼
/
▲
buttons to align the cursor at one among format options, then press ENTER for setting it up.
The display will return to the [FORMAT] screen.
Press the MENU button to return to the original screen.
• The 3D caution message screen will be displayed when switching to a 3D video (default factory setting when
shipped). Please read the “Health Precautions” on the previous page to watch videos in the correct manner. The
screen will disappear after 60 seconds or when the ENTER button is pressed. (
→
4. Turn on the power supply of the 3D eyewear and wear the eyewear to watch the video.
A normal video will be shown when a 2D video is input.
To watch a 3D video in 2D, select [OFF(2D)] in the [FORMAT] screen mentioned above in (3).
NOTE:
• If 3D content is played back on your computer and the performance is poor, it may be caused by the CPU or graphics chip. In this
case you may have difficulty seeing the 3D images as they were intended. Check to see if your computer meets the requirements
provided in your user’s manual included with your 3D content.
• The DLP
®
Link compatible 3D eyeglasses allow you to view 3D images by receiving synch signals, which are included in left eye
and right eye images, reflected from the screen. Depending on environments or conditions such as the ambient brightness, screen
size or viewing distance, the 3D eyeglasses may fail to receive synch signals, causing poor 3D images.
• When the 3D mode is enabled, the Keystone correction range will be narrower.
• When the 3D mode is enabled, the following settings are invalid.
[WALL COLOR], [PRESET], [REFERENCE], [COLOR TEMPERATURE], [DYNAMIC CONTRAST], [Brilliant Color]
• Signals other than those listed in “Compatible Input Signal List” on page


