background image


 7 

NEC Display Solutions of America, Inc.


www.necdisplay.com


OLP-554 


80 Point Touch Overlay 
Installation Guide for the OLP-554 

Rev 1.3 


7.2.4  To complete the total system grounding for the overlay and enclosure/kiosk, please review the 


following: 


a)  The enclosure/kiosk, enclosure door, and other overlay mounting system   


components must all share a single point electrical ground connection with the    


overlay. 


b)  Installer/technician must determine the best location and method of grounding the  


enclosure, enclosure door, and other enclosure components as well as the overlay/monitor 


chassis attached to a single AC power ground connection. 


7.2.5  After the overlay and enclosure/kiosk are grounded, the 80-point touch screen will need to be 


reset due to the change in its overall sensing environment: 


a)  Unplug the touch overlay’s USB cable from the PC or media player. 


b)  Leave the overlay’s USB cable unplugged for 10 to 15 seconds. 


c)  Plug the overlay’s USB cable back into the PC. 


d)  Wait for approximately 10 to 15 seconds for the system to reset, then test the touch  


functionality. 


7.2.6  Touch overlay hardware grounding is complete.  Enjoy your new touch capabilities!


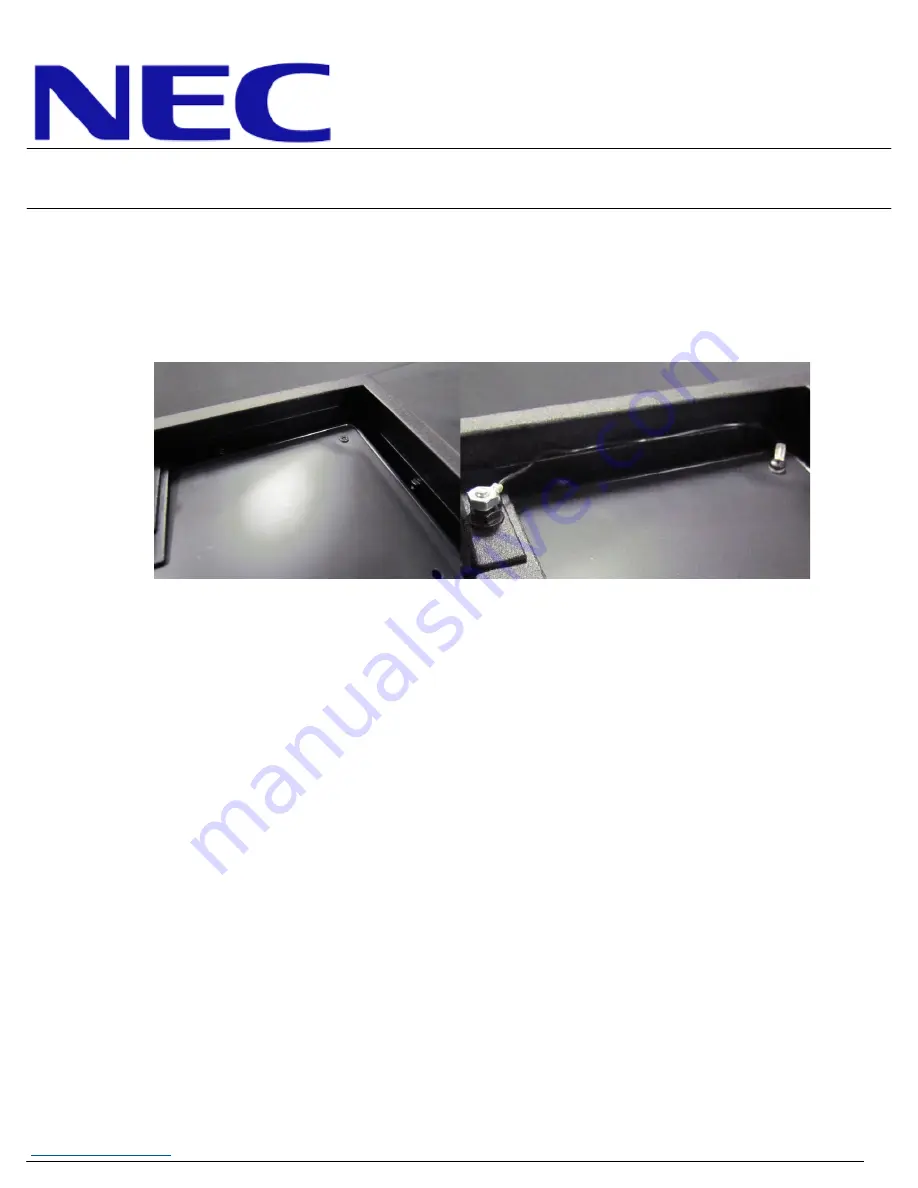
7.2.3  Using a #2 Philips screwdriver, remove the factory screw in the top right corner of the monitor 


chassis.  Secure the other end of the grounding wire to the monitor using the provided M3x10 


pan head screw, as shown in figure 8c.  The overlay is now grounded to the monitor chassis. 

Figure 8c 

Summary of Contents for OLP-554

Page 1: ...ve the NEC badge from the bottom edge of the monitor 3 2 The overlay contains tempered glass Use caution when handling 3 3 The overlay has an integrated USB cable located along the top edge of the overlay Ensure the cable is not pinched crushed or damaged during installation 3 4 Installation requires two persons at all times to ensure the touch frame does not bend or torque 3 5 Once the touch scre...

Page 2: ...NEC Display Solutions of America Inc 80 Point Touch Overlay Installation Guide for the OLP 554 Rev 1 3 4 0 Equipment 5 0 Dimensional Drawings 1 P554 V554 PCAP Overlay 1 Spare 6 32 Philips flathead machine screw 1 PCAP Grounding Kit ...

Page 3: ...itor clamp brackets to the overlay 6 2 1 Do NOT remove any remaining screws from the overlay 6 4 Remove the protective film from the back side of the overlay glass 6 4 1 Be sure not to touch the inside of the overlay glass once the film is removed 6 5 Use a cloth and mild cleaner to clean ONLY the monitor surface 6 5 1 Do not use any chemical solvents such as acidic or alkali solutions 6 5 2 If av...

Page 4: ...lay toward the bottom of the monitor The sides of the overlay will slide past the sides of the monitor 6 6 3 Lower the overlay down to the monitor surface Step 6 6 1 Step 6 6 2 Step 6 6 3 6 7 Be sure the USB cable is toward the top of the monitor and is not crushed or pinched during installation 6 8 Be sure not to scratch or damage the monitor or PCAP film while installing the overlay 6 9 Double c...

Page 5: ...ev 1 3 6 10 Return the monitor clamp brackets to their original positions 6 12 The touch overlay is now securely mounted on the monitor Proceed to the grounding provisions on the following pages to ensure proper touch functionality 6 11 Replace the two 2 6 32 flathead screws to secure the monitor clamp brackets to the overlay ...

Page 6: ... when the monitor and overlay are installed in a kiosk or other enclosure Insufficient grounding of all conductive components in the overlay s environment may result in random false touches or total touch system lock up failure 7 2 Grounding Instructions When a monitor with 80 point overlay is installed in an enclosure or kiosk the following steps must be taken to ensure correct touch functionalit...

Page 7: ...nnection 7 2 5 After the overlay and enclosure kiosk are grounded the 80 point touch screen will need to be reset due to the change in its overall sensing environment a Unplug the touch overlay s USB cable from the PC or media player b Leave the overlay s USB cable unplugged for 10 to 15 seconds c Plug the overlay s USB cable back into the PC d Wait for approximately 10 to 15 seconds for the syste...

Page 8: ......

Reviews: