14
2. Projecting an Image (Basic Operation)
❷
Connecting Your Computer/Connecting the Power Cord
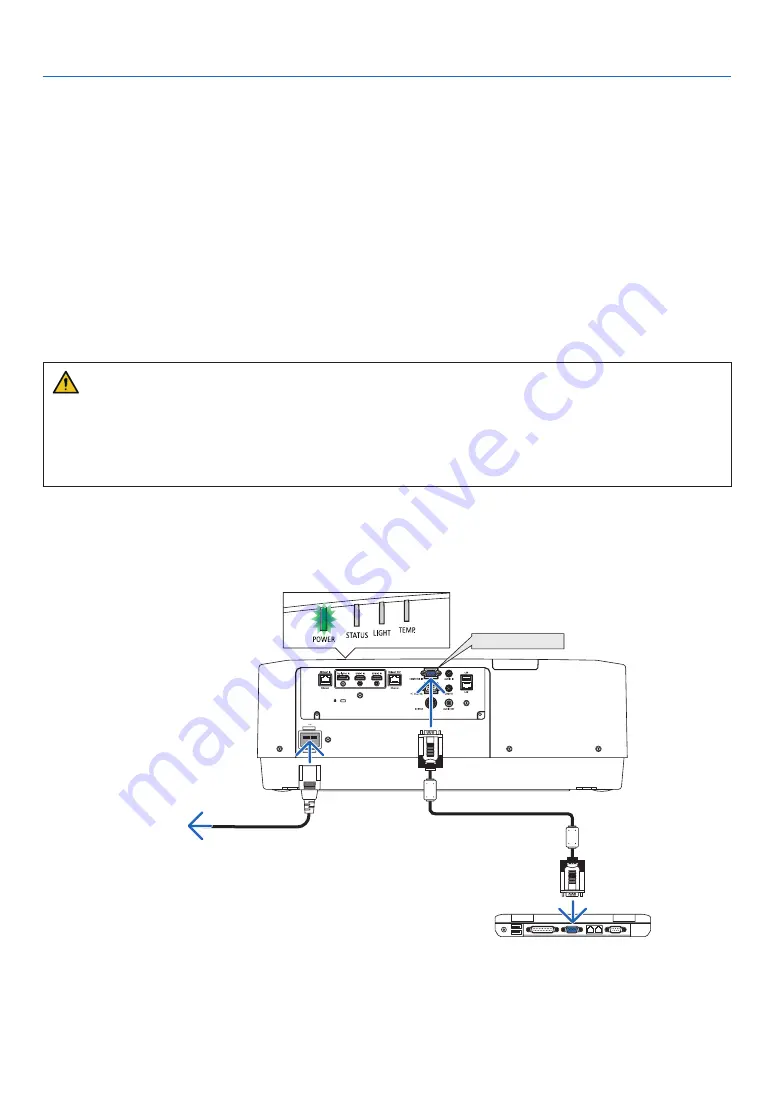
1. Connect your computer to the projector.
This section will show you a basic connection to a computer. For information about other connections, see “6-2
Making Connections” on page
.
Connect the display output terminal (mini D-sub 15 pin) on the computer to the computer video input terminal
on the projector with a commercially-available computer cable (with ferrite core) and then turn the knobs of the
connectors to secure them.
2. Connect the supplied power cord to the projector.
First connect the supplied power cord’s three-pin plug to the AC IN terminal of the projector, and then connect
another plug of the supplied power cord directly in the wall outlet. Do not use any plug converter.
CAUTION
• This equipment is designed to be used in the condition of the power cord connected to earth. If the power cord
is not connected to the earth, it may cause electric shock. Please make sure the power cord is earthed properly.
• To prevent the power cord from coming loose, make sure that all the prongs of the power cord plug are fully in-
serted into the AC IN terminal of the projector before using the power cord stopper. A loose contact of the power
cord may cause a fire or electric shock.
Upon connecting the power cable, the POWER indicator of the projector will light in green. If there are no input
signals, the device will go into the standby state.
(In the state, standby mode is NORMAL.)
(
→
)
COMPUTER IN
Make sure that the prongs are fully inserted into
both the AC IN and the wall outlet.
To wall outlet
Computer cable (with ferrite core)
(sold commercially)


