background image

English−7

English

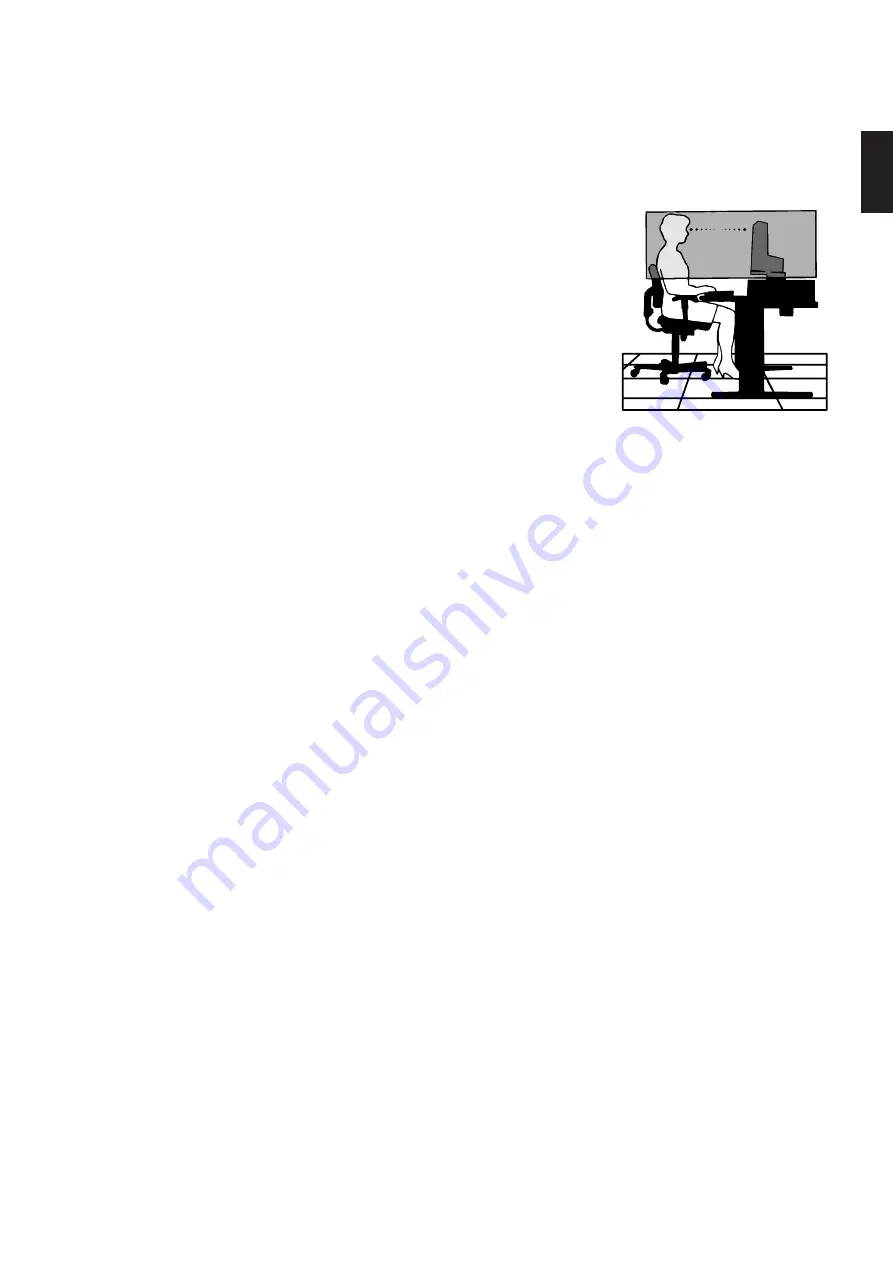
Ergonomics

CORRECT PLACEMENT AND ADJUSTMENT OF THE MONITOR CAN 

REDUCE EYE, SHOULDER, AND NECK FATINUE. CHECK THE 

FOLLOWINN WHEN YOU POSITION THE MONITOR:

To realize the maximum ergonomics benefits, we recommend the following:

•  For optimum performance of the monitor, allow 20 minutes for warming up. Avoid 

reproduction of still patterns on the monitor for long periods of time to avoid image 
persistence (after image effects).

•  Adjust the monitor height so that the top of the screen is at or slightly below eye level. 

Your eyes should look slightly downward when viewing the middle of the screen.

•  Position your monitor no closer than 40 cm (15.75 inches) and no further away than 

70 cm (27.56 inches) from your eyes. The optimal distance is 50 cm (19.69 inches).

•  Rest your eyes periodically for 5 to 10 minutes for every 1 hour by focusing on an object 

at least 20 feet away.

•  Position the monitor at a 90° angle to windows and other light sources to minimize glare 

and reflections. Adjust the monitor tilt so that ceiling lights do not reflect on your screen.

•  If reflected light makes it hard for you to see your screen, use an anti-glare filter.

•  Adjust the monitor’s brightness and contrast controls to enhance readability.

•  Use a document holder placed close to the screen.

•  Position whatever you are looking at most of the time (the screen or reference material) directly in front of you to minimize 

turning your head while you are typing.

•  Blink often. Eye exercise helps to reduce eye strain. Please contact your ophthalmologist. Net regular eye checkups.

•  To avoid eye fatigue, adjust the brightness to a moderate setting. Place a sheet of white paper next to the LCD screen for 

luminance reference.

•  Do not position the Contrast control to its maximum setting.

•  Use the preset Size and Position controls with standard signals.

•  Use the preset Color Setting.

•  Use non-interlaced signals.

•  Do not use primary color blue on a dark background, as it is difficult to see and may produce eye fatigue due to insufficient 

contrast.

•  Suitable for entertainment purposes at controlled luminous environments, to avoid disturbing reflections from the screen.

For more detailed information on setting up a healthy work environment, write to the American National Standard for Human 
Factors Engineering of Computer Workstations - ANSI/HFES 100-2007 - The Human Factors Society, Inc. P.O. Box 1369, 
Santa Monica, California 90406.

Cleaning the LCD Screen

•  When the LCD screen is dusty, please gently wipe with a soft cloth.

•  Please do not rub the LCD screen with hard or coarse material.

•  Please do not apply pressure to the LCD screen surface.

•  Please do not use OA cleaner as it will cause deterioration or discoloration on the LCD screen surface.

Cleaning the Cabinet

•  Unplug the power supply.

•  Nently wipe the cabinet with a soft cloth.

Dampen the cloth with a neutral detergent and water, wipe the cabinet and follow with a dry cloth.

Summary of Contents for MultiSync E172M

Page 1: ...User s Manual Desktop Monitor MultiSync E172M MODEL M179E9 Please find your model name in the label on the rear side of the monitor...

Page 2: ...for Mounting 15 Mount the Flexible Arm 15 Chapter 2 Basic Operation Using the OSD On Screen Display Controls 17 Changing the Input 18 Power management function LED indicator patterns 18 Chapter 3 Trou...

Page 3: ...terference by one or more of the following measures Reorient or relocate the receiving antenna Increase the separation between the equipment and receiver Connect the equipment into an outlet on a circ...

Page 4: ...and other countries Adobe and the Adobe logo are either registered trademarks or trademarks of Adobe Systems Incorporated in the United States and or other countries All other brands and product name...

Page 5: ...Unplug the power cord if the monitor malfunctions Should the monitor emit smoke or strange odors or sounds or if the monitor has been dropped or the cabinet broken turn off the monitor s power then un...

Page 6: ...or objects have fallen into the monitor Do not use flammable gas sprays to remove dust when cleaning the monitor Doing so could lead to a fire Do not play with the plastic bag which covers the monitor...

Page 7: ...is not supplied with this equipment please contact NEC For all other cases please use the power cord with the plug style that matches the power socket where the monitor is located The compatible powe...

Page 8: ...ble on the screen Unlike CRT monitors LCD monitors image persistence is not permanent but a still image being displayed for a long period of time should be avoided To alleviate image persistence turn...

Page 9: ...ference material directly in front of you to minimize turning your head while you are typing Blink often Eye exercise helps to reduce eye strain Please contact your ophthalmologist Get regular eye che...

Page 10: ...etup and installation by allowing the monitor to send its capabilities such as screen size and resolutions supported directly to your computer automatically optimizing display performance Intelligent...

Page 11: ...English 9 English Chapter 1 Installation This Chapter Includes Parts Name and Functions on page 10 Connections on page 12 Setup on page 13 Flexible Arm Installation on page 15...

Page 12: ...hen the OSD menu is displayed on the screen it navigates to the right or raises settings adjustments D When the OSD menu is not displayed on the screen it opens the BRIGHTNESS menu When the OSD menu i...

Page 13: ...o signal input from external equipment such as a computer or player C DisplayPort IN Digital DisplayPort signals input D HDMI IN Digital HDMI signals input E VGA IN mini D Sub 15 pin Analog RGB signal...

Page 14: ...selected monitor resolution is not a native panel resolution the text contents appearance in the monitor screen is expanded in a horizontal or vertical direction to show the non native resolution to...

Page 15: ...nstructions NOTE Make sure to read Important Information on page 3 before installation 1 Turn off the power to your computer 2 Place monitor face down on a non abrasive surface 3 Connect devices to th...

Page 16: ...les under the cable holder so that the cables rest side by side 5 Connect the power cord to a power outlet NOTE Please refer to the Caution section of this manual for proper selection of the AC power...

Page 17: ...e specifications listed below attach the arm to the monitor 100 mm 100 mm Mounting Bracket 2 0 3 2 mm Screw M4 Lock washer and flat washer Unit 6 8 mm Thickness of bracket and washer M4 4 x 12 mm with...

Page 18: ...English 16 Chapter 2 Basic Operation This Chapter Includes Using the OSD On Screen Display Controls on page 17 Changing the Input on page 18 Power management function LED indicator patterns on page 18...

Page 19: ...Below is an OSD structure Tables listing all options available in the OSD menu are located in Appendix A OSD Controls List on page 23 Main Menu Icon Select Sub menu Icon Select Press SELECT button Pr...

Page 20: ...deo content is generally commercially produced Blu rays and DVDs television broadcast and streaming media services Power management function LED indicator patterns The power management function is an...

Page 21: ...English 19 English Chapter 3 Troubleshooting This Chapter Includes Screen Image and Video Signal Issues on page 20 Hardware Issues on page 21 Image Persistence on page 21...

Page 22: ...OSD Image Adjust controls to focus and adjust the display by increasing or decreasing the FINE adjustment When the display mode is changed the OSD Image Adjust settings may need to be readjusted Chec...

Page 23: ...f VOLUME is set to a minimum Check to see if the computer supports an audio signal through DisplayPort or HDMI Check selected SOUND INPUT when DisplayPort or HDMI is in use Image Persistence Please be...

Page 24: ...Right Up Down 85 CR 10 80 CR 10 Response Time 5 ms Tr Tf Typ Active Display Area Horiz Vert 337 9 mm 13 3 inches 270 3 mm 10 6 inches AUDIO AUDIO Input STEREO Mini Jack DisplayPort Connector HDMI Con...

Page 25: ...on standard video inputs AUTO ADJUST Analog input only Automatically adjusts the image position the H SIZE and FINE settings LEFT RIGHT Analog input only Controls horizontal image position within the...

Page 26: ...s by five second increments OSD LOCK OUT This control completely locks out access to all of the OSD control functions except for VOLUME BRIGHTNESS and CONTRAST To activate the OSD LOCK OUT function op...

Page 27: ...NEC DISPLAY SOLUTIONS is strongly committed to environmental protection and sees recycling as one of the company s top priorities in trying to minimize the burden placed on the environment We are enga...

Page 28: ...ay solutions com in Europe https www nec display com global index html Global For Energy Saving information For ErP requirement Setting None Power consumption 0 5 W or less Time for power management f...

Reviews: