E – 34
Factory Default
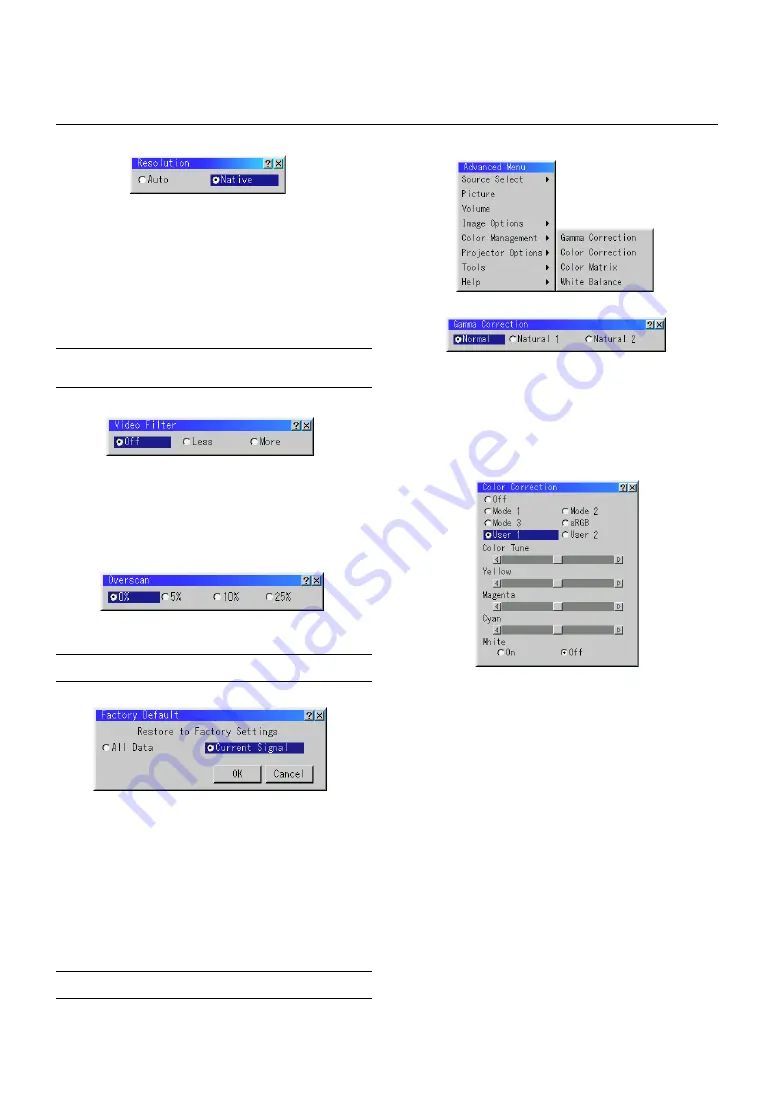
Overscan
You can select overscan percentage for RGB signal.
Select the appropriate option using the Select
or
button.
NOTE:
When “Resolution” is set to “Native”, this feature is not available, and
the stored settings and adjustments are invalid.
Changes all adjustments and setting to the factory preset for each
source individually except Remaining Lamp Time, Lamp Hour Meter,
Filter Usage, Projector Usage, Language and Communication Speed.
(To reset the lamp usage time, see “Clear Lamp Hour Meter” on page
E-37.)
All Data ............... Reset all the adjustments and settings for all the signals
to the factory preset.
Current Signal ..... Resets the adjustments for the current signal to the fac-
tory preset levels.
All the items in “Picture”, “Advanced Options” and “Color Management”
can be reset.
NOTE:
The Volume, Keystone, Lamp Mode and all the items in the Projector
Options can be reset only when “All Data” is selected.
Color Management
Gamma Correction
Use the
or
button to choose “Normal” when in a lighted room and
“Natural 1&2” when in a darkened room. “Natural 1” for better flesh
tone; “Natural 2” for true reproduction of middle tones.
Each mode is recommended for :
Normal ......... For the regular picture
Natural 1 ...... For true color reproduction of natural tones
Natural 2 ...... For dark portions of a picture
Color Correction
This option allows you to adjust neutral tint for yellow, cyan or magenta.
There are 4 factory presets optimized for various types of images, or
you can set 2 user adjustable settings.
Color Correction
OFF .............. Turns off the Color Correction. You obtain the brightest image.
Mode 1 ........ Recommended for true flesh tones
Mode 2 ........ Recommended for turf color
Mode 3 ........ Recommended for deep red
sRGB ........... Standard color values
User 1 .......... User adjustable
User 2 .......... User adjustable
When selecting User 1 or 2, the submenu below will be displayed.
You can customize each color or tint.
Color Correction (User Adjust)
Color Tune ... Adjusts the Tint on whole screen for RGB.
Yellow .......... Adjusts yellow to obtain reddish yellow or greenish yellow
Magenta ....... Adjusts magenta or purple to obtain reddish magenta or blu-
ish magenta.
Cyan ............. Adjusts cyan or light greenish blue to obtain greenish or blu-
ish cyan.
White(On/Off) . Select “ON” for a bright white image; “OFF” for a natural white
image.
Video Filter (when Auto Adjust is off)
This function reduces video noise.
Off ................ The low-pass filter is not applied.
Less ............. The low-pass filter is applied weakly.
More ............ The low-pass filter is applied strongly.
Screen adjustments are possible even when the filter is on.
This allows you to activate or deactivate the Advanced AccuBlend fea-
ture.
Auto ............. Turns on the Advanced AccuBlend feature. The projector au-
tomatically reduces or enlarges the current image to fit the
full screen.
Native ........... Turns off the Advanced AccuBlend feature. The projector dis-
plays the current image in its true resolution.
See “Auto Adjust (RGB Only)” on page E-37 for turning on or off the
Auto Adjust feature.
NOTE:
While you are displaying an image with higher resolution than the
projector’s native resolution, even when you are in the Native mode, the image
is displayed full screen using the Advanced AccuBlend feature.
Resolution (when Auto Adjust is off)


