


7. Setting the LAN Setting of Projector
29
Se
tt
in
g the
L
A
N Set
ting of
Pro
je
c
tor
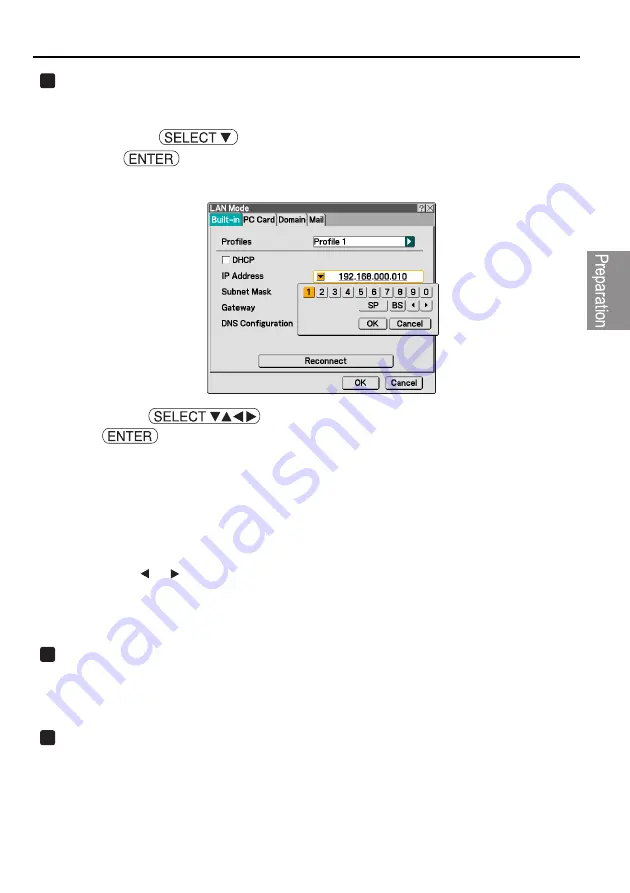
Input "IP Address".
If "DHCP" is not checked, input the IP address assigned to the projector by the administrator of
the network to which the projector is connected.
<1> Press the
button once to highlight the "IP Address" field and press
the
button.
The software keyboard will be displayed.
<2> Use the
button to select a number to input, and press the
button.
The characters will be input.
<3> Repeat step <2> above to input the IP address.
•
Each button on the software keyboard has the following function.
•
"SP"•••••••••••••••••••Inputs space.
•
"BS"•••••••••••••••••••Deletes one character to the left of the character insertion posi-
tion in the "IP Address" field.
•
"
" "
"•••••••••••••Moves the character insertion position in the "IP Address" field
to the left or the right.
•
[OK] •••••••••••••••••••Finalizes the input character and closes the software keyboard.
•
[Cancel] ••••••••••••••Cancels the input character and closes the software keyboard.
Input "Subnet Mask".
If "DHCP" is not checked, input the subnet mask of the network to which the projector is
connected.
The method of inputting is the same as that of the "IP Address" field.
Input "Gateway".
If "DHCP" is not checked, input the default gateway of the network to which the projector is
connected.
The method of inputting is the same as that of the "IP Address" field.
3
4
5
Summary of Contents for LT265 - INSTALLTION GUIDE
Page 6: ...4...


