background image

FACE LAYOUT, KEY AND PARTS 


FACE LAYOUT, KEY AND PARTS 

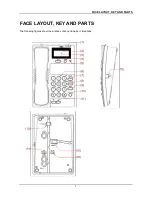
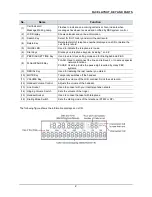
The following figures show the locations of key and parts of telephone. 


Summary of Contents for AT-50

Page 1: ...AT 50 USER GUIDE GVT 053680 001 Issue 2 0 December 2018 Caller ID Business Telephone ...

Page 2: ...mers The information contained herein is the property of NEC Corporation and shall not be reproduced without prior written approval from NEC Corporation All brand names and product names on this document are trademarks or registered trademarks of their respective companies Copyright 2018 NEC Corporation Package Contents Check the contents of package for the following items If any item is missing o...

Page 3: ...in a built in installation unless proper ventilation is provided 6 Never push objects of any kind into this product through cabinet slots as they may touch dangerous voltage points or short out parts that could result in a risk of fire electric shock or damage to the product itself Never spill liquid of any kind on the product 7 To reduce the risk of electric shock do not disassemble this product ...

Page 4: ...Setting the Flash Time 6 Setting the PBX DIAL Code 6 BASIC OPERATION 7 Making a Call using the Handset 7 Receiving a Call using the Handset 7 FEATURES 8 FLASH Key 8 PAUSE Key 8 Last Number Redial 8 Memory Redial 8 Microphone Mute 9 Message Waiting Lamp 9 Temporarily Switching Pulse to Tone Dialing 9 Caller ID CID 10 TROUBLESHOOTING 11 Troubleshooting Guide 11 Care and Maintenance 11 SPECIFICATIONS...

Page 5: ...FACE LAYOUT KEY AND PARTS 1 FACE LAYOUT KEY AND PARTS The following figures show the locations of key and parts of telephone ...

Page 6: ...r clock setting mode and for Dialing behind a PBX 8 FLASH PAUSE Key FLASH Used to disconnect the line and retrieve it or to access special network functions PAUSE Used to provide the pause digit required by many PBX systems 9 REDIAL Key Used for redialing the last number you dialed 10 MUTE Key Temporally switches off the handset 11 VOLUME Key Adjust the volume of the LCD contrast Scroll the call r...

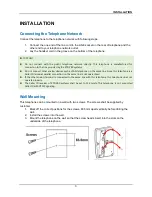
Page 7: ...AX telephone on the same line Since this telephone is a Caller ID terminal parallel connection on the same line is not guaranteed If the other analog terminal is connected to the same line with this telephone this telephone does not operate properly The Caller ID receiver of KTS PBX systems shall be set to FSK mode This telephone is not supported Caller ID with DTMF signaling Wall Mounting This te...

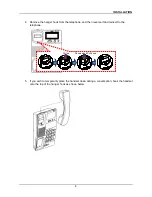
Page 8: ...ok from the telephone and then reverse it and reinsert to the telephone 5 If you wish to temporarily place the handset down during a conversation hook the handset onto the top of the hanger hook as shown below Pull up Reverse and Pull down ...

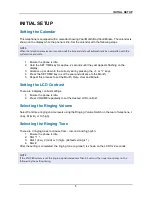
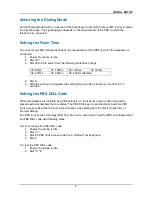
Page 9: ...advance to the Month 5 Repeat this process to set the Month Date Hour and Minute Setting the LCD Contrast There are 6 display contrast settings 1 Ensure the phone is idle 2 Press VOLUME repeatedly to set the desired LCD contrast Selecting the Ringing Volume Select from three ringing volume levels using the Ringing Volume Switch on the rear of telephone L low M mid or H high Selecting the Ringing T...

Page 10: ...Dial 5 After the setting is completed the setting time e g 300 is shown on the LCD for 15 seconds Setting the PBX DIAL Code When this telephone is installed as a PBX extension a trunk access code is often required to precede external numbers that are dialed The PBX DIAL key can automatically insert the PBX trunk access code at the front of a dialed number when dialing from the IN List Caller ID or...

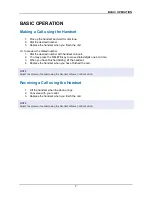
Page 11: ... You may press the DELETE key to erase dialed digits one at a time 3 When you have finished dialing lift the handset 4 Replace the handset when you have finished the call NOTE Adjust the volume if needed using the Handset Volume Control Switch Receiving a Call using the Handset 1 Lift the handset when the phone rings 2 Converse with your caller 3 Replace the handset when you finish the call NOTE A...

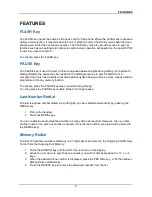
Page 12: ...ory location To activate press the PAUSE key when required during dialing You may press the PAUSE key multiple times for a longer pause Last Number Redial The last telephone number dialed up to 32 digits can be redialed automatically by pressing the REDIAL key 1 Pick up the handset 2 Press the REDIAL key You can re dial the same telephone number as many times as required However once you dial anot...

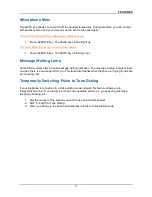
Page 13: ...PBX systems offer a visual message waiting indication The message waiting lamp is turned on when there is a message left for you This lamp also flashes while the phone is ringing to indicate an incoming call Temporarily Switching Pulse to Tone Dialing If your telephone is connected to a Pulse dialing mode network this feature allows you to temporarily switch to Tone dialing to access Tone operated...

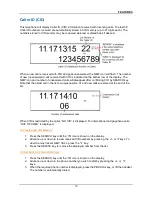
Page 14: ...all in the list occupies position 01 and new calls are stored at the end of the list When CID is restricted by the caller NO CID is displayed For international and payphone calls OUT OF AREA is displayed To Preview the CID Memory 1 Press the SEARCH key until the IN icon is shown on the display 2 Advance up or down to review received CID numbers by pressing the or keys To view the most recent NEW C...

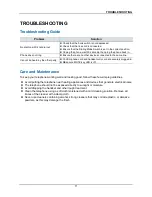
Page 15: ...andset curly cord are securely plugged in Make sure MUTE key LED is off Care and Maintenance To keep your telephone working well and looking good follow these few simple guidelines Avoid putting the telephone near heating appliances and devices that generate electrical noise The telephone should not be exposed directly to sunlight or moisture Avoid dropping the handset and other rough treatment Cl...

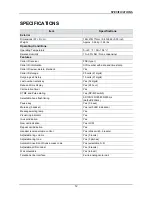
Page 16: ...ey Yes 32 digits Date and time display Yes 24 hour Call duration timer Yes DTMF and Pulse dialing Yes DP MF switch Selectable hook flash timing 95 100 120 180 300 600ms default 600ms Pause key Yes 3 6 sec Mute key handset Yes with LED indication Message waiting lamp Yes Visual ring indicator Yes In use indication Yes New call indication Yes LCD Repeat call indication Yes Handset receive volume con...

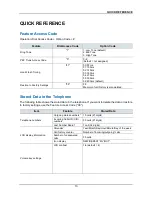
Page 17: ... Stored Data in the Telephone The following table shows the stored data in the telephone If you want to delete the data or restore to factory settings use the Feature Access Code 99 Item Feature Stored Data Telephone numbers Outgoing dialed numbers 10 calls 21 digits Incoming Caller ID CID numbers 30 calls 21 digits Last Number Redial 1 call 32 digits LCD display information Calendar Year Month Da...

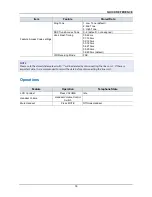
Page 18: ...3 180ms 04 270ms 05 300ms 06 600ms default CID Receiving Mode FSK NOTE Please note the stored data marked with will be deleted by disconnecting the line cord If there is important data it is recommended to record the data before disconnecting the line cord Operations Feature Operation Telephone State LCD Contrast Press VOLUME Idle Handset Volume Handset Volume Control Switch Mute Handset Press MUT...

Page 19: ...Caller ID Business Telephone AT 50 USER GUIDE GVT 053680 001 December 2018 Issue 2 0 NEC Corporation ...

Reviews: