background image

Recommended Use

5

Safety Precautions and Maintenance

FOR OPTIMUM PERFORMANCE, PLEASE NOTE

THE FOLLOWING WHEN SETTING UP

AND USING THE AUDIO BASE:

• DO NOT OPEN THE AUDIO BASE. 

There are no user serviceable parts inside

and opening or removing covers may expose you to dangerous shock hazards
or other risks. Refer all servicing to qualified service personnel.

Do not spill any liquids into the audio base or use your audio base near water.

Do not insert objects of any kind into the audio base slots, as they may touch
dangerous voltage points, which can be harmful or fatal or may cause electric
shock, fire or equipment failure.

Do not place any heavy objects on the power cord. Damage to the cord may
cause shock or fire.

Keep the audio base away from high capacity transformers, electric motors
and other devices such as external speakers or fans, which may create strong
magnetic fields.

When operating the audio base with its AC 220-240V worldwide power
supply, use a power supply cord that matches the power supply voltage of the
AC power outlet being used. The power supply cord you use must have been
approved by and comply with the safety standards of your country. (Type
H05VV-F should be used except in UK)
NOTE: The audio base is to be used only with NEC MultiSync and AccuSync

monitors.

• In UK, use a BS-approved power cord with molded plug and a black (5A) fuse

installed for use with this audio base. If a power cord is not supplied with this
audio base, please contact your supplier.

Immediately unplug your audio base from the wall outlet and refer servicing to
qualified service personnel under the following conditions:

When the power supply cord or plug is damaged.

If liquid has been spilled, or objects have fallen into the audio base.

If the audio base has been exposed to rain or water.

If the audio base has been dropped or the cabinet damaged.

If the audio base does not operate normally by following operating
instructions.

Allow adequate ventilation around the audio base so that heat can
properly dissipate. Do not block ventilated openings or place the
audio base near a radiator or other heat sources.

The power cable connector is the primary means of detaching the
system from the power supply. The audio base should be installed
close to a power outlet which is easily accessible.

Handle with care when transporting. Save packaging for transporting.

CAUTION

AudioBase

9/29/00, 11:27 AM

7

Summary of Contents for AccuSync Display Solutions AccuSync

Page 1: ...Audio Base U S E R S M A N U A L AccuSync To learn about other special offers register online at www necmitsubishi com productregistration AudioBase 9 29 00 11 26 AM 1 ...

Page 2: ...2 Quick Start 2 3 Controls 4 Specifications 4 Recommended Use 5 Troubleshooting 6 Avertissement 7 Contenu 8 Mise en marche rapide 8 9 Commandes 10 Fiche technique 10 Usage recommandé 11 Dépannage 12 AudioBase 9 29 00 11 26 AM 2 ...

Page 3: ... television reception 1 Please use the supplied power cord or equivalent to ensure FCC compliance 2 Please use the supplied shielded video signal cable 15 pin mini D SUB to DVI cable or DVI D to DVI D cable 2 This equipment has been tested and found to comply with the limits for a Class B digital device pursuant to part 15 of the FCC Rules These limits are designed to provide reasonable protection...

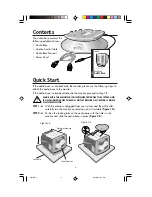
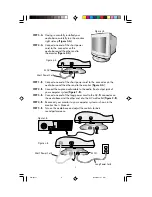
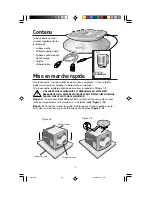
Page 4: ...EM AND IS UNPLUGGED FROM THE WALL OUTLET BEFORE ANY WORK IS DONE ON THE MONITOR STEP 1 A With the monitor unplugged from your system and the wall outlet carefully turn the monitor upside down on a firm table Figure 1 A STEP 2 A Position the locking tabs on the audio base with the holes in the monitor and slide the audio base in place Figure 2 A 2 Figure 1 A Figure 2 A Bottom of monitor Top of moni...

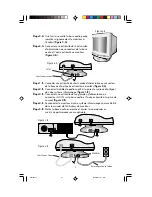
Page 5: ...se and the other end to the monitor Figure 4 A STEP 2 B Connect the captive audio cable to the audio line output jack of your computer system Figure 1 B STEP 3 B Connect one end of the long power cord to the AC IN connector on the audio base and the other end into the AC wall outlet Figure 2 B STEP 4 B Reconnect your monitor to your computer system as shown in the monitor User s Manual STEP 5 B Tu...

Page 6: ... Speakers Two 2 2 inch 57mm full range Power 1 1 Watts 8 Ohms with 10 THD Input Impedance 10k Ohms Input Sensitivity 500mV input for full output Frequency response 150Hz 10kHz Power Requirements AC 100 240V Current Rating 3 15A Audio 0 15A AC OUT 3A Headphone Jack Type 3 5mm Stereo Audio Input Plug Type 3 5mm Stereo Dimensions 10 2 in W x 1 8 in H x 9 5 in D 260mm W x 45mm H x 243mm D Weight 1 6 l...

Page 7: ...een approved by and comply with the safety standards of your country Type H05VV F should be used except in UK NOTE The audio base is to be used only with NEC MultiSync and AccuSync monitors In UK use a BS approved power cord with molded plug and a black 5A fuse installed for use with this audio base If a power cord is not supplied with this audio base please contact your supplier Immediately unplu...

Page 8: ...Distortion i e Speaker is being Make sure the audio base is Depending on your sound card static hissing overdriven by an connected to line out jack you may also turn off the crackling amplified audio unamplified of sound card and amplifier on the sound card source not speaker out jack amplified check your sound card manual Volume level on Check volume level of sound sound card or other card or aud...

Page 9: ...e d utiliser le câble d alimentation fourni ou équivalent pour assurer la conformité FCC 2 Veuillez utiliser le câble de signal vidéo blindé fourni un mini D SUB à 15 broches vers le câble DVI ou un DVI D vers le câble DVI D 2 Cet appareil a été testé et s avère conforme avec les spécifications d équipements de Classe B section 15 de la réglementation FCC Ces spécifications ont été établies pour g...

Page 10: ...SYSTÈME ET DÉBRANCHÉ DE LA PRISE DE COURANT AVANT D EFFECTUER QUELQUE TRAVAIL QUE CE SOIT SUR LE MONITEUR Étape1 A Le moniteur étant débranché du systéme et de la prise de courant renverser soigneusement le moniteur sur une table solide Figure 1 A Étape 2 A Positionner toutes les pattes de blocage sur la base audio avec les trous dans le moniteur et glissez la base audio en place Figure 2 A 8 Audi...

Page 11: ...au moniteur Figure 4 A Étape 2 B Connecter la câble de audio captif à la prise de sortie audio ligne de votre systéme informatique Figure 1 B Étape 3 B Connecter une extrémité du long cordon d alimentation au connecteur AC IN sur la base audio et l autre extrémité à la prise de courant Figure 2 B Étape 4 B Reconnecter le moniteur à votre systéme informatique comme illustré dans le manuel de l util...

Page 12: ...réo mesurant 3 5 mm 1 8 po Fiche technique Haut parleurs Deux 2 2 po 57 mm gamme complète Puissance 1 1 Watts à 8 Ohms avec THD 10 Impédance d entrée Supérieure à 10 k Ohms Sensibilité d entrée Entrée de 500 mV pour sortie complète Plage de fréquences 150 Hz à 10 kHz Alimentation nécessaire 110 240 V C A Courant nominal 3 15 A Audio 0 15A AC OUT 3A Type de prise du casque d écoute 3 5 mm stéréo Ty...

Page 13: ...ordon d alimentation qui correspond à la tension de l alimentation fournie à la prise de courant CA Le cordon d alimentation utilisé doit être agréé et en conformité avec les normes de sécurité de son pays Type H05VV F à utiliser sauf au Royaume Uni REMARQUE La base audio doit être utiliser seulement avec les moniteurs MultiSync et AccuSync Au Royauma Uni utiliser un cordon d alimentation certifié...

Page 14: ...on de la carte son que savoir parasites parleur due à une raccordée à la prise de sortie vous avez il peut être possible crépitements amplification de la de ligne non amplifiée de la de déconnecter l amplificateur de sifflements source audio carte son et non à la prise de la carte son se reporter au sortie de haut parleur manuel de description de votre amplifiée carte son Le volume de la Vérifier ...

Page 15: ...sionner un mauvais fonctionnement Partie responsable américaine NEC Mitsubishi Electronics Display of America Inc Adresse 1250 N Arlington Heights Road Itasca Illinois 60143 N tél 630 467 3000 Type de produit La Base Audio Classification de l appareil Périphérique classe B Modèle N9001 Nous déclarons par la présente que les appareils mentionnés ci dessus sont conforme aux normes techniques spécifi...

Page 16: ...at may cause undesired operation U S Responsible Party NEC Mitsubishi Electronics Display of America Inc Address 1250 N Arlington Heights Road Itasca Illinois 60143 Tel No 630 467 3000 Type of Product Computer Peripheral Equipment Classification Class B Peripheral Model N9001 We hereby declare that the equipment specified above conforms to the technical standards as specified in the FCC rules Part...

Reviews: