Q
ui
ck
st
art
gu
ide
Plug-in optional switches
e.g. to control with foot or head.
Press this question mark icon on screen for help
and hold for videos.
The Tablet will guide you through set-up and use.
PLEASE READ ALL SAFETY INSTRUCTIONS.
For further information, video hints, and tips go to
www.neater.co.uk
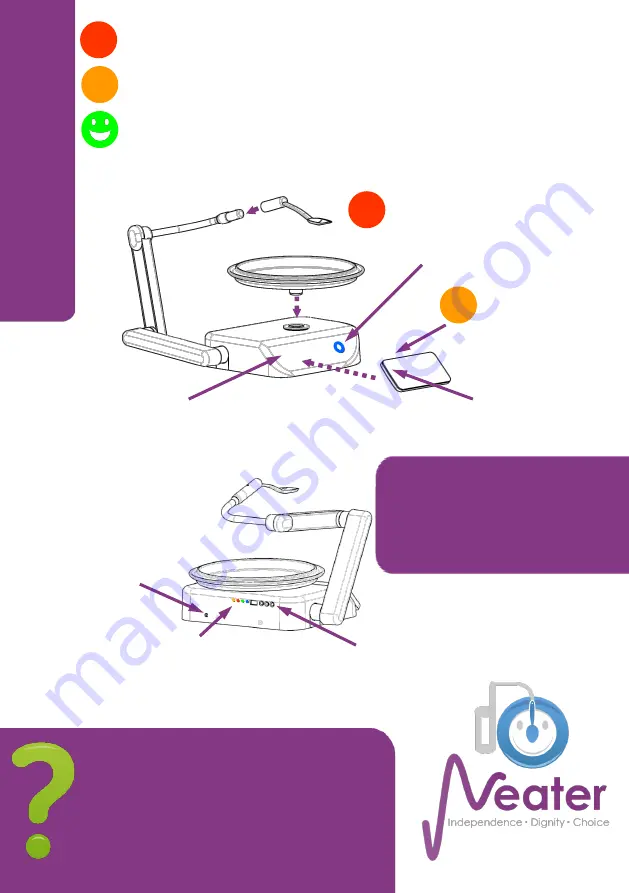
Orange Light
= Robot battery charging
Red Light
= power to Tablet charger
Green Light
= external power plugged in
Blue Light
= Tablet Bluetooth connected
1
2
Enjoy your meal!
Turn ROBOT on
(Remember to charge the Robot and Tablet every night)
Turn TABLET on and wait for onscreen guide
Robot power button.
Press on —
lights up,
hold to switch off.
Tablet power and
screen wake/sleep
button.
Red Light
= charging
(flashing = battery low)
Green Light
= fully charged
Removable
touchscreen
Tablet for easy access.
Replace here between meals to
recharge its battery wirelessly.
1
2
Copyright and patent applied for
20180926
Problem?
Ensure robot and tablet are charged.
Hold Tablet power and the volume up buttons
until it vibrates.
Hold Robot power button until light goes out.
Press Robot power button again—it lights up.
Wait two minutes for Neater App to start.
Plug power in here
overnight to charge batteries
(can be plugged
in when eating).


