background image

The product described in this book is a licensed product of NCR Corporation.

NCR is a registered trademark of NCR Corporation. NCR RealPOS is a trademark of NCR Corporation in the United States
and/or other countries. Other product names mentioned in this publication may be trademarks or registered trademarks of their
respective companies and are hereby acknowledged.

The terms HDMI and HDMI High-Definition Multimedia Interface, and the HDMI Logo are trademarks or registered trademarks
of HDMI Licensing LLC in the United States and other countries.

Where creation of derivative works, modifications or copies of this NCR copyrighted documentation is permitted under the terms
and conditions of an agreement you have with NCR, NCR's copyright notice must be included.

It is the policy of NCR Corporation (NCR) to improve products as new technology, components, software, and firmware become
available. NCR, therefore, reserves the right to change specifications without prior notice.

All features, functions, and operations described herein may not be marketed by NCR in all parts of the world. In some instances,
photographs are of equipment prototypes. Therefore, before using this document, consult with your NCR representative or NCR
office for information that is applicable and current.

To maintain the quality of our publications, we need your comments on the accuracy, clarity, organization, and value of this book.

Address correspondence to:

Manager, Information Solutions Group
NCR Corporation
Discovery Centre, 3 Fulton Road
Dundee, DD2 4SW
Scotland

Internet Address:

http://www.info.ncr.com/Feedback

Copyright © 2014
By NCR Corporation
Duluth, GA U.S.A.
All Rights Reserved

Summary of Contents for 7197

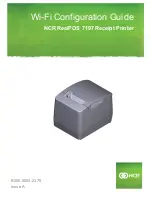
Page 1: ...Wi Fi Configuration Guide NCR RealPOS 7197 Receipt Printer B005 0000 2375 Issue A...

Page 2: ...CR s copyright notice must be included It is the policy of NCR Corporation NCR to improve products as new technology components software and firmware become available NCR therefore reserves the right...

Page 3: ...er 6 Connecting a Wi Fi Device to the Printer 6 Security Settings 10 No Security 10 WEP Security 11 WPA WPA2 Personal Security 12 WPA WPA2 Enterprise Security 13 Final Installation 15 Signal Strength...

Page 4: ...4...

Page 5: ...configure a Wi Fi printer for a POS network you need to acquire the following network information in advance POS Network ID SSID Security Type Security Password Access to Security Certificates if app...

Page 6: ...n the network workstation open the dialog for Choosing a Network and note the Printer Serial Number in the list This is the Printer SSID WF serial number 6 Connect to the Printer SSID Example For Wind...

Page 7: ...er IP Address on the Diagnostic Printout 8 Open an internet browser on the workstation and enter the Printer IP Address in the Browser Address Bar 192 168 2 1 Enter 9 Enter the User Name and Password...

Page 8: ...selection and setup Limited AP Settings Access Point mode settings Operation Mode Selection Not used Administrator Settings administrator and password control 10 Click Client Settings The Client Setti...

Page 9: ...ct an Existing Networks 2 All existing Access Points are listed in a table Choose the Access Point to connect to and click Select Note Install the printer in a location where the signal strength shown...

Page 10: ...d a Wi Fi device and the following network information in advance POS Network ID SSID Security Type Security Password Access to Security Certificates if applicable Connecting a Wi Fi Device to the Pri...

Page 11: ...n a Wi Fi enabled device open the dialog for Choosing a Network and note the Printer Serial Number in the list This is the Printer SSID WF serial number 5 Connect to the Printer SSID Example For Windo...

Page 12: ...r IP Address on the Diagnostic Printout 7 Open an internet browser on the Wi Fi device and enter the Printer IP Address in the Browser Address Bar 192 168 2 1 Enter 8 Enter the User Name and Password...

Page 13: ...ion and setup Limited AP Settings Access Point mode settings Operation Mode Selection Not used Administrator Settings administrator and password control 9 Click Client Settings The Client Settings men...

Page 14: ...n arrow and select No Security 2 Click Advanced Options 3 Select the method how to obtain an IP address Acquire IP Address automatically DHCP or Static IP Address enter data 4 Select Next to show the...

Page 15: ...ect WEP 2 Enter the WEP key 3 Click Advanced Options 4 Select the method how to obtain an IP address Acquire IP Address automatically DHCP or Static IP Address enter data 5 Select Next to show the sum...

Page 16: ...row and select WPA WPA2 Personal 2 Enter the Passphrase 3 Select the method how to obtain an IP address Acquire IP Address automatically DHCP or Static IP Address enter data 4 Select Next to show the...

Page 17: ...rinter 13 WPA WPA2 Enterprise Security 1 Click the Security menu down arrow and select WPA WPA2 Enterprise 2 Enter the EAP Type EAP Username and EAP Password 3 Skip the Time Settings section 4 Click U...

Page 18: ...ficates must be in DER format and must be less than 2K bytes 6 Click Advanced Options 7 Select the method how to obtain an IP address Acquire IP Address automatically DHCP or Static IP Address enter d...

Page 19: ...r toward positive numbers after connecting the printer The signal strength can be found on the diagnostic form Network Connection If the printer does not connect to the network the IP Address indicate...

Page 20: ...ttings By default the printer is in Access Point Mode no security DHCP These settings can be changed in this option 1 Click Limited AP Settings 2 Click the Security menu down arrow and select WEP 3 En...

Page 21: ...Select the method how to obtain an IP address Acquire IP Address automatically DHCP or Static IP Address enter data 6 Select Next to show the summary of your selection 7 If the summary is correct clic...

Page 22: ...Settings This option is used to change the Administrator login and password 1 Click Administrator Settings 2 Enter the Administrator Username 3 Enter the Administrator Password at lease 4 characters...

Page 23: ...mes disconnected during the configuration process you may find it necessary to reset it to factory Access Mode This is none in the Printer Diagnostics Mode 1 Disconnect power to the printer 2 There ar...

Page 24: ...nect power to the printer Hold the Receipt Feed Button down until you get a diagnostic printout 4 At the Main Menu enter 8 short clicks 5 Enter 1 long click to reset the EEPROM 6 Disconnect power to t...

Reviews: