background image

6. Setup

7. Technical Specifications

Power 

Adapter:

Input: AC 100-240V    50/60HZ    350mA

Output: DC 5V/1A

Picture Format: 

JPEG

Memory Cards: 

SD

MMC

SDHC

USB connection: 

USB 2.0 Host

Screen Parameter:

Screen Size: 

7

 inch TFT

Resolution:400*240 pixels

Contrast: 300:1

Aspect Ratio:16:9

Brightness: 300 cd/m

2

Response Time: 20ms

Viewing Angle: 60°(left/right/vertical), 40°(horizontal)

Working Temperature: 0

~40

, Humidity: 10-85

8. Troubleshooting Guide

If you have problems with your 

frame

, please consult both this guide and 

the instructions


in this manual. 

For the latest news, alerts, and documentation, visit us on the web at 

www.naxa.com

. If you need further assistance, 

please contact 

Naxa


Technical Support.

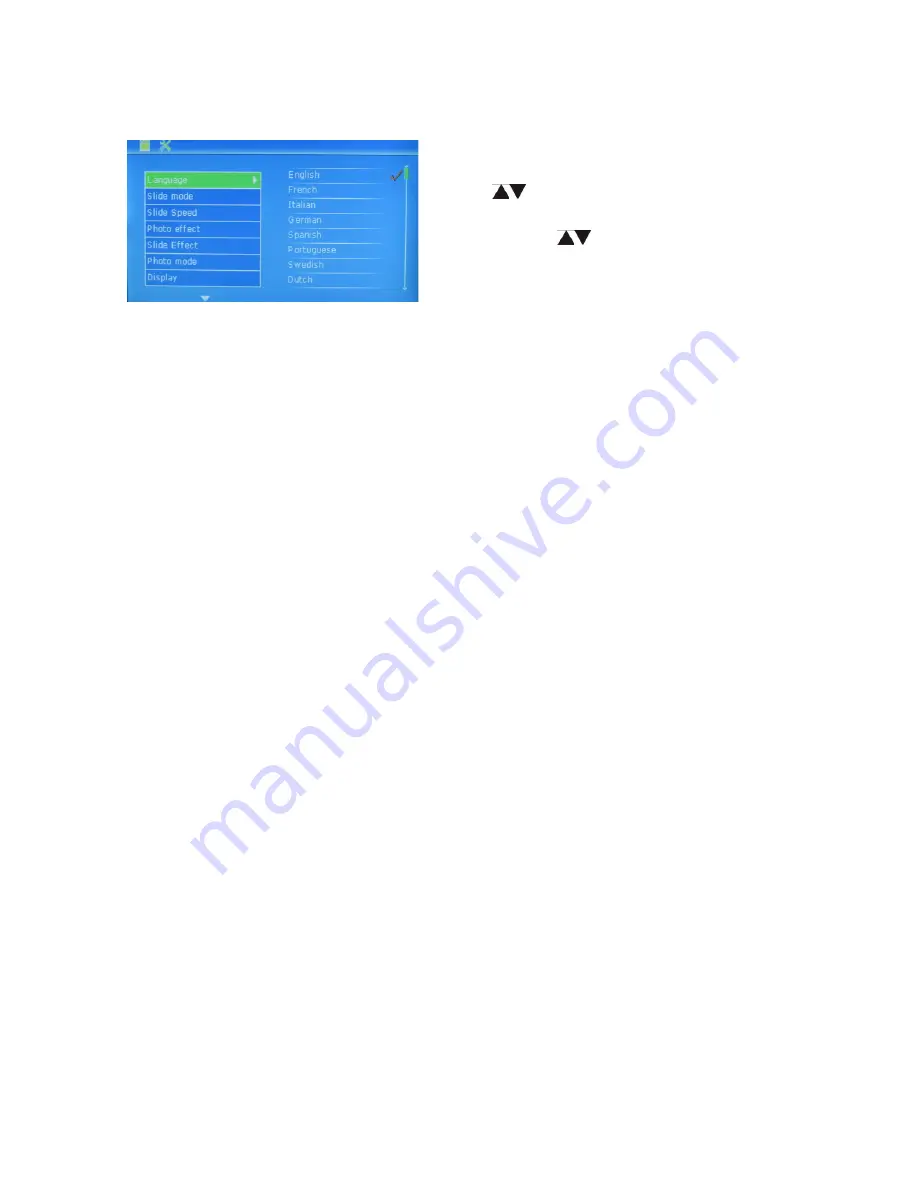
Select

  Setup

  from the 

main  menu

then press 

PLAY

 to


enter the S

etup 

menu

Use 


to select the 

option that

 you want to 

adjust.

 Press 

PLAY

 to 

view


a

 sub menu

 if it is 

available, use         to adjust the option, 

then press

OK to conf

irm.

Summary of Contents for NF-501

Page 1: ...7 7 ...

Page 2: ......

Page 3: ...The screen of the Digital Photo Frame is made of glass and it can be broken or scratched If fingerprints or dust accumulate on the screen we recommend using a soft non abrasive cloth such as a camera lens cloth to clean the screen If necessary you may moisten the cleaning cloth with water before cleaning the screen Do not use liquid cleaners or aerosol cleaners Unplug this product from all power s...

Page 4: ... SD MMC SDHC 4 Supports viewing pictures in thumbnail mode 5 Auto Slideshow when a Memory Card is inserted 6 Built in Clock and calendar with slideshow window 7 Photo display modes slideshow preview rotate function 8 Adjustable slideshow speed and over 10 kinds of slideshow transitions 9 Adjustable brightness contrast saturation 10 Copy files to memory and delete files from cards memory 11 OSD lan...

Page 5: ...t Side of Frame 4 1 2 Rear of Frame 4 2 Getting Started 4 3 Operating Instruction 5 3 1 Card and USB 5 3 2 Picture Mode 5 3 3 Copy Delete function 6 4 File 6 5 Calendar 7 6 Setup 7 7 Technical Specifications 7 8 Troubleshooting Guide 8 3 ...

Page 6: ...e other end into the DC IN power jack found on the right side of the frame 2 2 Remove the protective film covering the LED 2 3 Place the unit on a flat stable surface Turn the unit on or off by pressing the Power button on the unit 1 POWER On Off 2 UP 3 PLAY PAUSE OK 4 RIGHT 5 LEFT 6 DOWN 7 MENU Press hold EXIT Press once 1 SD MMC SDHC CARD SLOT 2 USB PORT 3 DC IN Power 4 ...

Page 7: ...B stick that contains photo files a slideshow will start automatically Press MENU twice to return to the Main Menu interface where you may access the Photo File Calendar and Setup modes From the Main Menu highlight the Photo option and then press PLAY The frame will display six photos use to choose the photo you want to display and then press PLAY Press PLAY to start slideshow pictures in the sele...

Page 8: ...rowse all the photos stored on the memory card or on the frame s built in memory Copy photos to built in memory In Photo mode press PLAY PAUSE to pause then use to select the photo you want to copy to the built in memory then press hold MENU to view the operation menu Select an option save rotate or zoom and then press PLAY to confirm To delete pictures from built in memory or the memory card in s...

Page 9: ...horizontal Working Temperature 0 40 Humidity 10 85 8 Troubleshooting Guide If you have problems with your frame please consult both this guide and the instructions in this manual For the latest news alerts and documentation visit us on the web at www naxa com If you need further assistance please contact Naxa Technical Support Select Setup from the main menu then press PLAY to enter the Setup menu...

Page 10: ... the CARD or USB Please confirm whether there are supported JPEG files on the card or USB device Empty devices cannot be read Cannot play the file Please confirm if the file format is compatible with the frame Display too bright or too dark Please adjust the brightness or contrast options in the setup menu The color is light or no color ...

Reviews: