6
First steps
1.
First start
At first start, screen calibration may be
required. Please refer to “Calibration” at page
30.
Next, you have to select language of the
device’s menus (this does not affect the
language setting in navigation software).
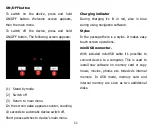
To use navigation, SD card with software and
maps is required. This card should be inserted
to card reader in the device. There is only one
way to insert the card.
Do not remove the card when the navigation
software is running.
To remove the card, press it’s top to release
the lath, than slide it out.
2.
Locating your current position
Your NavRoad AURO must be outside to locate
your current position. The first time you start
your NavRoad, it can take up to 3 minutes to
find your current position. If it takes longer
than 3 minutes, make sure that you are in an
open place without tall buildings or trees
around you.
In the future, your position will be found much
faster.
Once your NavRoad has located your current
position, the Driving View is shown in full color
and shows your position on the map.
3.
Battery
Battery in the device does not require
formatting.
Avoid complete discharging, as it has influence
on battery efficiency.
To charge the battery, an optional AC charger
may be used, with charging current like on a
devices’ name plate.
To charge the device in a vehicle, car charger
should be used, with one end connected to the
device, the other to the cigarette lighter socket.
USB cable delivered with device, can charge it
when the device is switched off or in standby
mode. This way is not effective and may last
several hours.
Summary of Contents for auro
Page 1: ......
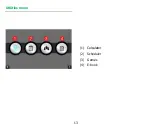
Page 13: ...13 Utilities menu 1 Calculator 2 Scheduler 3 Games 4 E book ...
Page 33: ...33 Scheduler 1 Events browser 2 Add new event 3 Delete events ...
Page 35: ...35 ...
Page 47: ...13 Menu Dodatki 1 Kalkulator 2 Kalendarz 3 Gry 4 E book ...
Page 67: ...33 Kalendarz 1 Przegląd zapisanych zdarzeń 2 Dodawanie zdarzenia 3 Usuwanie zdarzeń ...


