background image

4  |  

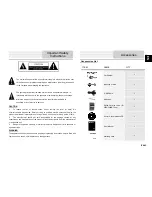
РУКОВОДСТВО ПОЛЬЗОВАТЕЛЯ — ЭКСПЛУАТАЦИЯ УСТРОЙСТВА

RU

Крепление на лобовое стекло на присоске и автомобильное 

зарядное устройство поставляются в комплекте с прибором.

Крепление на лобовое стекло

ВНИМАНИЕ: Тщательно выбирайте место установки 

крепления. Никогда не устанавливайте крепление таким 

образом, чтобы оно закрывало поле зрения водителя. 

Если лобовое стекло автомобиля содержит встроенную 

обогревательную сетку или защиту от ультрафиолета, то 

возможно ухудшение приема сигнала.

Сборка крепления на лобовое стекло

Для начала снимите защитную пленку с присоски крепления. 

После этого выберите подходящее место на лобовом или 

боковом стекле, убедитесь, что поверхность чистая, не 

содержит воды, пыли или грязи, после чего зафиксируйте 

крепление на стекле с помощью присоски. Подключите 

кабель зарядного устройства к креплению. Соедините 

навигатор с магнитным креплением, обеспечивающим 

устойчивую фиксацию навигатора. 
При соединении с креплением навигатор включится 

автоматически. В случае необходимости устройство можно 

легко отсоединить, оставив крепление на лобовом стекле. 

После отсоединения устройство автоматически отключится 

через 15 секунд.

12. Не допускается самостоятельное вмешательство, 

модификации и открытие корпуса прибора, так как это 

может привести к некорректной работе прибора или к 

его повреждению. Все работы должны производиться 

квалифицированным персоналом.

13. Питание прибора осуществляется от встроенной Li-

ion батареи, которая может взорваться или выделить 

токсичные вещества при неправильной эксплуатации. Не 

подвергайте прибор ударам, не используйте прибор при 

наличии в окружающей среде взрывоопасных газов и 

жидкостей.

14. Перед зарядкой устройства убедитесь в том, что 

обеспечены  нормальные условия вентиляции для 

адаптера питания, так как в процессе зарядки выделяется 

большое количество тепла. Не закрывайте адаптер 

питания бумагой или другими объектами, ухудшающими 

вентиляцию.

15. При очистке дисплея и внешних поверхностей прибора не 

прилагайте излишнюю силу. Для очистки не используйте 

бумажные салфетки или жесткий материал, который может 

поцарапать дисплей. Используйте только мягкую ткань.

16. Допустимая температура внешней среды в режиме 

эксплуатации: от 0 до +35 °С. Температура хранения: от 

+5 до +45 °С. Относительная влажность: от 5% до 90% без 

конденсата (25 °С).

Использование 

прибора в автомобиле

Summary of Contents for DN505

Page 1: ......

Page 2: ...EN NAVITEL DN505 MAGNETIC 1 1 2 3 4 5 6 7 8 9 10 11...

Page 3: ...5 microSD 6 mini USB 7 8 9 10 Reset 11 mini USB NAVITEL DN505 MAGNETIC NAVITEL s r o U Habrovky 247 11 140 00 Praha 4 Czech Republic 247 11 140 00 4 NAVITEL s r o Dongguan Digi in Digital Technology...

Page 4: ...NAVITEL DN505 MAGNETIC 3 RU 1 2 3 4 5 6 GPS 7 GPS 8 9 10 11...

Page 5: ...4 RU 15 12 13 Li ion 14 15 16 0 35 5 45 5 90 25...

Page 6: ...NAVITEL DN505 MAGNETIC 5 RU...

Page 7: ...tex A7 800 128 DDR3 microSD 32 8 Linux 132 89 17 5 5 TFT 480 272 8 1 600 3 7 GPS GPS MSR2112 32PIN QFN 1 575 66 22 C A 1 023 165 10 2D RMS 5 2D RMS WAAS 0 1 1 0 1 10 35 45 18 000 515 NMEA 0183 v3 01 1...

Page 8: ...NAVITEL DN505 MAGNETIC 7 RU...

Page 9: ...8 RU 1 2 POI POI POI 3 SPEEDCAM SPEEDCAM SPEEDCAM 4 2D 3D 5 6 7 8 9...

Page 10: ...NAVITEL DN505 MAGNETIC 9 RU 10 11 12 13 10 14 15 16 17 GPS 18...

Page 11: ...10 RU GPS 1 2 3 3 4 5 6 7 8 9 10 3 11 12 1 2 3...

Page 12: ...NAVITEL DN505 MAGNETIC 11 RU 4 5 6 10 11 12 7 8 9...

Page 13: ...12 RU 1 2 3 GPS 4 5 3 6 1 2 3 4 5 6...

Page 14: ...NAVITEL DN505 MAGNETIC 13 RU 1 Windows 2 USB Flash Drive Mass Storage 3 1 4 2 1 2...

Page 15: ...14 RU 5 6 3 7 4 3 4 3 4...

Page 16: ...NAVITEL DN505 MAGNETIC 15 RU 8 5 6 9 5 6...

Page 17: ...screen Stylus Car charger 12 24 V Mini USB USB cable User manual Warranty card Device Layout shown on the page 1 1 On Off button 2 Battery charge indicator 3 Display 4 3 5 mm mini jack audio connector...

Page 18: ...to where an electromagnetic source is situated or inside buildings 7 If you have not used the device for a long period it will take significant amount of time to locate your position even if the GPS...

Page 19: ...out condensation 25 Using Device in Vehicle Windscreen holder and battery charger are delivered as part of the product package Windscreen holder ATTENTION Carefully select a place to attach the holder...

Page 20: ...not use paper napkin or towels for cleaning the display Do not try to disassemble fix or modify the device on your own as it may be dangerous for your health as well as result in incorrect operation o...

Page 21: ...lay 5 TFT 480 272 Speaker 8 Ohm 1 W Battery type 600 mAh 3 7 V rechargeable GPS parameters GPS MSR2112 32PIN QFN Frequency 1 575 GHz Channel Qty 66 channels search positioning 22 channels tracking C A...

Page 22: ...ional navigation application used for efficient route search and planning Key tasks of the program are identification and display of current position on the map automatic and manual setting of route p...

Page 23: ...D 3D map scaling and volume settings 5 Main menu Tapping this button will open the main menu of the program 6 Road signs Warning road signs 7 Cursor This button becomes available only when a point is...

Page 24: ...to the point of destination and estimated arrival time The selection of gauges can be changed in the program settings 15 Current street The name of the current street active only when connection with...

Page 25: ...g 1 Fig 2 Fig 3 Route to an address To have a route calculated to a point of a known address press Menu in the bottom left corner of the screen 4 Find 5 By address 6 then press Select country and star...

Page 26: ...QUICK START GUIDE NAVITEL DN505 MAGNETIC 25 EN Fig 4 Fig 5 Fig 6 Fig 7 Fig 8 Fig 9 Fig 10 Fig 11 Fig 12...

Page 27: ...ute screen Tap on the information panel at the bottom of the screen 2 Press Set start in the Properties screen 3 The GPS receiver must be switched off The point will be marked on the map as a starting...

Page 28: ...ds section of the official NAVITEL website The instructions below will help you to learn how to work with it 1 Install Navitel Navigator Update Center on your PC 2 Connect your device to the PC as a U...

Page 29: ...continue press Update then OK 5 Navitel Navigator Update Center will download and install the updates on your device 6 After updating you can download or buy additional maps by pressing Download or B...

Page 30: ...CENTER NAVITEL DN505 MAGNETIC 29 EN 8 To buy a map press on the entry corresponding to the map you want to buy select subscription length and press Buy 5 6 9 Run Navitel Navigator on your device Fig 5...

Page 31: ......

Reviews: