Navitar Motorized Zoom Systems Instruction Manual for Windows
Revision B
Page 1 of 23
2/17/2004
NAVITAR
MOTORIZED ZOOM SYSTEMS
INSTRUCTION MANUAL FOR WINDOWS
Page 1: ...Navitar Motorized Zoom Systems Instruction Manual for Windows Revision B Page 1 of 23 2 17 2004 NAVITAR MOTORIZED ZOOM SYSTEMS INSTRUCTION MANUAL FOR WINDOWS...
Page 2: ...Page 2 of 23 2 17 2004 Navitar Motorized Zoom Lenses Generic Schematic Computer Digital Firewire Digital Frame Grabber Frame Grabber Com 1 2 USB 1 2 3 Analog Camera Serial USB Communication Communica...
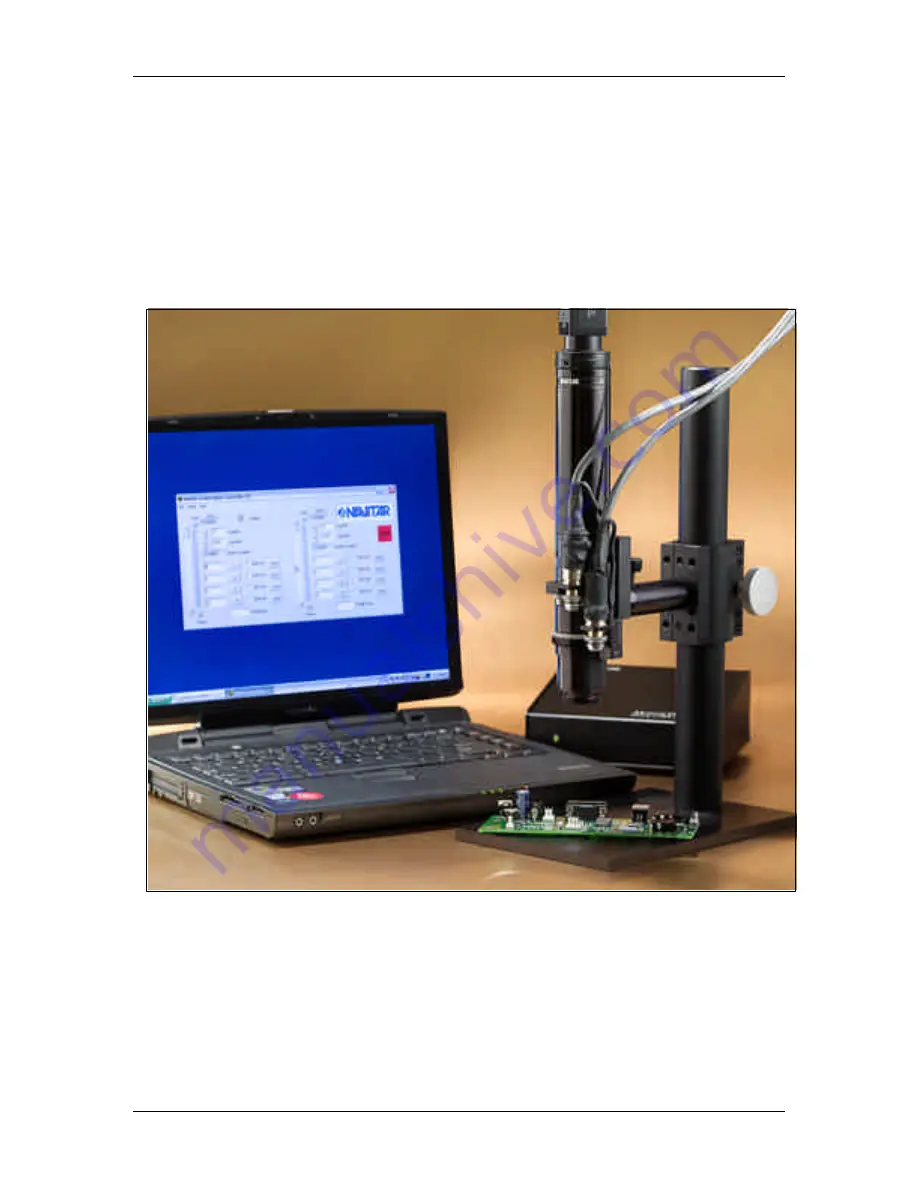
Page 3: ...Navitar Motorized Zoom Systems Instruction Manual for Windows Revision B Page 3 of 23 2 17 2004 User s Guide Windows Demonstration Application Serial and USB Connection...
Page 4: ...ty Backlash Elimination 13 8 6 1 5 Customer Setup Reverse Backlash 14 8 6 1 6 Customer Setup Forward Backlash 14 8 6 1 7 Customer Setup Zero 14 8 6 1 8 Customer Setup Down Through Home 15 8 6 1 9 Cust...
Page 5: ...roller to the serial port on the PC 9 pin serial cable Note the COM number On most PCs with only one serial port the port is COM1 Some older PCs have multiple COM ports Usually these ports are labeled...
Page 6: ...ors will drive to their home position reverse direction drive to the limit position reverse and return to the home position and stop 6 Starting the Application Before starting the motorized applicatio...
Page 7: ...before the program will perform Further explanation of each parameter and suggested initial values may be located in section 8 6 7 Establishing Communications On the control panel is an On Line indica...
Page 8: ...ished If the communications is not established after the correct port is selected check the following Power to the controller is turned on Cable is connected to both devices Correct cable is being use...
Page 9: ...n dialog box The user locates the desired configuration file and confirms selection by clicking the Open button The configuration values are automatically loaded into the control panel Note that there...
Page 10: ...Save As Selecting the Save As item from the file pull down menu activates the standard Windows Save As dialog box The user locates and names the new configuration file and confirms the selection by c...
Page 11: ...s the list will contain only the available motor controllers and the Off Line setting If there is only one controller connected to the PC via USB the list will show only one USB device Note that the C...
Page 12: ...low pertain to each axis equally 8 6 1 1 Customer Setup Initial Velocity This value specifies the initial velocity in steps per seconds of the motor at start up From this value the motor will ramp to...
Page 13: ...ks up play from the motor s internal gearing zoom drive gears and cam clearances There are means expensive of reducing but not totally eliminating this To be able to repeat a zoom setting accurately N...
Page 14: ...the final target value Note Assuming 0 has been set to near this method is an improvement but not as accurate as returning to home 8 6 1 6 Customer Setup Forward Backlash This value specifies the numb...
Page 15: ...tion to the desired target count This feature acts to reset the absolute position count and remove any potential backlash 8 6 1 9 Customer Setup Disable Axis 2 Selecting this box will disable Axis 2 A...
Page 16: ...t at high mag and the rear conjugate distance from lens to image plane at low mag Note If an integral focus is present on the zoom lens set if halfway between extremes of travel 1 Zoom to the highest...
Page 17: ...ition within the column will cause the motor to advance to that position Dragging the slider to a specific location within the column will cause the motor to advance to that position By clicking the a...
Page 18: ...t this point calling it the reference home zero position Because of this homing action the home indicator will light up only briefly while the magnetic field is within the sensor area When the motor i...
Page 19: ...ble presets that permit returning to the preset position Preset Value Window This numerical entry window is used to set the count value for the specific preset The current window value is highlighted...
Page 20: ...nt motor step position count value into the preset window The user positions the motor at some desired location most likely using the Jog buttons and by pressing the Save button the position value is...
Page 21: ...set to 1 for a write Bit 7 is set to 0 for a read Byte 3 low byte of 4 byte register Set to 0 for a read Byte 4 second byte of 4 byte register Set to 0 for a read Byte 5 third byte of 4 byte register...
Page 22: ...ETUP_INITVELOCITY_1 0x16 sets initial motor 1 velocity REG_SETUP_INITVELOCITY_2 0x26 sets initial motor 2 velocity REG_SETUP_MAXVELOCITY_1 0x17 sets maximum motor 1 velocity REG_SETUP_MAXVELOCITY_2 0x...
Page 23: ...ent position REG_USER_LIMIT_1 0x13 motor 1 limit seek command REG_USER_LIMIT_2 0x23 motor 2 limit seek command The value written drives the motor to one of the limits 0 home motor 1 limit motor REG_US...