NAVIS NavDP 4000. Operation Manual
5.6
Enter Heading Setpoint
Press the
AUTO
softkey on the
HDG
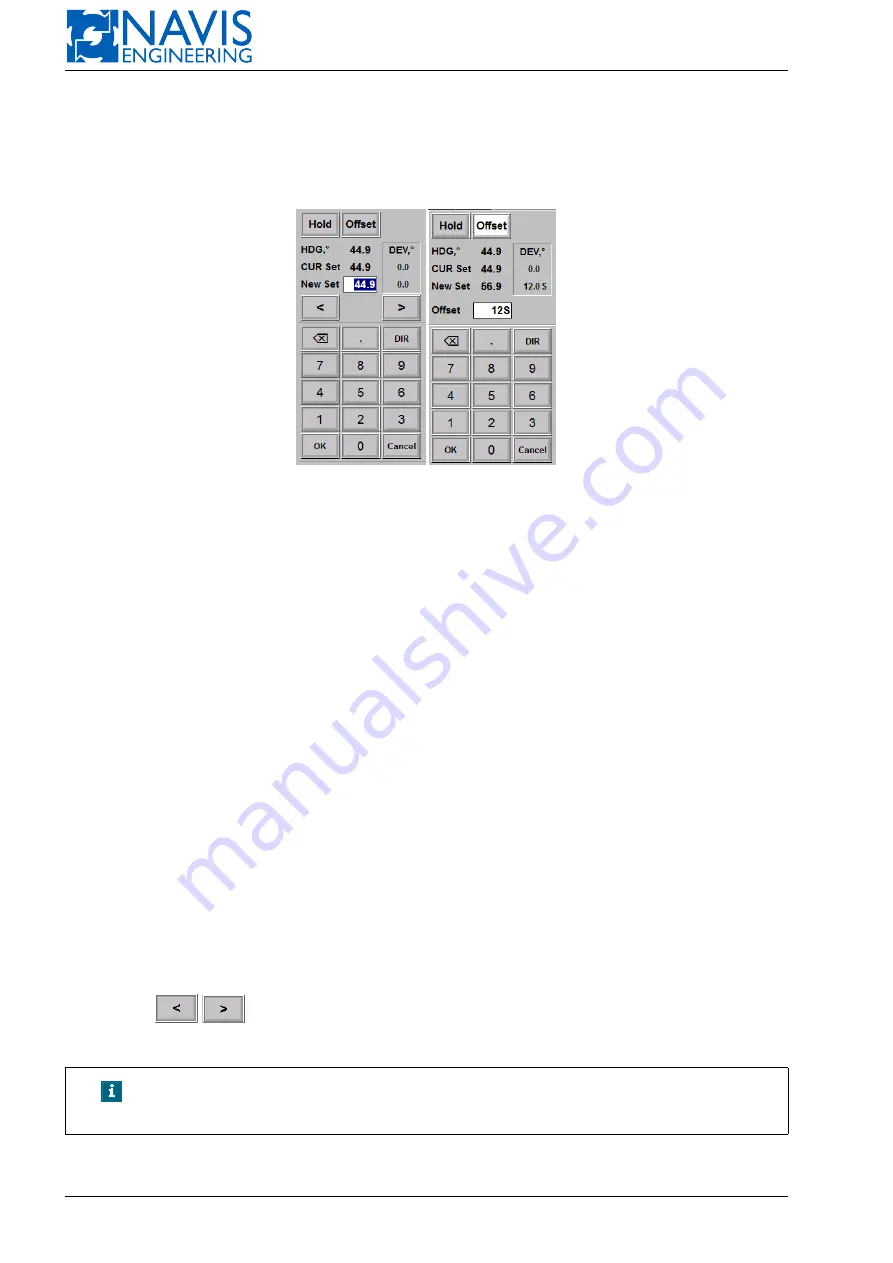
panel and set a new value for the heading setpoint in the appeared dialog box
(see figure 5.22(a)).
(a) Enter heading setpoint
(b) Enter heading offset
Figure 5.22: Input Heading dialog
Hold softkey
Press this softkey to put Actual heading into the Editing Field.
Offset softkey
New Heading Setpoint input as offset of Actual heading value.
5.6.1
Preset heading input
In preset heading mode
Offset
softkey is not active. The following information is displayed in the window:
HDG
— actual heading;
CUR Set
— current heading setpoint;
New Set
(white input field) — new heading setpoint;
DEV from CUR Set
— the actual continiously updated deviation of the vessel from the heading setpoint (difference
between the actual heading and this one setpoint).
P
symbol means that the rotation direction is to the left from the
actual heading to the set one,
S
— to the right respectively;
DEV from NEW Set
— the actual continiously updated deviation of the vessel from the new heading setpoint.
P
symbol
means that the rotation direction is to the left from the actual heading to the set one,
S
— to the right respectively.
For more information about this sign see the note below.
To set a new value, different from the latest one, you can enter this value in the
NEW Set
field and then press
Ok
softkey, or use
/
softkeys to increase/decrease new value.
To change the
direction of rotation
use
DIR
softkey.
NOTE!
For large deviations sign “P” or “S” is always highlighted with white
bar.
The input is available with control panels (CP4000 family). See Sections 2.4.7, page 27, 2.5.10, page 35 for details.
79
Doc. 000.JDP-10000-OME, rev.3.3.13/“2102.$–17A-Advanced”


