background image

Nature Power Products 


Nature Power Monocrystalline Solar Cells are manufactured in Germany by Bosch and Solar Panels are assembled in China. 

Manual Printed in China 

Nature Power 8 Amp Charge Controller


is an easy to connect and easy to read charge controller with LED light indictors for battery 

charging 

cut-in voltage 13V

 and battery full 

cut out voltage 14.2V

. The 8 Amp Charge Controller 

is compatible with solar system arrays rated up to 130 Watts.  


Protections: 


Reverse Current 


Over Charge 


Low Voltage 


High Voltage surges 


Nature Power 28 Amp Digital PWM Charge Controller


With Pulse Width Modulation (PWM) technology this charge controller helps to maintain a 

higher charging efficiency, thus maintaining a higher battery reserve and capacity than the 

standard on-off 8 Amp charge controller. The 28 Amp Digital PWM Charge Controller 

features a digital LCD display and adjustable voltage settings. 

Protections: 


Short Circuit 


Low Voltage 


Overloading 


Discharging 


Reverse Current 


Discharging 


Selecting the correct Battery 

Nature Power does offer batteries. However, please choose a 12 Volt rechargeable battery. Do not attempt to 

recharge non-rechargeable batteries. 6 Volt battery configurations may also be used if connected in series 

(Negative to Positive).  You may choose a Sealed Lead Acid battery, a Gel-Cell or a Deep Cycle 12 Volt battery.  

Batteries come in all different sizes, Please converse with your battery dealer for more information on which 

type of battery you should use for your system. Note your solar panel amperage rating when selecting your 

battery size. 


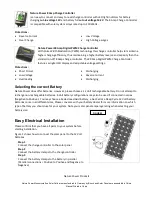
Easy Electrical Installation 

Please confirm that you have all parts to your system before 

starting installation.  
Figure 1 shows how to connect the solar panel to the 12 Volt 

batteries 

Step 1 

Connect the charge controller to the solar panel 

Step 2 

Connect the battery clamps to the charge controller 

Step 3  

Connect the battery clamps to the battery in parallel. 

(Parallel connections = Positive to Positive and Negative to 

Negative) 


FIGURE 1 

Summary of Contents for 50042

Page 1: ...VERSION 2 1 INSTALLATION MANUAL MONOCRYSTALLINE MODELS 40 Watt 50042 65 Watt 50062 85 Watt 50082 140 Watt 50132 280 Watt 50262 ...

Page 2: ... generate hydrogen and oxygen during charging resulting in evolution of explosive gas mixture Care should be taken to ventilate the battery area and follow the battery manufacturer s recommendations Batteries contain very corrosive diluted acid as electrolyte Precautions should be taken to prevent contact with skin eyes or clothing Use caution to reduce the risk of dropping a metal tool on the bat...

Page 3: ... charge controller within 5 feet of battery or loss of current may occur Wire the battery to the charge controller and then the solar panel to the charge controller to ensure that the correct polarity is observed Secure the solar panel to the desired location solar panel must be within 20 feet of the battery or loss of current may occur Selecting the correct Charge Controller Charge Controllers ma...

Page 4: ...rotections Short Circuit Low Voltage Overloading Discharging Reverse Current Discharging Selecting the correct Battery Nature Power does offer batteries However please choose a 12 Volt rechargeable battery Do not attempt to recharge non rechargeable batteries 6 Volt battery configurations may also be used if connected in series Negative to Positive You may choose a Sealed Lead Acid battery a Gel C...

Page 5: ...me Cable Length American Wire Gauge size 20 30 Feet 12 40 50 Feet 10 60 Feet or more 8 To prevent loss of current we suggest mounting the solar panel within 20 feet of the charge controller and the charge controller should be installed within 5 feet of the battery Additional Solar Panels You may choose to purchase additional solar panels for higher wattage and faster charging Connecting more panel...

Page 6: ...d components if necessary Clean with a damp towel or cloth remove all debris Check and maintain the battery electrolyte levels are at regular intervals as per the battery manufacturer s recommendations if flooded wet cell lead acid batteries are used Check solar panel open voltage range Check solar panel close circuit range Confirm all wiring connections are secure and tight Confirm all mounting c...

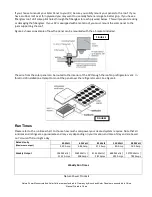
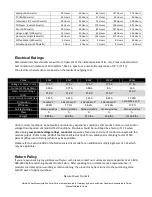
Page 7: ...roof Figure 3 shows an example of how the panel can be mounted with the z brackets included The wire from the solar panel can be routed to the interior of the RV through the roof top refrigerator vent In this kind of installation attempt to mount the panel near the refrigerator vent See Figure 4 Run Times Please refer to the runtimes chart to choose how much solar power your desired system require...

Page 8: ...r voltage than reported at Standard Test Conditions Modules should be multiplied by a factor of 1 25 when determining component voltage ratings conductor capacities fuse sizes and size of controls connected to the module output Refer to Sec 6908 of the National Electric Code for an additional multiplying factor of 125 percent 80 percent of rating which may be applicable Please refer to Section 690...

Page 9: ...ribed herein Any implied warranty of merchant ability of fitness for a particular purpose on this unit is limited in duration to the duration of this warranty The solar module is warranted to be free of defects in materials and workmanship for one year from the date of purchase without additional charge Nature Power will not be responsible for any amount of damage in excess of the retail purchase ...

Reviews: