12
ATTENTION
:
THIS SECTION OF THE MANUAL IS FOR QUALIFIED
SERVICE TECHNICIANS ONLY!
6.
INSTALLATION:
6.1
Directions for Unpacking
o
Cut the banding straps on the carton
o
Remove the top, top pad and cardboard sleeve
o
With the help of another person, lift the unit up off the bottom pad and place into
the final installation location
6.2
Directions for Proper Assembly
o
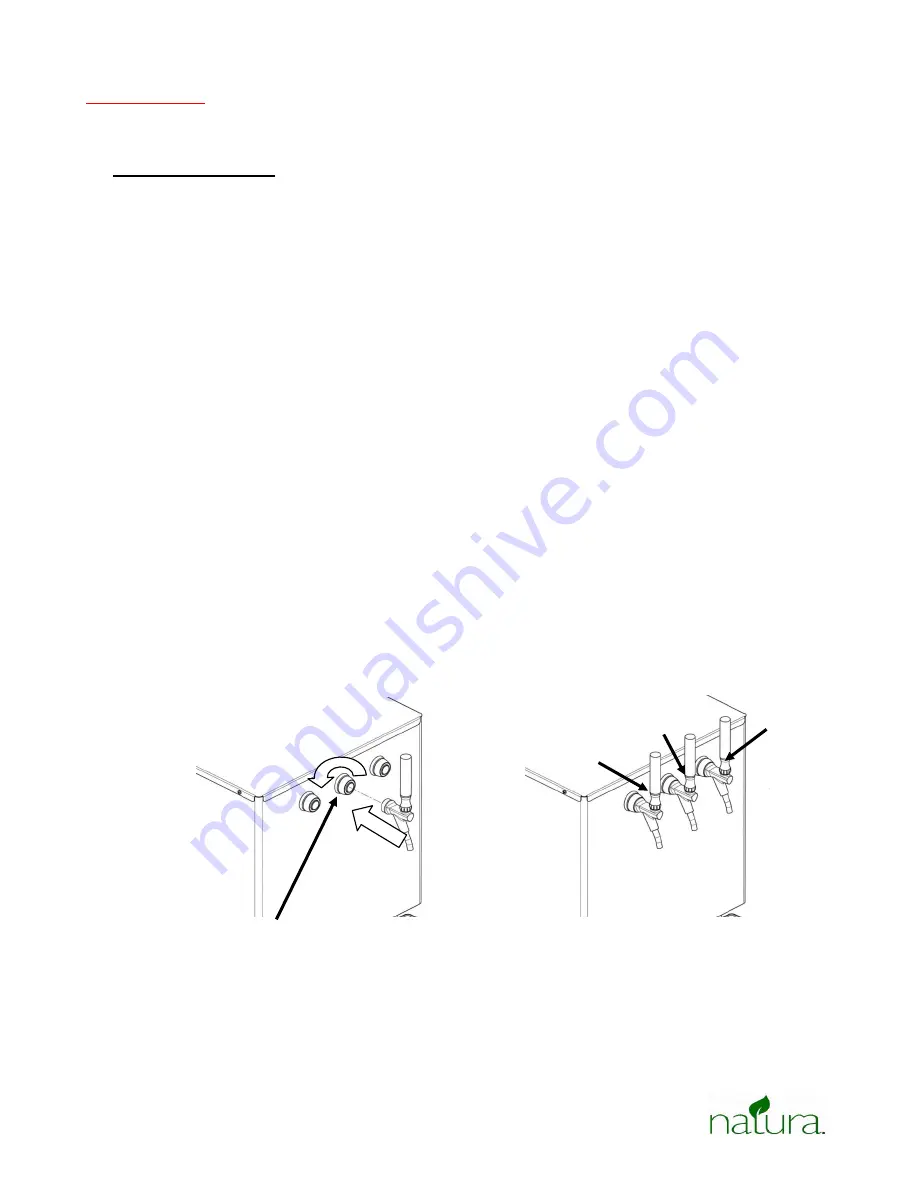
6.2.1 Installing the faucets
o
Find the three loose faucets. They are inside the pockets of the
packaging top pad.
o
Locate the white, blue and green bands found on the faucet levers.
These indicate the type of water each faucet dispenses and the location
on the front panel.
o
Starting on the left, install the faucet with the GREEN band. The faucet
with the BLUE band goes in the middle. The faucet with the WHITE band
goes on the right.
o
Install a faucet by placing the faucet into the fitting located on the front
panel. Make sure that the faucet is properly aligned (vertical). Push the
faucet all the way back onto the fitting.
o
Grasp the chrome ring attached to the fitting and screw it onto the faucet
body securely.
GREEN
BLUE
WHITE
CHROME RING
(ON EACH FAUCET)
STEP 2
STEP 1


