background image

NI SCXI-1332 Installation Instructions

8

ni.com

6. Install the Terminal Block

To connect the SCXI-1332 to the SCXI-1127/1128 front connector, 
complete the following steps:

1.

Plug the SCXI-1332 onto the front connector on the SCXI-1127/1128.

2.

Tighten the top and bottom thumbscrews on the terminal block rear 
panel to hold it securely in place.

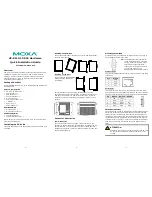
Figure 5.  

Installing the SCXI-1332 Terminal Block

1

SCXI-1332 Thumbscrew

2

SCXI-1127/1128 Thumbscrews

3

Front Connector

4

SCXI-1127/1128

5

SCXI-1332

2

1

3

4

5

Summary of Contents for SCXI-1332

Page 1: ...ons Conventions The following conventions are used in this guide The symbol leads you through nested menu items and dialog box options to a final action The sequence File Page Setup Options directs yo...

Page 2: ...andling the terminal block take the following precautions Caution Never touch the exposed pins of connectors Ground yourself using a grounding strap or by touching a grounded object Touch the antistat...

Page 3: ...nd of the wire 2 Remove the top cover screw 3 Unsnap and remove the top cover 4 Loosen the two strain relief screws on the strain relief bar 5 Run the signal wires through the strain relief opening 6...

Page 4: ...NI SCXI 1332 Installation Instructions 4 ni com Figure 1 SCXI 1332 Top Cover Diagram 1 Top Cover Screw 2 Top Cover 2 1...

Page 5: ...al blocks If you are not expanding the number of columns of the matrix skip to the 6 Install the Terminal Block step For more information about expanding matrices refer to the NI Switches Help 1 Colum...

Page 6: ...one end of the matrix expansion cable to a row connector in one of the terminal blocks 2 Connect the other end of the matrix expansion cable to a row connector in another terminal block Figure 3 Expa...

Page 7: ...e following steps 1 Connect one end of a matrix expansion cable to a column connector in one of the terminal blocks 2 Connect one end of a second matrix expansion cable to another column connector in...

Page 8: ...the following steps 1 Plug the SCXI 1332 onto the front connector on the SCXI 1127 1128 2 Tighten the top and bottom thumbscrews on the terminal block rear panel to hold it securely in place Figure 5...

Page 9: ...document for more information about measurement categories Maximum Current Maximum current per channel 2 ADC 2 AAC Environment The NI SCXI 1332 is intended for indoor use only Operating temperature 0...

Page 10: ...liance This product meets the essential requirements of applicable European Directives as amended for CE marking as follows Low Voltage Directive safety 73 23 EEC Electromagnetic Compatibility Directi...

Page 11: ...al Instruments trademarks Other product and company names mentioned herein are trademarks or trade names of their respective companies For patents covering National Instruments products refer to the a...

Reviews: