


10. Connect the keyboard and mouse to the appropriate connectors. If you are using a PS/2
keyboard and a PS/2 mouse, a Y-splitter adapter is available to connect both to a single
USB connector. National Instruments offers a Y-splitter adapter cable, part number
778713-02, available through the online catalog at
ni.com/products
.
11. Connect the DisplayPort monitor video cable to the DisplayPort connector, or use the
DisplayPort-to-VGA adapter included with your controller to connect a VGA monitor to
the DisplayPort connector.
12. Connect devices to ports as required by your system configuration.
13. Power on the display.
14. Power on the chassis.
15. Verify that the controller boots. If it does not boot, refer to the
Troubleshooting
section.
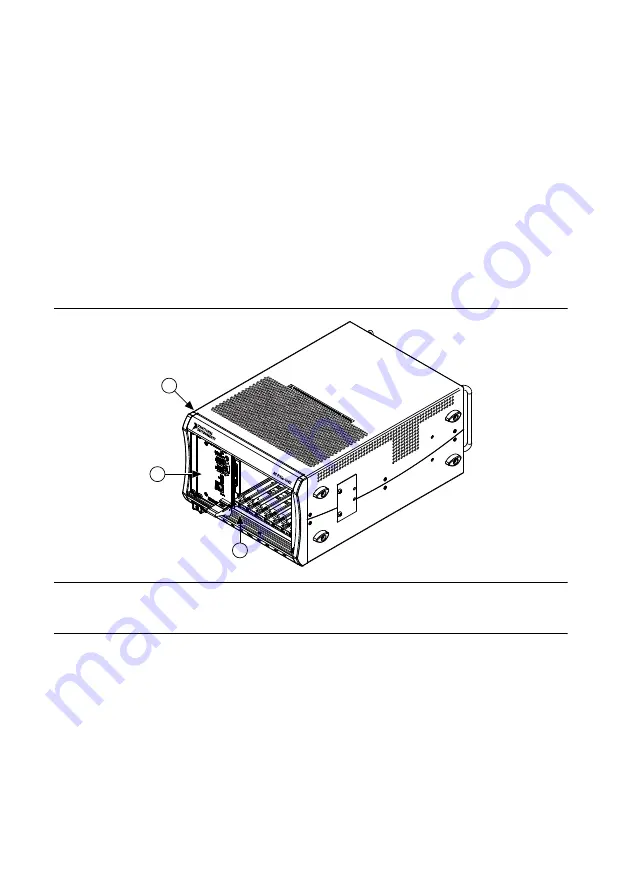
The following figure shows a PXIe-8821 controller installed in the system controller slot
of an NI PXIe-1082 chassis.
Figure 2. PXIe-8821 Installed in a PXI Express Chassis
1
3
2
1. PXI Express Chassis
2. PXI Express Controller
3. Injector/Ejector Rail
LabVIEW RT
This section explains software installation and switch configuration for LabVIEW RT on your
PXI Express controller.
LabVIEW RT Software Installation
The following section describes the necessary steps to get your PXI Express embedded
controller set up to run LabVIEW Real-Time. In this section you will configure the controller
boot mode, verify or change IP settings, and install LabVIEW Real-Time software.
PXIe-8821 Getting Started Guide
|
© National Instruments
|
5


