NI-DAQmx and DAQ Device Installation Guide
4
ni.com
PCI and PCI Express Devices
Complete the following steps to install a PCI and PCI Express device:
1. Power off and unplug the computer.
2. Remove the computer cover and/or the expansion slot cover.
3. Touch any metal part of the computer to discharge any static electricity.
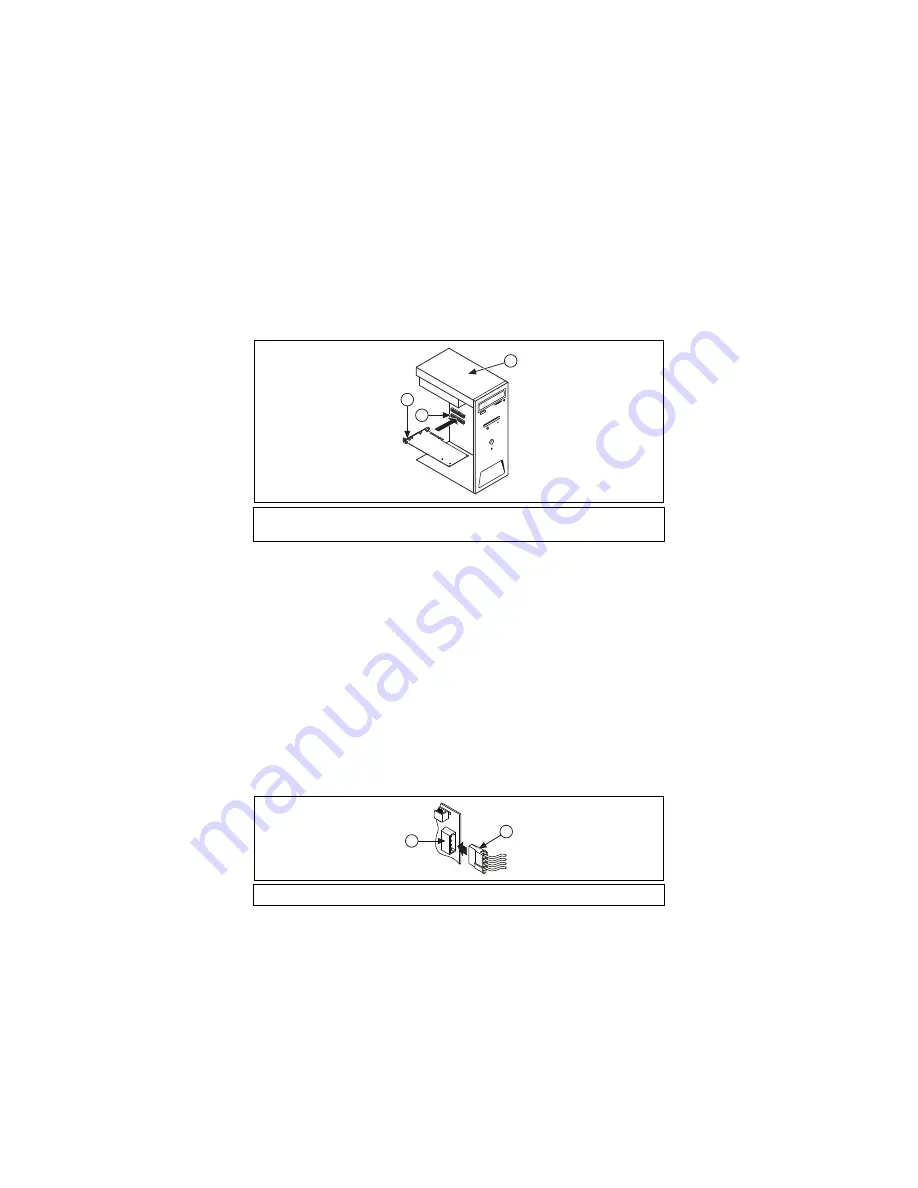
Figure 2.
Installing a PCI/PCI Express Device
4. Insert the device into the applicable PCI/PCI Express system slot. Gently
rock the device into place. Do
not
force the device into place.
Per the PCI standard, NI PCI DAQ devices with the Universal
PCI connector are supported in PCI-compliant buses, including PCI-X.
You cannot install PCI Express devices in PCI slots and vice versa.
PCI Express devices support up-plugging into a PCI Express slot of
higher lane width. For guidelines, refer to
ni.com/pciexpress
.
5. Secure the device mounting bracket to the computer back panel rail.
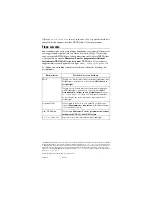
6. (Optional) On NI M and X Series PCI Express devices, such as the
NI PCIe-625x/635x, connect the PC and the device disk drive power
connectors. Refer to the device user manual on the NI-DAQmx media for
when to use the disk drive power connector. Use a disk drive power
connector that is not in the same power chain as the hard drive.
Figure 3.
Attaching Disk Drive Power to the PCI Express Device
1
PCI/PCI Express DAQ Device
2
PCI/PCI Express System Slot
3
PC with PCI/PCI Express Slot
1
Device Disk Drive Power Connector
2
PC Disk Drive Power Connector
3
1
2
1
2


