Adjust Print and Erase Energy
67
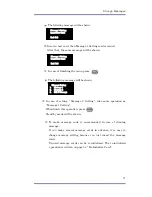
The following message will be shown.
⑤
In case of changing the printing density, press the number.
(The range is from 1 to 8.)
After confirmation, press
The following message will be shown.
⑥
In case of changing the printing density, press the number.
(The range is from 1 to 11.)
⑦
Afrter confirmation, press
After “Pi Pi” sounds, the setting is done.
(Operation is done.)
<Precaution>
①
When adjust print and erase energy, you can’t issue a setting card for it.
②
After adjust print and erase energy, be sure to do “9. R/W Print Test” in
function menu, and then confirm the printing density.
>
印字濃度補正設定
<
現在設定値:
0
Adjust Printing
Sub Density
Current Setting: 4
Factory Default Value (1
~
8)
Adjust Erase
Density
Current Setting: 4
Factory Default Value (1
~
11)


