


2
BEFORE FIRST USE
Before using for the first time, it is recommended to clean the interior of the hot pot
thoroughly. Please follow the procedures below before using the hot pot:
1.
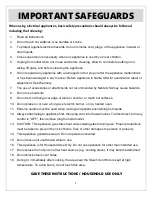
Read all instructions and important safeguards.
2.
Remove all packing materials and make sure that the product has been received in good
condition.
3.
Take care to keep the electrical components on the exterior of the hot pot dry, wipe the interior
of the hot pot with a damp cloth. If your hand will not fit inside the hot pot, swish warm, soapy
water around in the interior of the hot pot with the lid closed.
4.
Rinse out the inside of the hot pot thoroughly with water.
5.
With a damp cloth, gently wipe off the exterior of the hot pot. Do not wipe off electrical
components as this may cause damage to the unit.
6.
Dry all parts completely.
7.
It is recommended to run your hot pot through one boiling cycle before using it to consume
beverages. Following the instructions in Boiling Water on page 8, boil one hot pot of water.
When water has boiled, pour it out and rinse the inside of the hot pot once more. The hot pot is
now ready for use.
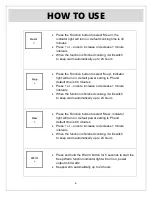
HOW TO CLEAN
1.
Wipe the exterior of the hot pot with a damp cloth, taking care to avoid the electrical
components.
2.
Clean the interior of the hot pot with a soft sponge and warm, soapy water. If your hand does
not fit in the lid opening, swish warm, soapy water around inside the hot pot with the lid closed.
3.
Rinse any remaining soapy water from the hot pot.
4.
Drain.
BRIEF INTRODUCTIONS:
Thank you for purchasing the Narita Electric Hot Pot with Steamer. Please follow these simple tips to
get the maximum performance and satisfaction from this appliance. Use according to our instructions
and it will give you years of trouble-free enjoyment.


