NAPOLI ELECTRONICS NPL-3735 Owner'S Manual Download Page 14


14 

OPERATION

to display the console information of the 

current disc on the screen.   


RADIO OPERATION   


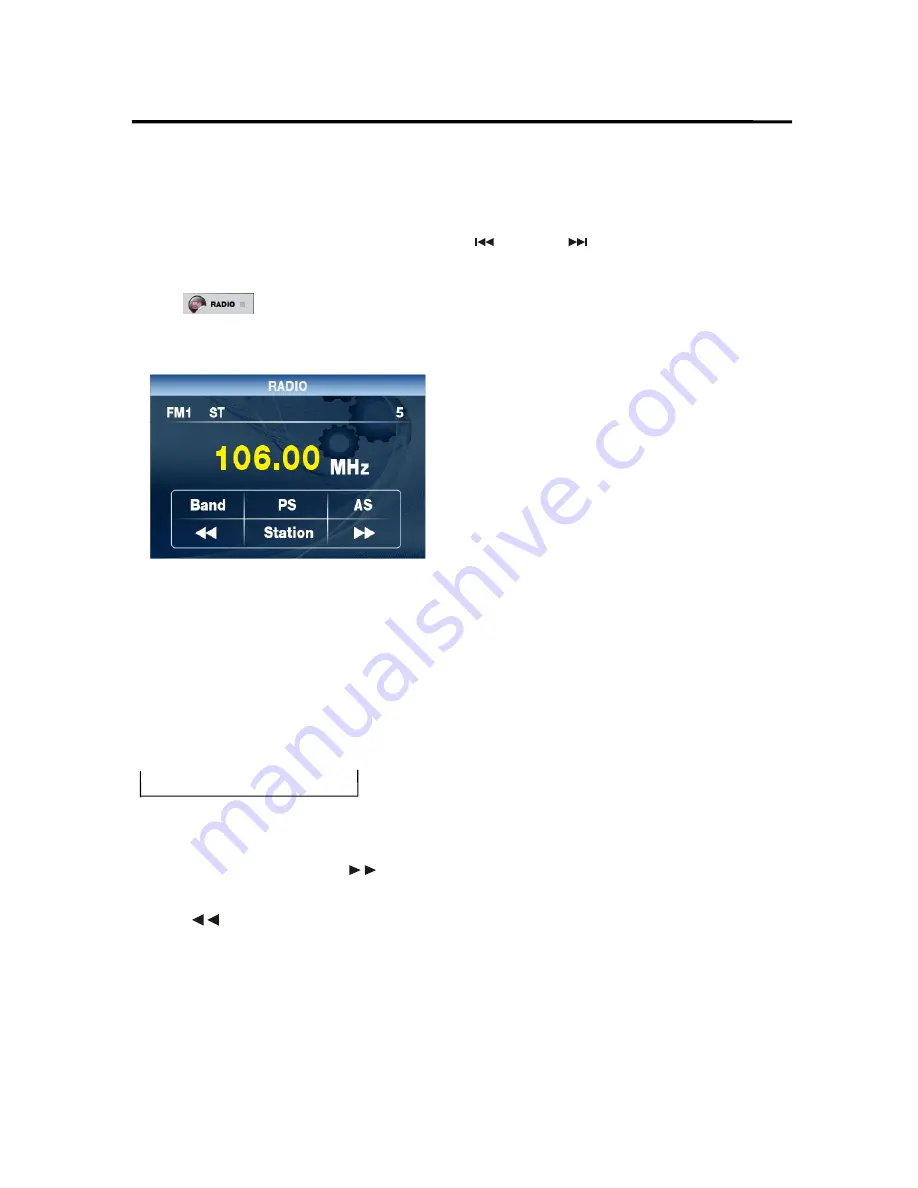
SWITCHING TO THE RADIO MODE 

  Press 

MODE

  button on remote control or 

select 

  icon on the source menu to 

select RADIO mode. . The following information 

will appear on the display. 


SELECTING THE FREQUENCY BAND 

  Shortly press 

BAND

  button on the front 

panel on remote control or tap 

BAND

  bar on 

the screen  to select desired band. The 

reception band will change in the following 

order: 

For two wave bands: 

FM1

FM2 

FM3

 AM   


Selecting Frequency   

   During radio mode, press 

button on 

the remote control  to increase frequency,  

press 

  button on the remote control to 

decrease frequency by one step of channel 

spacing.   


Radio Function Select: 

  Long    press 

SETUP

  button on the front 

panel to select Band->PS>AS-> 

->Station->

  . 

Then  press“

ENT

” to confirm the function .


Automatic Memory Story & Program 

Scanning: 

- Program scanning 

Shortly press 

AS/PS

 button on remote control 

or  select 

PS

  icon  on screen to scan preset 

station. And it will hold at each station for 

about 5 seconds.


- Automatic memory storing   

  Press and hold 

AS/PS

  button on remote 

control or select 

AS

  bar on the screen for 

about several seconds , the radio searches 

from the current frequency and checks the 

signal strength until one cycle search is 

finished. And then stations are stored into the 

preset number button in turn according to the 

strength of the stations. When auto search is 

finished, it will enter into preset scan mode 

automatically. 


SELECTING STATION and STORE   

  STATION AUTOMATICALLY 

  Please long to "

SETUP

” and select "station"   

function,after press shortly to “

SETUP

” ordinal 

Choice 1 to 6 station may also directly press 1 

to 6 button belong to the remote  or panel, 

Press and hold Remote Control 1,2,3,4,5, 6 

button for 2 seconds. It will save the current 

radio station into the memory. 


Summary of Contents for NPL-3735

Page 1: ...OWNER S MANUAL DVD730I 1...

Page 2: ...4 5 INSTALLATION 6 7 ELECTRICAL CONNECTION 8 THE PLAYER 9 OPERATION 10 POWER ON OFF THE UNIT 10 SETTINGS 10 DISC DVD VCD CD MP3 OPERATION 11 13 RADIO OPERATION 14 USB SD Error Marcador no definido RE...

Page 3: ...Do not expose the product to water or excessive moisture This could cause electrical shorts fire or other damage When Parked Parking in direct sunlight can produce very high temperatures inside your v...

Page 4: ...wing places 1 Direct sunlight 2 Dirty dusty and damp areas 3 Near car heaters 4 On the seats or dashboard Disc Cleaning Use a dry soft cloth to wipe the surface If the disc is quite dirty use a soft c...

Page 5: ...isc with rough edges is used the proper setting will not be performed and the player will not play the disc Therefore remove the rough edges in advance by using a ballpoint pen or pencil as shown on t...

Page 6: ...irt or excessive vibration DIN FRONT REAR MOUNT This unit can be properly installed either from Front conventional DIN Front mount or Rear DIN Rear mount installation utilizing threaded screw holes at...

Page 7: ...7 INSTALLATION 4 Fix the unit by metre strap and screw Outer Trim Ring Outer Trim Ring...

Page 8: ...ound in order to active the video function 3 This player can only be used by the 12V DC cathode grounding electrical system 4 Don t connect the terminals of the car battery until the player is absolut...

Page 9: ...S button 5 VOL SEL ENT button 6 BAND button 7 5 button 8 IR Infra Sensor 9 3 TFT display 10 USB port 11 AUX IN jack 12 6 TFT display 13 button 14 button 15 4 button 16 MODE button 17 2 RDM button 18 1...

Page 10: ...the unit SETTINGS AUDIO SETTINGS In the AUDIO settings With the cursor and the ENT key to change the corresponding value you want PICTURE SETTINGS In the PICTURE settings With the cursor and the ENT...

Page 11: ...nt panel or on the screen or on the remote control is pressed normal playback will continue Press button twice to stop the playback and go back to the DVD LOGO Pressing on the front panel or on the re...

Page 12: ...n Press SUBT during playback The following information will be shown on the screen Each time the button is pressed the subtitle language changes in sequential order Notes The language number is differ...

Page 13: ...YSTEM SETUP When you open the setup menu you will see the system setup page at first see below 1 TV SYSTEM Change the TV mode among NTSC PAL and AUTO 2 SCREEN SAVER Change the SCREEN SAVER on or off 3...

Page 14: ...confirm the function Automatic Memory Story Program Scanning Program scanning Shortly press AS PS button on remote control or select PS icon on screen to scan preset station And it will hold at each s...

Page 15: ...ad the disc automatically When reading the USB SD device Press stop or pause button on the remote control or on the front panel to enter PRE STOP STOP or PAUSE mode When reading the USB SD device disc...

Page 16: ...T SEL button to select the desired adjustment mode The audio adjustment mode will change in the following order BASS TREBLE BALANCE FADER EXIT MUTE In radio DVD USB SD AUX mode Press MUTE button to mu...

Page 17: ...17 REMOTE CONTROL...

Page 18: ...menu that is stored on the DVD disc 13 SUB T Changing of the SUBTITLE language on multi subtitle language DVD disc 14 AUDIO MO ST Changing of the AUDIO soundtrack on multi audio soundtrack DVD disc I...

Page 19: ...ng range USA 87 5 107 9 MHz EUR 87 5 108 MHz USA 530 1710KHz EUR 522 1620KHz Sensitivity 4uV S N 30dB 63uV S N 20dB S N ratio 50 dB 45 dB 60 dB Stereo separation 25 dB 50dB Freq Response 40Hz 12KHz 40...

Reviews: