background image


Portable DVD Player


from AV IN port when switch to the DVD mode or ISDB mode if you don’t need to output this 
video/audio to other video/audio system! 
2: The volume is set up as default and can’t be adjusted. 
 

★ 

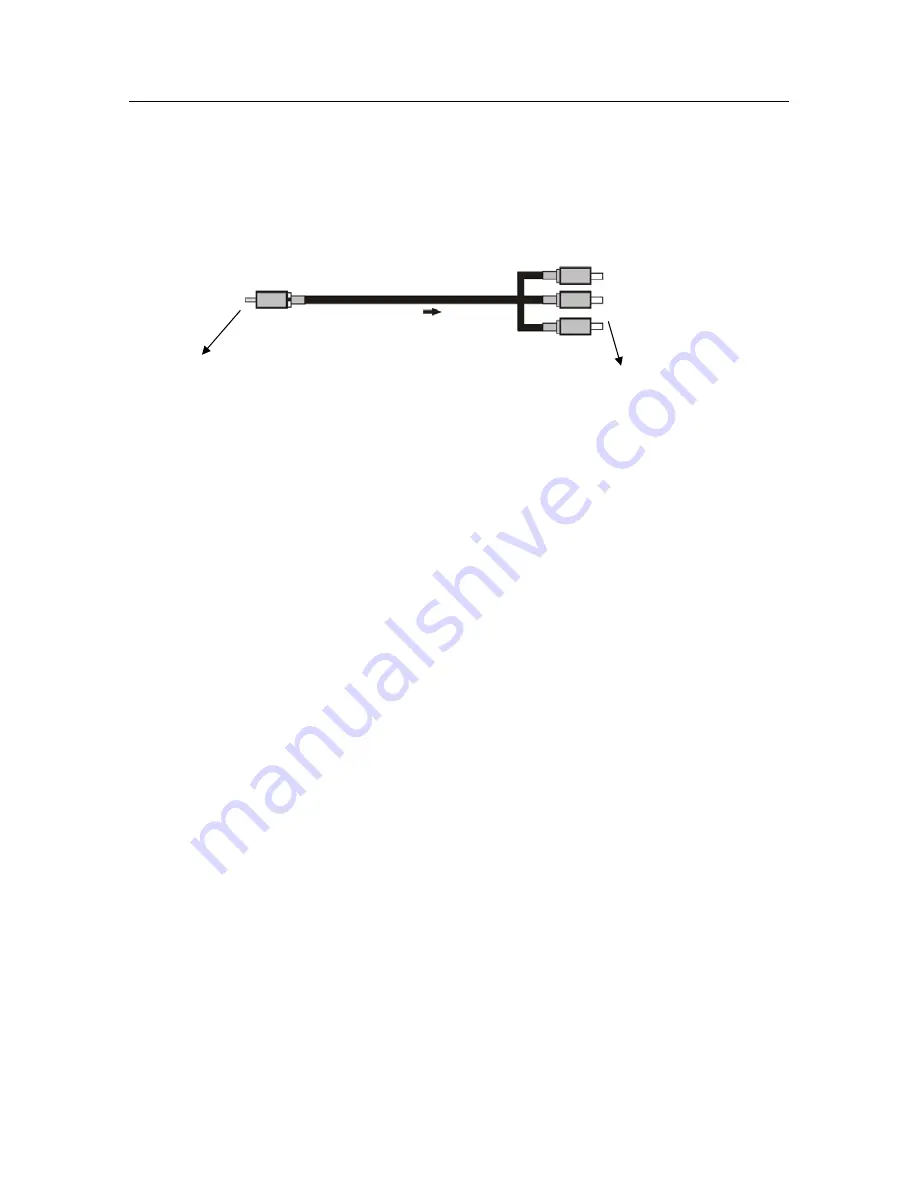
AV OUT Mode Play 

      You can connect your audio/video directly to a television and/or stereo system for the highest audio 

and video quality. 


Video (YELLOW) 
Left Audio   
Right Audio   

Video Output   
Audio Output 

Unit (AV OUT port)                                                                                    AV Signal in (television) 
 

★ 

Charge 

Connect the adaptor and charge for the built-in battery of the machine; the charging lamp is red. When the 
battery is full charged, the lamp turns to green. 


★ 

Discharge 


      The built-in batteries will automatically discharge for the machine if there’s no AC adaptor.   
Note: If the machine only uses the built-in battery for discharging playback, it will automatically detect to 
          power off, enter protection mode and cannot startup when the battery is in low state; if you need to restart   

the machine for playback, please just connect the AC adaptor, turn off the power switch and then reboot   
it, the machine can play normally after startup.         


  Play VIDEO/AUDIO/PHOTO files in U disk/Card Device 

1. Insert the U disk/Card device into the player USB/Card interface when in DVD mode; 
2. If there’s no disc in the tray, the player will automatically detect the USB/Card device, and play its inside 
files first.   


Play Games 

Put the Game disc into the player and insert the game handle into the game ports in DVD mode, after read out 
the disc, you can select a game in the list by pressing the number key on remote to play with the game handle. 


8

Summary of Contents for NPL-9073

Page 1: ......

Page 2: ...ton Definition 5 Definitions of Machine Interface 5 Accessories 6 Getting started Preparation 6 Precautions 6 Operating the Player 7 Remote Control Functional Diagram and Precautions 9 MENU SETUP 11 D...

Page 3: ...can play music and photo so you can listen to music or browse photo albums wherever you are Audio and video outputs allow you to connect your player to a television or stereo system for the highest au...

Page 4: ...cabinet 2 To prevent electric shock please match wide blade of plug to wide slot fully insert 3 To reduce the risk of fire or electric shock do not expose this machine to rain or moisture 4 The machi...

Page 5: ...in a ventilated environment prevent overheating do not place it on the bed sofa fabric or other similar materials so that the vents will not be blocked 6 Heat Source Do not place the apparatus in a p...

Page 6: ...s this button for temporarily pause resume playback by pressing PLAY button press the button twice to stop play 9 SETUP press this button to enter DVD TV AV system function setup mode and then press i...

Page 7: ...receptacle 3 Pull the plastic tab out of the battery slot on the remote 4 Connect to a wall socket and the other end to the DC IN jack on the side of the player Note Battery is charged approximately 6...

Page 8: ...4 Close the receptacle cover the player will begin to play the disc automatically Note Remove the laser head protective shield for the first time use For more detail setting please refer to DVD Setup...

Page 9: ...ine if there s no AC adaptor Note If the machine only uses the built in battery for discharging playback it will automatically detect to power off enter protection mode and cannot startup when the bat...

Page 10: ...used for the set 3 Remove the batteries from the remote control unit whenever it is not to be used for a long time to prevent the remote control being damaged from the leakage of battery electrolyte 4...

Page 11: ...D acts as copy function for CD ripping when playing CD disc REPEAT Cycles through the available repeat modes MODE switch the system mode available for DVD TV AV work modes SETUP Press to bring up the...

Page 12: ...r function The default is ON 6 HDCD Optional setting Off 1X 2X the default is 1X 7 Last Memory set whether to activate the Last Memory playing function The default is ON Audio setup menu 1 Dual Mono O...

Page 13: ...nal ON OFF 2 Language item set the language Optional 1st 2nd 3 Dual Mono item set dual or mono function Optional Main Sub Main Sub 4 Audio Setting item set Audio function Optional 1st 2nd 5 OSD Langua...

Page 14: ...to Startup 1 Check to see if the switch is toggled at the ON position 2 Whether it is caused due to the low battery level and unit automatically run the detections to power off Picture Rolling or No...

Reviews: