background image


Portable DVD Player


Accessories 

Before using your new portable DVD player, you should unpack the contents of the box and check to 
make sure everything is present and undamaged. If any items are missing or damaged, contact the seller 
immediately. 

Parts list 

Main unit*1; A/V Connector*1; DC Adaptor*1; Remote Control*1; Operation 

Instructions*1; Magnetic Antenna*1; Earphones*1; 12V Car Charger*1;Game 
handle*1;Game disc*1; 

Getting started(Preparation) 

1.


Open the player and peel the protective plastic cover from the screen. 

2.


Open the disc receptacle by pressing the OPEN button, remove the paper laser protector, and then 
close the receptacle. 

3.


Pull the plastic tab out of the battery slot on the remote. 

4.


Connect to a wall socket, and the other end to the DC IN jack on the side of the player.     

Note:

 Battery is charged approximately 60% before they are shipped. The battery should be charged for 

at least 6 hours before first use. The lifetime of the battery is about 300 re-charges. 

Precautions  

Use of Discs 

z


Please hold the discs by the outer edge, do not touch the surface, so as to avoid damage to the surface 
digital signals. 

z


Do not place the discs in a place subject to direct sunlight or extreme heat; 

z


Protect the discs properly after playing; 

Cleaning Discs   


Clean the discs by using a clean cotton fabric in a straight line from the center of the disc toward the 

outer edge. 


Do not use the organic solvent such as volatile gasoline and thinner, to clean discs. 

Operating the Player 

★ 

Turning the player On and Off 

Once the battery is fully charged or the player is attached to a power outlet with the power adapter, turn the 

player on by sliding the POWER switch on the side of the player to the appropriate position. Once startup, it 
will access the DVD startup screen. Power LED lamp flickers on startup, and no flickering when power off; 


6

Summary of Contents for NPL-7070G

Page 1: ......

Page 2: ...ions 4 Button Definition 5 Definitions of Machine Interface 5 Accessories 6 Getting started Preparation 6 Precautions 6 Operating the Player 6 Remote Control Functional Diagram and Precautions 8 MENU...

Page 3: ...music or browse photo albums wherever you are Audio and video outputs allow you to connect your player to a television or stereo system for the highest audio and video quality A car adapter allows yo...

Page 4: ...cabinet 2 To prevent electric shock please match wide blade of plug to wide slot fully insert 3 To reduce the risk of fire or electric shock do not expose this machine to rain or moisture 4 The machi...

Page 5: ...in a ventilated environment prevent overheating do not place it on the bed sofa fabric or other similar materials so that the vents will not be blocked 6 Heat Source Do not place the apparatus in a p...

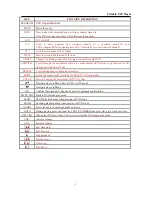
Page 6: ...use the play 8 STOP press this button for temporarily pause resume playback by pressing PLAY button press the button twice to stop play 9 SETUP press this button to enter DVD TV AV system function set...

Page 7: ...mately 60 before they are shipped The battery should be charged for at least 6 hours before first use The lifetime of the battery is about 300 re charges Precautions Use of Discs z Please hold the dis...

Page 8: ...on the panel or MODE key on the remote to switch to the TV mode 2 Insert the antenna included in your package or cable TV into ANT port 3 Press the SETUP button on the panel or SETUP key on the remot...

Page 9: ...select a game in the list by pressing the number key on remote to play 2 Copy the Game files into the U disk Card than switch to USB Card Mode Select the Game Icon Press OK key to enter And than selec...

Page 10: ...as copy function for CD ripping when playing CD disc REPEAT Cycles through the available repeat modes MODE switch the system mode available for DVD TV AV work modes SETUP Press to bring up the Setup m...

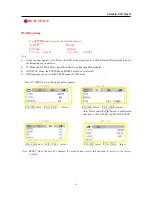
Page 11: ...ence in Function Menu display At DVD AV Mode the SYSTEM and PRESET menu is not selected OSD language can be set in the SETUP menu of DVD mode Press TV MENU button the picture below appears PRESET SYST...

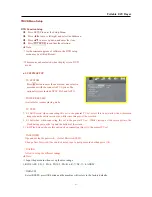
Page 12: ...creen when connecting this set to the general TV set select this item to allow the widescreen image spans the entire screen size while some images will be removed 2 4 3 Letterbox when connecting this...

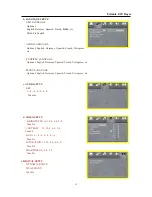
Page 13: ...TLE LANGUAGE Optional English Germany Spanish French Portuguese etc MENU LANGUAGE Optional English Germany Spanish French Portuguese etc c AUDIO SETUP KEY 4 2 0 2 4 b Tunable d VIDEO SETUP BRIGHTNESS...

Page 14: ...the ON position 2 Whether it is caused due to the low battery level and unit automatically run the detections to power off Picture Rolling or No Color 1 Be sure the outlet AV line is correctly connec...

Reviews: