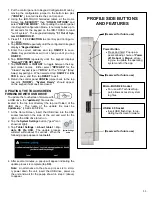
2
To secure the touchscreen directly to a hollow dry wall or
similar surface, proceed as follows:
1. Select a mounting location that is preferably at eye level
for easy viewing and that also allows the power / keypad
bus wires to be hidden within the mounting surface. At
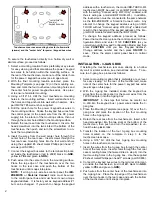
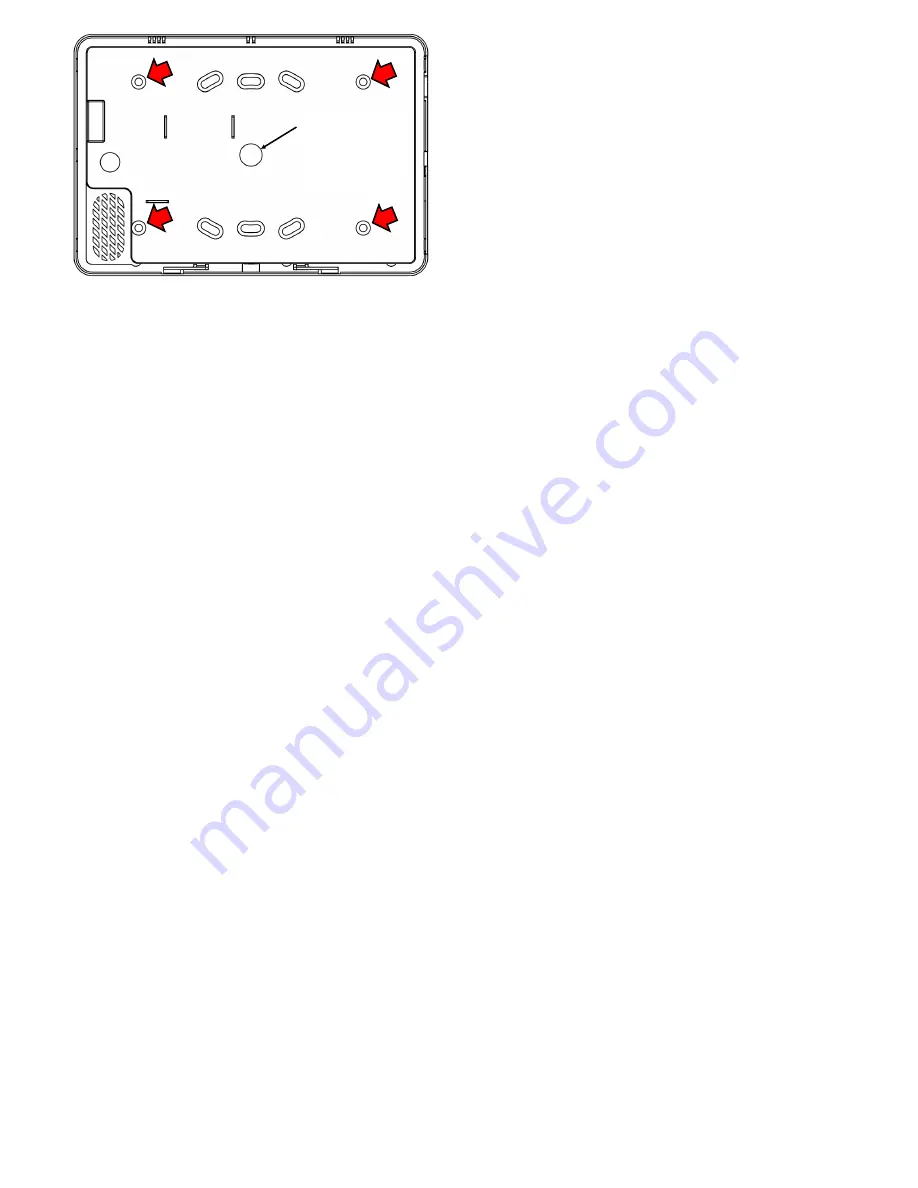
the rear of the touchscreen, make note of the center hole
for the power / keypad bus wires (see image above).
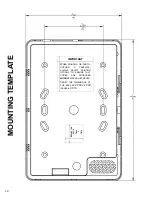
2. With the final mounting location selected, place the
Mounting Template (see page 12) on the mounting sur-
face and mark the four touchscreen mounting holes and
the center hole for power / keypad bus wires. Use a lev-
el to ensure horizontal mounting.
3. Using a 3/16" bit, drill the four touchscreen mounting
holes in the mounting surface. Insert wall anchors into
the holes and tap anchors into wall with a hammer. Use
part MX1327 #6 wall anchor, supplied.
4. Drill the center hole for the power / keypad bus wires in
the mounting surface. Snake the keypad bus wires from
the control panel (or the power wire from the DC power
supply) into the
interior
of the mounting surface, then out
through the center hole drilled in the mounting surface.
5. Detach the rear case from the touchscreen: Insert a flat
head screwdriver into the two slots at the bottom of the
touchscreen, then push and turn the screwdriver to un-
hook the two plastic tabs.
6. Insert the wires from the wall center hole through the
center hole of the rear case. Insert screws through the
four rear case mounting holes into the four wall anchors
using the supplied #6 sheet metal Phillips pan head 1"
screws (part SC655).
7. Connect the keypad bus wires to the terminal strip locat-
ed inside the touchscreen (red to
+12V
, black to
-GND
,
yellow to
YEL
and green to
GRN
).
8. Push wires into the center hole in the mounting surface.
Place the top edge of the touchscreen over the two
hooks in the rear case and push the bottom of the
touchscreen until it snaps into place.
NOTE:
If wiring to a 4-wire bus control panel, the
IBR-
ZREMOTE
or
StarLink Connect
radio must be wired
to the control panel bus and must have its own unique
keypad address. It is factory set as keypad address #1
but can be changed. If you wish to change the keypad
Touchscreen rear case mounting holes for hollow walls
(arrows) and the "center hole" for power / keypad bus wires
"center hole" for
power or
keypad bus wires
address with a touchscreen, the model IBR-TOUCH-WL
touchscreen MUST be used (or an IBR-TOUCH running
with the setting "Connect using Wi-Fi Only" enabled, and
thus is acting as a model IBR-TOUCH-WL). In addition,
the touchscreen must be connected to the same network
as the IBR-ZREMOTE or StarLink Connect radio. Any
attempt to change the keypad address using an IBR-
TOUCH without "Connect using Wi-Fi Only" enabled will
result in the changing of the keypad address of the inte-
gral RCM module located inside the IBR-TOUCH.
To change the keypad address, proceed as follows:
Power the touchscreen, place the control panel into Con-
figuration Mode and enter 11123
FUNCTION
(as you
normally would for Keypad Configuration Mode) and then
press
FUNCTION
until you see "Keypad Address".
Change address number and then press
ON/OFF
to
save. Place the alarm control panel back in normal
mode.
INSTALLATION - 3-GANG BOX
If installing the touchscreen rear case directly to a hollow
dry wall or similar surface, see instructions above. To se-
cure to a 3-gang box, proceed as follows:
1. Select a mounting location that is preferably at eye level
for easy viewing. At the rear of the touchscreen, make
note of the center hole for the power / keypad bus wires
(see image on this page).
2. With the 3-gang box installed, snake the keypad bus
wires from the control panel (or the power wires from the
12VDC adapter) into the 3-gang box.
IMPORTANT
: In the steps that follow, be careful not
to drill into the keypad bus / power wires inside the 3-
gang box.
3. Place the Mounting Template (see page 12) over the 3-
gang box and mark the location of the four mounting
holes in the 3-gang box.
4. Detach the rear case from the touchscreen: Insert a flat
head screwdriver into the two slots at the bottom of the
touchscreen, then push and turn the screwdriver to un-
hook the two plastic tabs.
5. Transfer the location of the four 3-gang box mounting
holes marked on the template in step 3 to the
touchscreen rear case.
6. Using a 3/16" bit, drill the four 3-gang box mounting
holes in the touchscreen rear case.
7. Insert the wires from the 3-gang box through the center
hole of the rear case. Insert screws through the four rear
case mounting holes (that were drilled in step 6) into the
four mounting holes in the 3-gang box. Use the supplied
#6 sheet metal Phillips pan head 1" screws (part SC655).
8. Connect the keypad bus wires to the terminal strip locat-
ed inside the touchscreen (red to
+12V
, black to
-GND
,
yellow to
YEL
and green to
GRN
).
9. Push wires from the center hole of the touchscreen into
the 3-gang box. Place the top edge of the touchscreen
over the two hooks in the rear case and push the bottom
of the touchscreen until it snaps into place.


