background image

EN


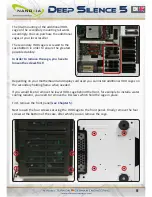
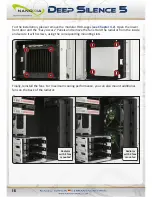
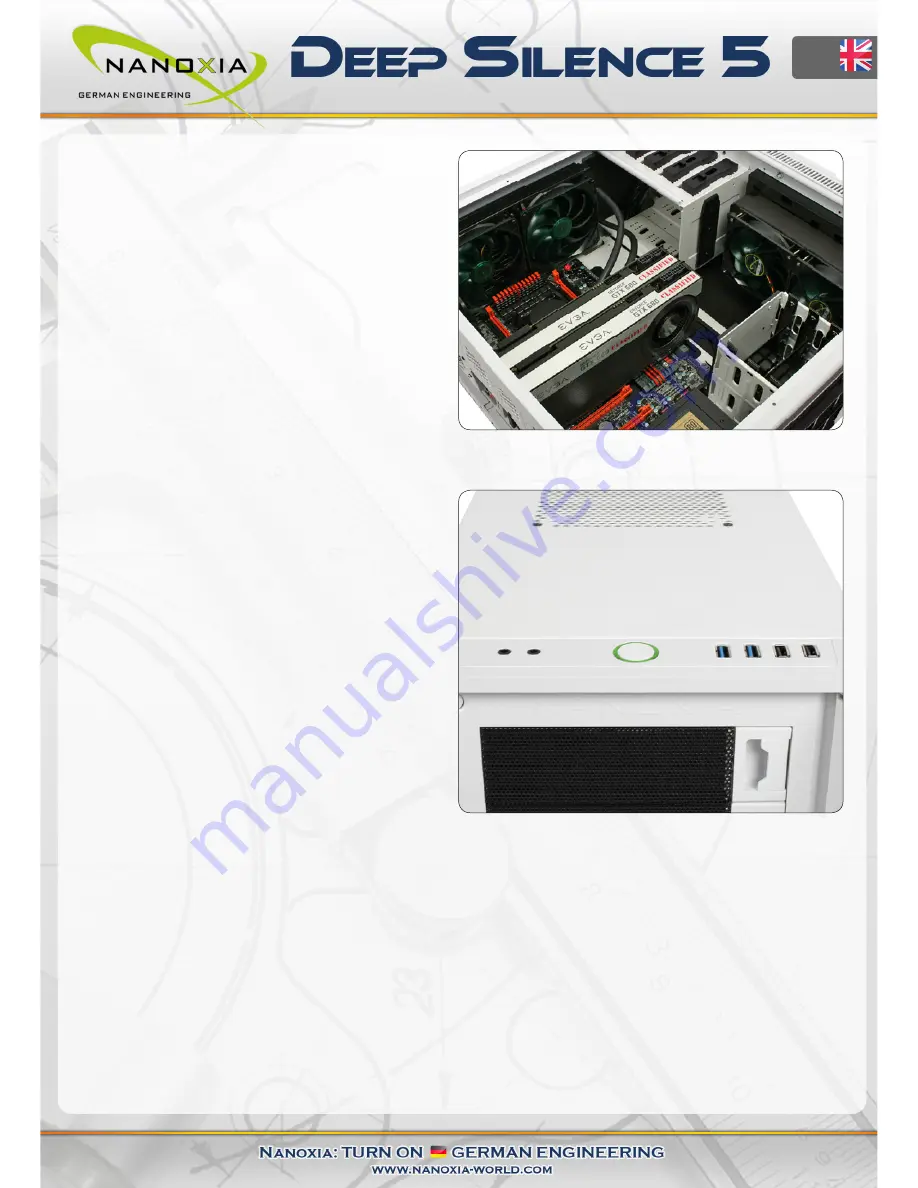
8.2 Installation of a slim radiator or com

-

pact water cooling solution under the top 

cover

Under the top cover, you can install in a 

240/280 mm slim radiator. To mount a radia-

tor under the cover, please use the 120/140 

mm fan mounting holes. 


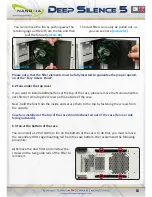
Before the installation, please check care

-

fully, if the distance to the motherboard 

components is sufficient.


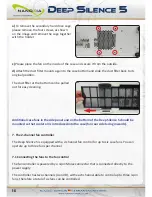
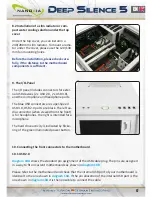
9. The I/O-Panel

The I/O panel includes connectors for exter-

nal USB devices (2 x USB 2.0, 2 x USB 3.0), 

and the microphone and headphone ports. 

The blue USB connectors are super-Speed 

USB 3.0, USB 2.0 ports are black. The left au-

dio connector (when viewed from the front) 

is for headphones, the right is intended for a 

microphone.

The hard drive activity is indicated by flicke-

ring of the green illuminated power button.


10. Connecting the front connectors to the motherboard

10.1 USB 2.0

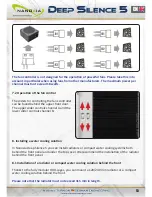
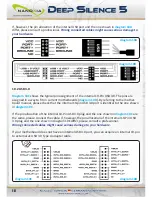
Diagram 10A

 shows the standard pin assignment of the USB cable plug. The pins are assigned 

in a way to fit on current motherboards as shown in 

diagram 10B

.

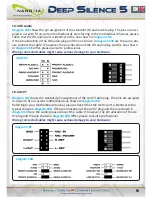
Please refer to the motherboard and check that the internal USB port of your motherboard is 

identical to the one shown in 

diagram 10A

. If the pin allocation of the internal USB port is the 

one shown in 

diagram 10A

 it is then possible to connect the cable.

17

Summary of Contents for Deep Silence 5

Page 1: ......

Page 2: ...__________________________________________03 ___________________________________________________06 ___________________________________________06 ___________________________________________07 _________...

Page 3: ...r most demanding projects Due to the fully modular hard drive cages the case offers maximum versatility and compatibility both for water cooling project and the installation of high end systems with a...

Page 4: ...e time allowing for extremely low system temperatures The sound insu lation design of the Deep Silence 5 is based on multiple interacting design elements The most important part is the large scale lin...

Page 5: ...be removed at any time and allow the installation of 120 mm or 140 mm fans for optimized heat dissipation The Deep Silence axial flow fans have been specifically optimised for very quiet operation The...

Page 6: ...120 240 mm radiator Behind the front panel a 120 or 240 mm radiator can be mounted Please note that the front HDD cages must be removed for this the HDD cage on the secondary mounting rail can usu all...

Page 7: ...e an easy installation of your motherboard we suggest the following procedure a Please consult the following charts to find your motherboard form factor E ATX XL ATX ATX Micro ATX Mini ITX b Attach th...

Page 8: ...tion of the power supply you can connect the EPS extension cable to the EPS connector on the PSU at the back of the motherboard tray 2 Installation of the power supply Please install the power supply...

Page 9: ...for example desire to place a 3 5 inch card reader you can use the internal adaptor for this purpose Please remove the 5 25 inch cover first Open the two quick release of the 5 25 inch bay and remove...

Page 10: ...rackets and pull the slide out gently To install a hard drive into a bracket insert the disk so that the connectors point to the back and attach the hard drive using the screws provided For the fittin...

Page 11: ...ont fans In order to ensure an easy modification of the HDD cages we recommend that you remove both side panels of the case first a Remove the upper age A by pressing the lever upwards as shown in the...

Page 12: ...first Depending on your motherboard and display card used you can install additional HDD cages on the secondary holding frame when needed If you would like to remove the lower HDD cage behind the fron...

Page 13: ...anoxia Deep Silence fans available separately These are technically and visually equivalent to the factory installed case fans and will work in perfect harmony with the built in fan control of your ca...

Page 14: ...anoxia VentCo vers first by removing the screws on the outside of the case Next hold the fans from the inside and secure them to the top by fastening the screws from the outside Case fans installed at...

Page 15: ...fans in the side panel and on the bottom of the Deep Silence 5 should be mounted so that cooler air is introduced into the case fan rear side facing inwards 7 The 2 channel fan controller The Deep Si...

Page 16: ...nel A and the lower slider controls channel B 8 Installing a water cooling solution In Nanoxia Deep Silence 5 you can install radiators or compact water cooling systems both behind the front panel and...

Page 17: ...cess Panels and remove the fans Hold the radiator from the inside and secure it with screws using the corresponding mounting slots Finally reinstall the fans For maximum cooling performance you can al...

Page 18: ...per Speed USB 3 0 USB 2 0 ports are black The left au dio connector when viewed from the front is for headphones the right is intended for a microphone The hard drive activity is indicated by flicke r...

Page 19: ...k that the internal 19 pin USB 3 0 port is identical to the one shown in diagram 10C If the pin allocation of the internal 19 Pin USB 3 0 plug and the one shown in diagram 10C are the same please conn...

Page 20: ...ofessional Wrong connected cables might cause serious damage to your hardware 10 4 AC 97 Diagram 10F shows the standard pin assignment of the AC 97 cable plug The pins are assigned in a way to fit on...

Page 21: ...uggestions and comments about our case very much Our staff will respond to all inquiries quickly and professionally Customers from Germany and other European countries can use the following e mail add...

Reviews: