Watercooling-ready
Das Nanoxia Deep Silence 5 Rev. B ist wie alle Nanoxia Gehäuse für die Verwendung von
Wasserkühlungen ausgelegt. So lassen sich im Gehäuse sowohl hinter der Gehäusefront als
auch unter dem Gehäusedeckel Radiatoren oder kompakte Wasserkühllösungen unterbringen.
Gehäusedeckel: 120/140/240/280 mm Slim-Radiator
Bitte beachten Sie, dass bei der Montage einer Wasserkühlung im Deckel darauf geachtet werden
muss, ob genügend Abstand zu den Mainboard-Komponenten gegeben ist. Wir empfehlen
grundsätzlich die Radiator-Montage im Frontbereich des Gehäuses.
Gehäusefront: 120/240 mm Radiator
Hinter der Gehäusefront kann ein 120/240 mm Radiator montiert werden. Bitte beachten
Sie, dass die vorderen Festplattenkäfige hierfür ausgebaut werden müssen – der HDD-Käfig auf
der sekundären Schiene kann im Regelfall im Gehäuse verbleiben.
Bei Kompakt-Wasserkühlungen sollten Sie vor der Montage prüfen, ob die werksseitigen
Schläuche zwischen Kühler und Radiator ausreichend lang dimensioniert wurden, um die
Lüfter-Radiatoren-Kombination frontseitig montieren zu können.
Schlauchdurchführungen:
Rückseitig stehen vier gummierte Schlauchdurchführungen zur Verfügung, so dass entspre-
chende Wasserkühlungs-Komponenten extern betrieben bzw. montiert werden können.
Im Folgenden finden Sie einige wertvolle Tipps und Erklärungen für die optimale Nutzung
Ihres neuen Gehäuses und für die Installation Ihrer Hardware.
5.2 Fans under the top cover
If you want to install additional fans at the top of the case, please remove the Nanoxia VentCovers
first by removing the screws on the outside of the case.
Next, hold the fans from the inside and secure them to the top by fastening the screws from
the outside.
Case fans installed at the top of the case should exhaust air out of the case (fan rear side
facing outwards).
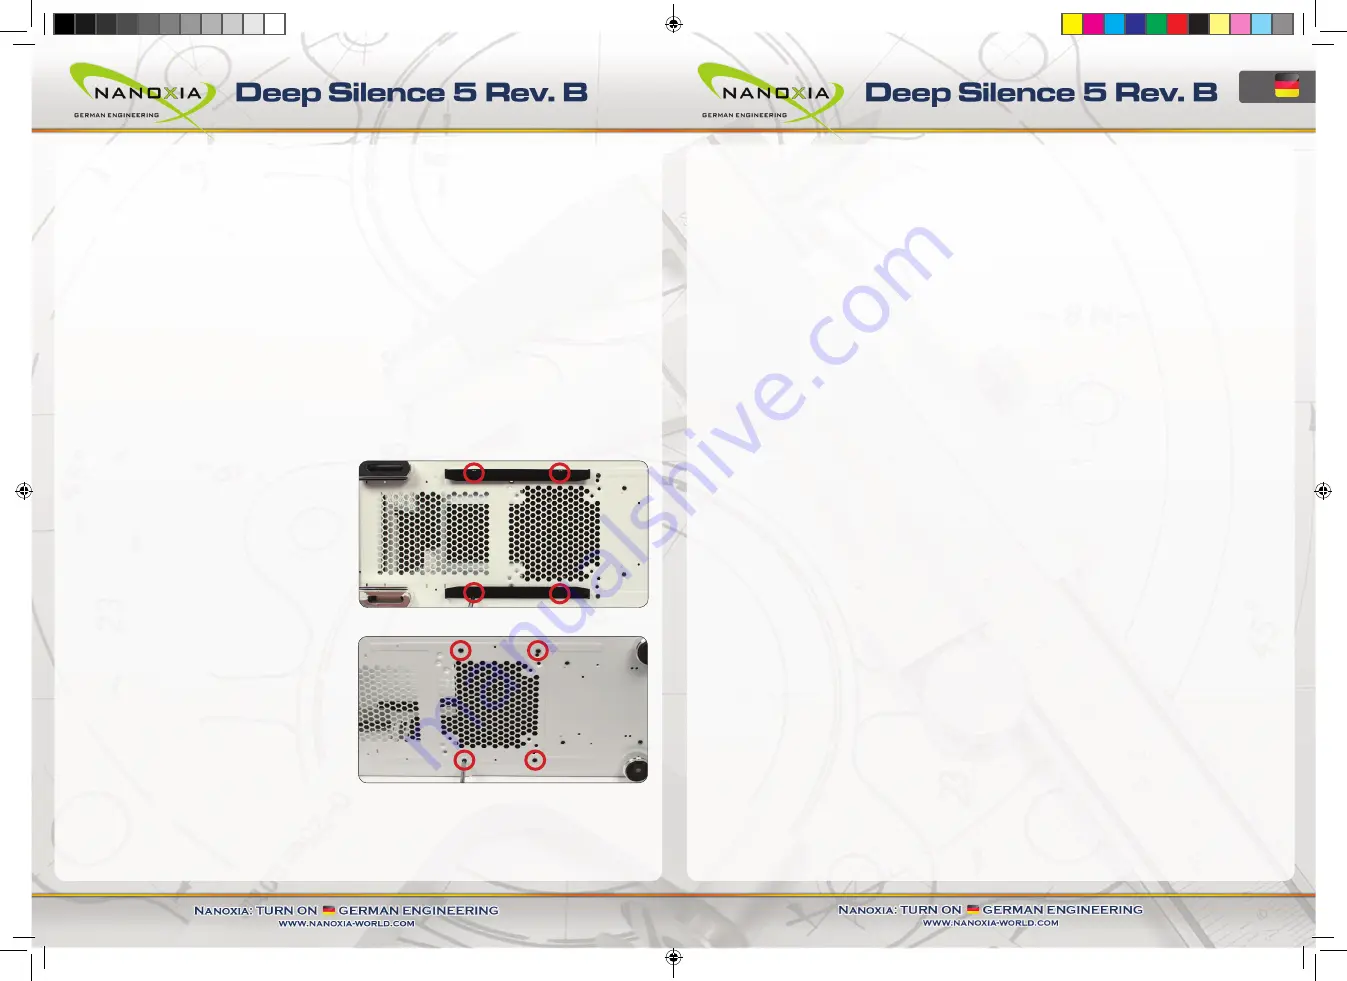
5.3 Fan at the bottom of the case
You can install a 120 or 140 mm fan on the bottom of the case. To do that, you must remove
the secondary HDD-cage mounting rail from the case bottom. We recommend the following
procedure:
a)
Remove the dust filter and unscrew the
screws on the two guide rails of the filter to
remove it.
b)
To remove the secondary hard drive
bracket, please remove the four screws, as
shown on the image.
c)
Please place the fan on the inside of the case and secure it from the outside
d)
Attach the dust filter mounts again to the case bottom and slide the dust filter back to its
original position.
DE
28
05
MAnual_DeepSilence5_revB_DE_EN.indd 13-14
23.10.2014 10:05:05


