background image

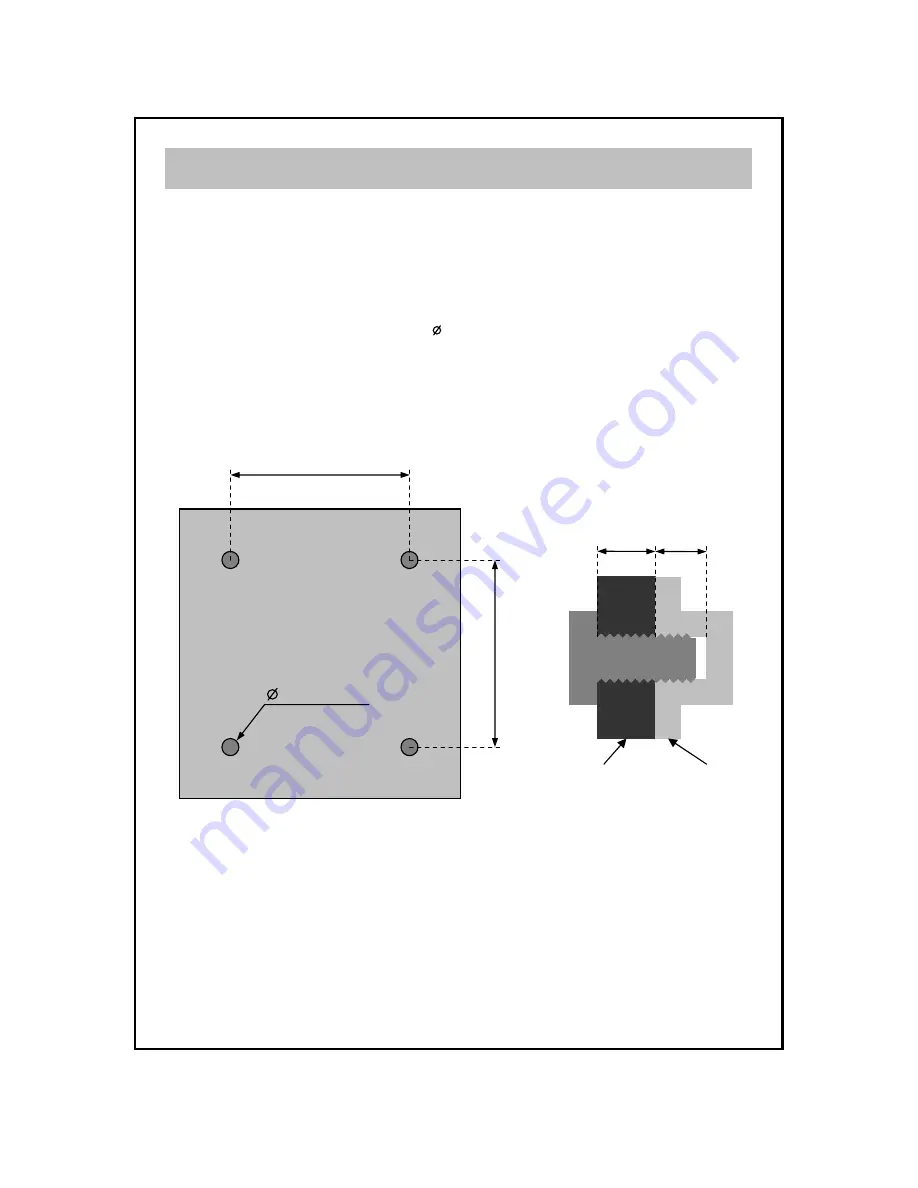
Installing VESA compliant mounting devices

Wall mounting

1. Align the mounting interface pad (75mm 

×

75mm hole spacing) with the holes

in the holes in the televisions rear cover mounting pad.

2. Secure bracket with the four screws (   4mm : M4) that came with the VESA mounting

device.

Note : The length of screws should be within A+5mm.

75mm

75mm

4mm (M4)

5

5mm

A

bracket

rear cover

Summary of Contents for NGLT104WPD

Page 1: ...NGLT104WPD NGLT150WPD LCD TV Monitor IP67 Grade USER S Manual This Manual is revisable without further notice...

Page 2: ...ons 2 Operating Safety 3 Packing 4 Wall mounting 5 Wiring 6 Remote Controller 7 A V Basic Operations 8 A V Menu Operations 10 PC Menu Operations 15 Only 14 TV DVB T Basic Operations 15 TV DVB T Menu O...

Page 3: ...S INSIDE REFER SERVICING TO QUALIFIED SERVICE PERSONAL This symbol is intended to alert the user to the presence of important operating and maintenance servicing instructions in the literature accompa...

Page 4: ...r have it checked by a qualified technician before operating again z Do not open the back cover if a user opens the back cover the TV Monitor is to be leak z Do not clean a front bezel with a strong v...

Page 5: ...1pc 1pc 1pc 1pc 1pc TV Remote Controller Power Adapter User s manual z LCD TV z Remote controller z Power adapter z User s manual z Power cord Power Cord Packing 4...

Page 6: ...rface pad 75mm 75mm hole spacing with the holes in the holes in the televisions rear cover mounting pad 2 Secure bracket with the four screws 4mm M4 that came with the VESA mounting device Note The le...

Page 7: ...iring before WIRING CONNECTION Audio In Right Red Audio In Left White Video In CVBS Yellow 1 AV Connecter 3 D SUB PC Connecter 15 Only 5 DC 12V Power Jack 2 S Video Connecter Speaker Out Right Red Spe...

Page 8: ...btitle View Information View Source Select Audio Mute Channel Select Teletext Menu Enter Exit up down right left Function selection and adjustment Program Guide View Audio Configuration 1 2 3 4 5 6 7...

Page 9: ...ogy you can control by touching each button only not pressing 1 POWER ON OFF SOURCE MENU CH VOL To adjust the screen quality or another functions put your finger on the MENU button The OSD will appear...

Page 10: ...per side of the screen in turn whenever touch SOURCE button SOURCE When you desire select your favorite TV channel put your finger on the CHANNEL button or When you desire control the audio volume put...

Page 11: ...wn On the contrary touch the button the green color Bar will move upward To access a Tree of sub menu from a main menu put your finger on button and another green color Bar will appear on a sub menu i...

Page 12: ...arpness 0 33 66 100 Adjust sharpness by using right left keys 11 A V Menu Operations 3 SCREEN MENU Scaling Standard Full Select scaling by using right left keys Color Temperature Cool Normal Warm User...

Page 13: ...ff by using right left keys Language English Select language of menu by using right left keys H Position 0 100 Adjust horizontal position of menu box by using right left keys V Position 0 100 Adjust v...

Page 14: ...13 A V Menu Operations 6 MISCELLANEOUS MENU Sleep Time Off 10 250 min Adjust sleep time by using right left keys Default Press the right key and the setting will be reset to factory default...

Page 15: ...eft keys Gain Green 0 100 Adjust green gain by using right left keys Gain Blue 0 100 Adjust blue gain by using right left keys Auto adjust Standard Full Optimal PC screen is set automatically when Aut...

Page 16: ...anging Channel You can change channels with or button Channel information window is displayed on changing channels Channel Description Channel description window is displayed on touching INFO button w...

Page 17: ...u touch or button Channel List Channel List mode is displayed when you pushing ENTER button With or button you can select TV channel list and Radio channel list With or button you can change channels...

Page 18: ...on Menu TV DVB T Menu Operations Automatic Search By selecting S t a r t it tunes through all of the frequencies Manual Search When you set up Channel or Frequency and selecting search it tunes throug...

Page 19: ...18 TV DVB T Menu Operations Reset Default You can delete saved Channel information with pushing OK...

Page 20: ...19 2 System Menu TV DVB T Menu Operations System Status You can check Hardware version Software version etc Signal Detection Signal Strength and Quality is displayed...

Page 21: ...Channels You can edit channels with Lock Unlock Delete and Edit buttons Favorite Channels You can designate Favorite Channels Favorite Channels is displayed by pushing enter on Live display You can d...

Page 22: ...ou can change status of Setting Censorship Change Password Installation Lock Preferences Lock Channel Edit Lock Channel Lock In order to change status of Parental Control you need password its initial...

Page 23: ...Power on Time Power off Power off Time A V Control TV SCART is fixed with CVBS You can select Audio Output with Mono and Stereo Screen Ratio is fixed with 4 3 You can select Auto PAL or NTSC mode at D...

Page 24: ...ol Remote Control Front Touch IR Type Key Waterproof Grade IP 67 Power Input DC Power Adapter DC 12V 5A Power Consumption 30W Max Operation Temperature 0 40 Audio Out L R For External Speaker Dimensio...

Page 25: ...trol Remote Control Front Touch IR Type Key Waterproof Grade IP 67 Power Input DC Power Adapter DC 12V 5A Power Consumption 36W Max Operation Temperature 0 40 Audio Out L R For External Speaker Dimens...

Page 26: ...1 Water Resistant Wall Mount Brackets Optional Accessories 25 2 RAM Mount with VESA Plate 3 Monitor Enclosure with Arm Mount Flush Adjustable...

Reviews: