background image

Step Ten: Charge the battery

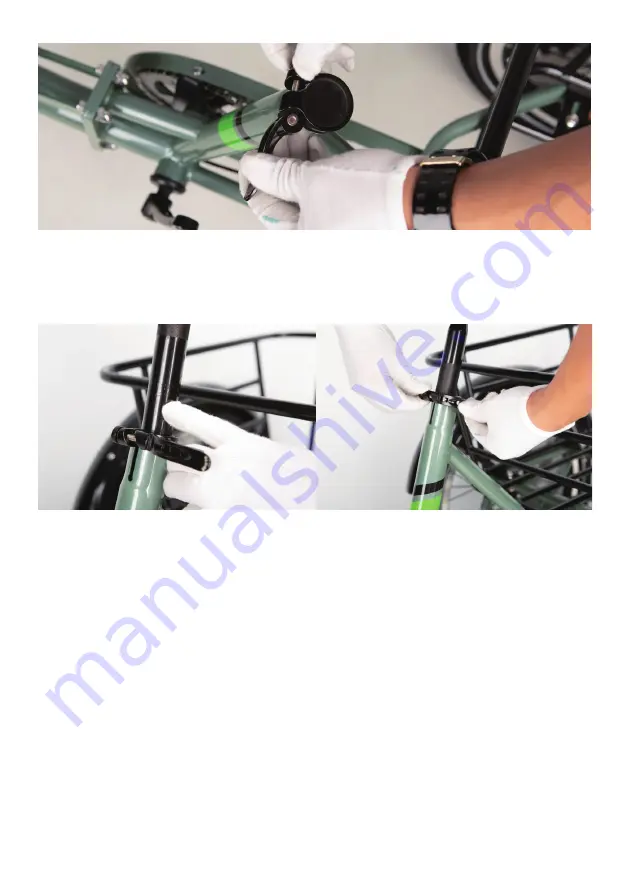
2. Insert seat post into seat tube. Adjust the seat post up or down to a 

comfortable height, while ensuring the seat post is inserted into the 

frame past the minimum insertion point.

3. Close the quick release lever to secure the seat post and check that it 

cannot move. If needed, use the thumb nut to add tension to the clamp 

so there is some resistance when the lever is in line with the clamp bolt.

Operate the electrical system when the battery has been adequately 

charged and the battery is secured to the frame mount. Your Nakto bike 

comes partially charged. We recommend you connect the charger input 

plug (110/220-volt plug) to the power outlet for 3 to 4 hours. The charger

 light will go from red to green when it is fully charged.

Summary of Contents for S02

Page 1: ...S02...

Page 2: ...as not to damage the paint or cut any wires or cables Notice Keep the spare fuse in a safe place lt is not used for assembly and will be used for the replacement if the original fuse were damaged 2 En...

Page 3: ...ake rotor should go into the brake caliper in between the brake pads and the axle should enter the fork dropouts fully The front rotor orientation should be to the left of the fork 3 After inserting t...

Page 4: ...th axle nuts with the supplied double open end wrench Notice Before doing the nal tightening of the axle nuts make sure the wheel is square and true with the forks 5 Push the black plastic nut caps on...

Page 5: ...cable directly up from the front brake caliper to the left handlebar and ensure the cables and wires are not twisted Notice The horn is on the left hand side and the gear shift is on the right 3 Cent...

Page 6: ...make sure the handlebar and front wheel are still properly aligned 3 Repeat the twist test pulling pushing with the opposite hands 5 Adjust the angle of the display according to your personal prefere...

Page 7: ...o cancel the parking function Step Four Install the front fender 1 Remove the fender mounting bolt from the fork arch with the supplied wrench and set aside 2 Place the fender in position Pass the fro...

Page 8: ...1 Remove the front basket screws 3 Tighten with the screwdriver Step Five Install the front basket...

Page 9: ...tightly with the screw and the angle of the light can be adjusted by yourself Step Six Install the front light 2 Assemble the front basket The 4 holes of the basket are aligned with the 4 holes of the...

Page 10: ...4 holes of the rear frame with an even distance between the left and right and put back the mounting bolts tighten it with screwdriver Step Seven Install the rear basket 2 Fix the headlight cable Fix...

Page 11: ...L stamped into the end of the axle is the left pedal The left pedal goes on the crank on the left side of the bike 2 The right pedals threaded to tighten by turning clockwise The left pedals reverse t...

Page 12: ...it cannot move If needed use the thumb nut to add tension to the clamp so there is some resistance when the lever is in line with the clamp bolt Operate the electrical system when the battery has been...

Page 13: ...g 110 220 volt to the power outlet ardware Loca on H H ardware Torque Required Nm Front Dropout Area Front Axle Nuts 40 andlebar Area Handlebar Stem Clamp Bolts 10 andlebar Area Stem Bolts 10 H H andl...

Page 14: ...10 Rear Dropout Area Derailleur Cable Pinch Bolt 6 8 Rear Dropout Area Kickstand Moun ng Bolts 8 Bo om Bracket and Crank Area Bo om Bracket and Lockring 60 Bo om Bracket and Crank Area Crank Arm Bolt...

Page 15: ...The twist throttle The throttle is located on the right side of the handlebar The rider can use it with a twist of the throttle grip to propel the bike forward without pedaling Warning The throttle i...

Page 16: ...re 4 Begin riding carefully Hold handlebars and start pedaling on a at surface in a low gear 1 or 2 most riders should be able to begin pedal ing the bike with pedal assist level 0 or 1 You may also u...

Page 17: ...s and hold this button to turn on walk mode the bike will move engage automatically at 4 km h 3 Power button Press and hold this button to turn on and o the unit Press it quickly to switch the display...

Page 18: ...get the longest range and 5 is the most amountof pedal assist use to get there the fastest with theleast e ort 3 Odometer Meter Shows the value of the setting above 4 KM Miles Shows whether the value...

Page 19: ...und lightness 1dark 2 normal 3lightest P02 Distant unit 0 KM 1 MILE P03 Battery Voltage 24V 36V 48V default 36V P04 Sleeping time 0 unlimited 1 60 minutes P05 PAS Level 0 3 levels model Level1 2V Leve...

Page 20: ...rottle In P9 the setting has to be 1 P11 PAS sensitivity Range 1 24 P12 PAS starting intensity Range 0 5 P13 Magnet steel model for PAS 5 8 12 three models P14 Currency limit for controller Range 1 20...

Page 21: ...o move without slowing This feature will allow you to achieve faster speeds when coasting moving downhill or moving with the wind lt will also allow you to conserve electrical power because you will b...

Page 22: ......

Page 23: ......

Page 24: ......

Reviews: