The oNeTRAK Manual
The oNeTRAK Manual
ANALOG WIRING TIPS
7
BRANCH LINE JUNCTION
10
A
A
B
C
B
C
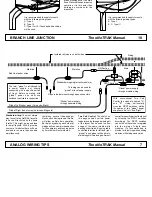
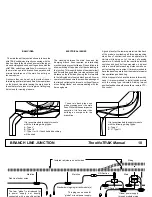
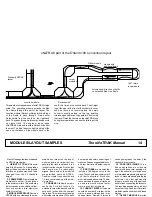
It is recommended to supply turnouts
with the following wiring types:
A: Type V
B: Type III
C: Type II or III, if track behind backdrop
will be used
It is recommended to supply turnouts
with the following wiring types:
A: Type V
B, C: Type III
BASIC IDEA
The main idea of the junction shown is to have the
oNeTRAK subdivision directly connected with the
blue line. Usually the blue line has most of the indus-
tries and sidings and can be put to good use with the
oNeTRAK switching operations. A crossover over
the main lines permits branch line operation with
minimal interference of the main line activity on
those modules.
A scheme then can be set up to provide true car
forwarding and time table and train order operations
on the branch line while leaving the main lines to
those that prefer a less strict regime of letting long
trains loop for viewing pleasure.
ELECTRICAL ISSUES
The crossing between the main lines and the
diverging branch lines requires an interlocking
mechanism to prevent collisions. One solution is to
allow switching off a portion of all tracks leading to
the junction. This is easily done on the module itself
and it would be a good idea to increase the security
distance on the left side by having the first module
to the left included in the stop block as well. A tower
operator will then ensure the crash-free passage of
the trains by aligning the turnouts, cutting off power
at conflicting tracks, and communicating with the
train engineers.
A good place for the tower operator is at the back
of the module overlooking all three approaching
sides free of obstructions such as operators or
visitors while being out of the way of passing
operators. A tall chair with the required electrical
switches and push buttons mounted on a panel
within a comfortable reaching distance makes a
perfect working environment. It is recommended to
have the panel separate from the module for easier
transportation and handling.
While it is possible to have the turnouts thrown by
hand it is recommended to install switch motors
with the wiring type indicated. Adding turnout
position feedback would even allow a remote CTC-
like control.
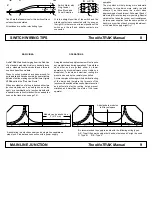
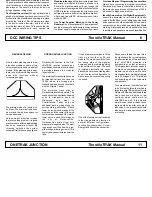
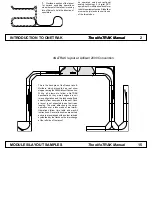
These two track plans use
grade crossings over the main
lines. While that has an impact on
operation, it is far easier than
building an overpass for the
branch line.
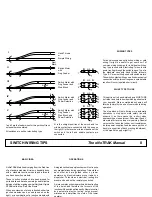
Standard wiring The most simple
way to control a oNeTRAK layout is
to have all tracks fed by the same
throttle. This might be a good idea
for small layouts. With a growing
number of modules there will be a
demand to run more than one train
simultaneously.
Installing several independant
blocks, each having its own throttle,
will allow multiple train operation.
But trains bypassing each other at
sidings will cause major headaches
for the operators and running trains
by time table will not work well.
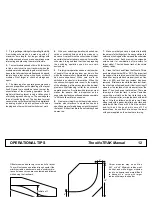
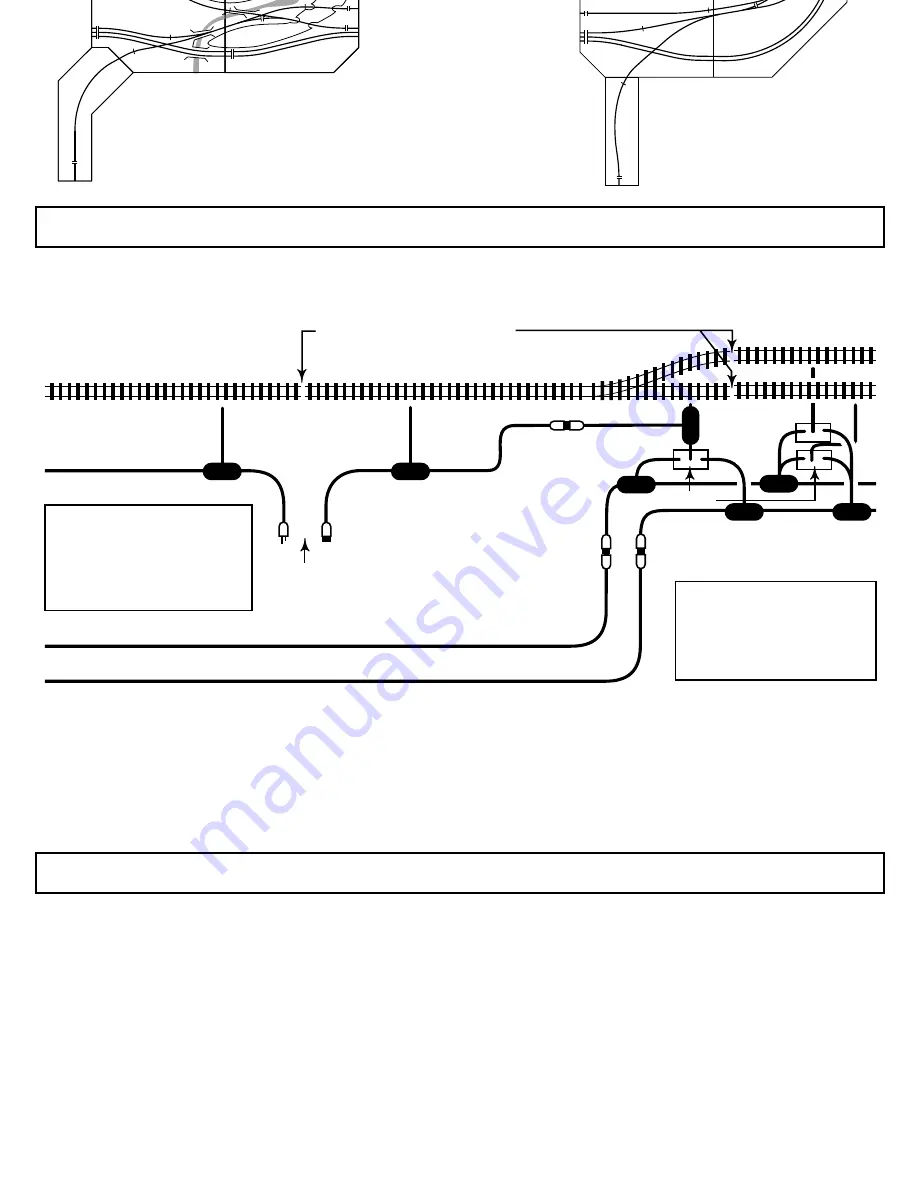
Two Cab Control The sketch on
this page shows how two power
feeders running through a whole part
of the layout can be used to allow
usage of the same throttle while
passing other trains. By using radio
controlled throttles for left and right
“global”, an engineer will be able to
walk along his train and give himself
control for specific parts of the layout
by throwing the DPDT switches
accordingly. The DPDT switches
can, but do not have to be, integrated
into the wiring of single track
modules. It's recommended to
provide for this wiring while building
modules with sidings and yards.
Siding
Main
OS-Section
Mainline
Mainline
Isolated rail joiners on both sides
Red Line feeder wires
“Global” Left feeder wires (Colorcode: Black)
“Global” Right feeder wires (Colorcode: Magenta)
DPDT-Switches
Gaps in feeder wires through open connectors
This plug can be used for
“global” or local power supply.
Standard wiring single track module(s)
“Global” power supply
through separate wiring
“Global” power supply
through module wiring
The term “global” is introduced for
a power supply not directly
connected with a specific portion
of track. Before operating with
“global” power, one must use
switches to activate a connection.
With conventional Two Cab
Control the cabs are named "A"
and "B". Using horizontally
mounted DPDT switches yields
the names of two “global” power
supplies to be “Left” and “Right”.


