background image


3.


INSTALLING THE MCS II SYSTEM 


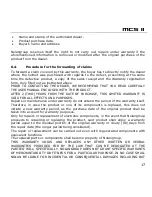
Remove the cheek padding (see helmet instructions). 


Fig. 1 


Remove the helmet edge gasket 
using the special tool (Fig. 1). 


Remove 

the 

“N-Com” 

plug 

found  at  the  back  of  the  shell 
gasket (Fig. 1).


Fig. 2 


Completely remove the gasket 
as shown in Fig. 2; by doing so 
you also remove the padding. 


Summary of Contents for MCS II

Page 1: ...SAFETY AND INSTRUCTIONS FOR USE V 04...

Page 2: ...s Long tests and thorough system development have made it possible to achieve the highest sound quality The MCS II system can only be assembled on Nolan helmets pre set for N Com The MCS II system all...

Page 3: ...SYSTEM 8 3 1 Removing the MCS II system from the helmet 13 4 OPERATION OF THE MCS II SYSTEM 14 5 MAINTENANCE 14 6 LIMITED WARRANTY 15 6 1 Warranty coverage 15 6 2 Exclusions and limitations of the co...

Page 4: ...electronic components of the N Com mounted inside the helmet are not waterproof Consequently make sure the inside of the helmet including the comfort padding does not get wet in order to avoid damage...

Page 5: ...e to your hearing Caution Adjust the volume of the N Com system where provided and of the audio sources connected to it so as to avoid audio reproduction at high volumes Constant exposure to high volu...

Page 6: ...anual when disassembling the system from the helmet Once the system has been disassembled dispose of it according to the instructions provided here below The presence of a crossed out wheelie bin indi...

Page 7: ...7 2 CONTENTS OF THE PACKAGING MCS II system v 04 Honda Goldwing connection cable Harley Davidson connection cable Extension and fixing clip Key...

Page 8: ...ding see helmet instructions Fig 1 Remove the helmet edge gasket using the special tool Fig 1 Remove the N Com plug found at the back of the shell gasket Fig 1 Fig 2 Completely remove the gasket as sh...

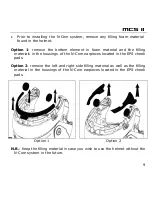
Page 9: ...materials in the housings of the N Com earpieces located in the EPS cheek pads Option 2 remove the left and right side filling material as well as the filling material in the housings of the N Com ea...

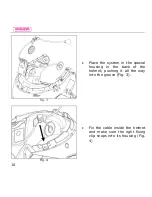
Page 10: ...ace the system in the special housing in the back of the helmet pushing it all the way into the groove Fig 3 Fig 4 Fix the cable inside the helmet and make sure the right fixing clip snaps into its ho...

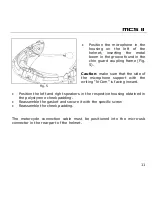
Page 11: ...the side of the microphone support with the writing N Com is facing inward Position the left and right speakers in the respective housing obtained in the polystyrene cheek padding Reassemble the gask...

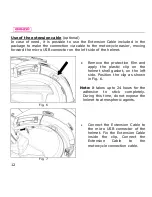
Page 12: ...Fig 6 Remove the protective film and apply the plastic clip on the helmet shell gasket on the left side Position the clip as shown in Fig 6 Note It takes up to 24 hours for the adhesive to stick comp...

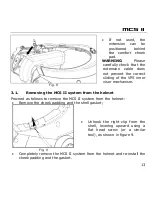
Page 13: ...isor mechanism 3 1 Removing the MCS II system from the helmet Proceed as follows to remove the MCS II system from the helmet Remove the cheek padding and the shell gasket Fig 9 Unhook the right clip f...

Page 14: ...ume has to be set at a comfortable level for conversation Do not increase the volume too much to avoid background interference For all audio settings and adjustments please read your motorbike manual...

Page 15: ...remedy the defect except in those cases where the damage is caused by one of the items listed in the following paragraph Exclusions and limitations of the Coverage 6 2 Exclusions and limitations of t...

Page 16: ...p shall not guarantee proper operation of the product device combination nor will it accept requests for repairs or replacements under warranty in case the product is used in such a way Nolangroup sha...

Page 17: ...do not extend the period of the warranty itself Therefore in case the product or one of its components is replaced this does not initiate a new warranty period as the purchase date of the original pr...

Page 18: ...ional jurisdiction in force or on the consumer s rights towards the dealer sanctioned by the purchase sale contract This warranty is valid throughout the European territory and it represents the only...

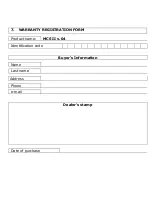
Page 19: ...7 WARRANTY REGISTRATION FORM Product name MCS II v 04 Identification code Buyer s Information Name Last name Address Phone e mail Dealer s stamp Date of purchase...

Page 20: ...Printed on recycled paper MCS II v 04 07 03 2016 16 34 00...

Reviews: