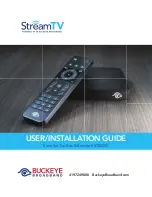
background image


2.4.

        Manage applications
Select Apps to manage all applications 
installed in the device.
First you can see all the downloaded 
applications.

You can see how many MB each 

applications are.

The next column shows all the system 
applications. Unlike downloaded 

applications, these applications cannot 
be uninstall.

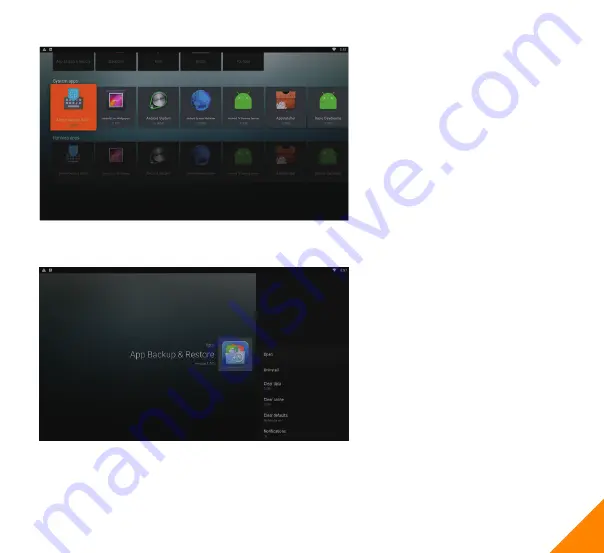
Select one of the application and click 

ok button will enable you to:
1. Open the application (some 

application auto runs in the background 
will not have this option.)

2. Uninstall the application (system 
application do not have this option), this 

will also delete user data and save 
game of the application.

4. Clear cache: Delete the temporary files stored by this application.

5. Clear defaults: Clear default setup.

6. Select show or not show notifications from this application.

7. Show permissions of this application.

The final column shows all the current

running applications.

3. Clear data: Delete any addition data

this application has download or stored,
some application or game will not work

properly if download data is deleted.

9

Summary of Contents for ATV1910

Page 1: ...1 User Manual http www mygica com 1910 Digital TV box...

Page 2: ......

Page 3: ...check carefully with the packing list If any item is missing or damaged please contact your dealer as soon as possible 1 2 3 4 5 6 1 CVBS Port 2 USB Port 3 LAN Port 4 HDMI Port 5 DC Input 6 Wi Fi Ant...

Page 4: ...ct Power and HDMI Place ATV1910 on a at platform near the TV and make sure nothing block the remote control signal USB Modem DC HDMI HDMI Output HDMI DC IN CVBS L R USB USB LAN Video Output Audio Outp...

Page 5: ...ice 1 Hold the Fn button to use the orange color keys 2 Hold the shift button to use the 3rd keys on the top right corner ex KR 41 Remote 1 Power 2 Menu 3 Home 4 Navigational buttons 5 Play Pause 6 Vo...

Page 6: ...First Time Usage Part 1 Power Up 1 1 For rst time power up it will enter the setup wizard 1 2 Select your language Note English is default 4...

Page 7: ...1 3 Adjust your screen position to t properly onto your television or monitor 1 4 Setup your Wi Fi or Ethernet connection 5...

Page 8: ...the one currently selected as favorite app Now select the app you want to show on the home screen and press the OK button The old favorite app will switch to the one you just select The right screen s...

Page 9: ...etwork 2 2 Setup Wi Fi Select Wi Fi then all the available Wi Fi networks in your area will be scanned Connect to the Wi Fi network that is available to you If connecting to a secured Wi Fi network th...

Page 10: ...switching the output mode 2 3 1 Screen postion You can use Zoom in or Zoom out to adjust the screen position to t your television screen to your liking 2 3 2 Screen rotation If some application reques...

Page 11: ...on auto runs in the background will not have this option 2 Uninstall the application system application do not have this option this will also delete user data and save game of the application 4 Clear...

Page 12: ...time In this menu you can setup the Date Time Time Zone and Time Display Format 2 6 Language In this menu you can change the system language to the language of your choice Note Default language is En...

Page 13: ...then select Factory data rest In here you can erase all user data on the device and reset all settings to default settings Please take note using this function will delete all user data and all user...

Page 14: ...market places already pre installed on your MyGica 1 Google Play Store 2 MyGica Store 4 0 KODI Media Center KODI Media Center allows you to play and view most videos music such as free podcasts from...

Page 15: ...les select Files and enter Files interface as shown in the picture Select Files and if you have connect a USB storage device or a SD card you will see sda1 or sdcard depends on the storage device you...

Page 16: ...t channels to view these channels goto Videos or Music and select Add ons Once you enter Add ons you will see a list of di erent channels These channels are in alphabetical order browse through the li...

Page 17: ...Congratulations This completes the rst time setup process of your brand new MyGica For technical support please visit our website http www mygica com 15...

Page 18: ......

Page 19: ......

Page 20: ...http www mygica com...

Reviews: