Instruction Manual
more to myerson than teeth
www.myersontooth.com
myerson HOTSHOTELITE MANUAL ENGLISH.indd 1
3/23/10 9:54:23 AM
Page 1: ...Instruction Manual more to myerson than teeth www myersontooth com myerson HOTSHOTELITE MANUAL ENGLISH indd 1 3 23 10 9 54 23 AM ...
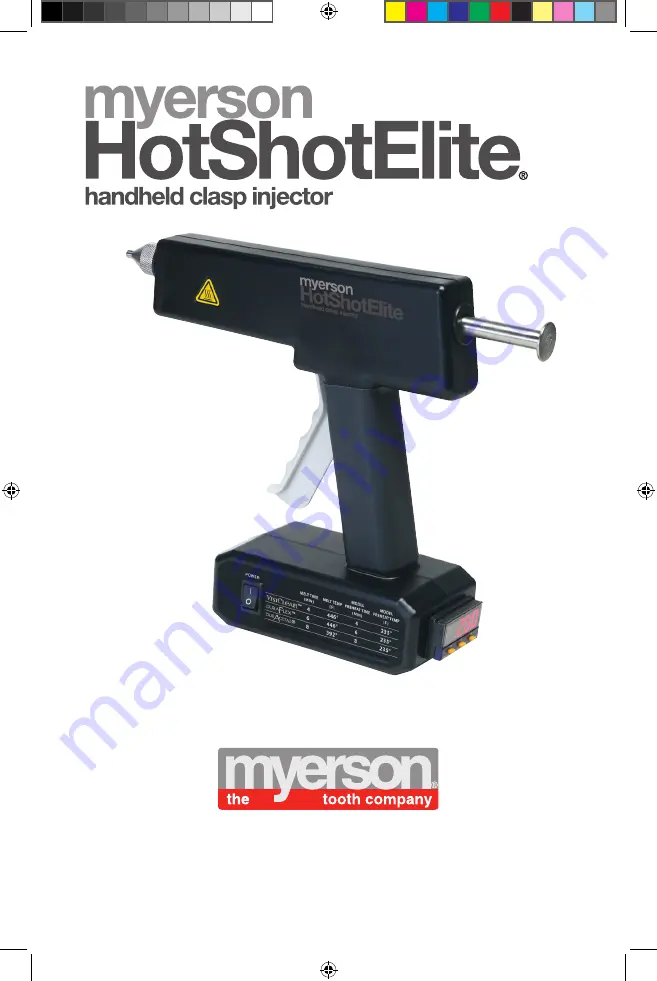
Page 2: ...Section 17 Troubleshooting 21 Section 18 Notes 22 section 1 general description Congratulations on purchasing a myerson HotShotElite handheld clasp injector US Patent No 7303392 This unique piece of laboratory equipment is incredibly light extremely durable and is specially designed for creating flexible clasps in under thirty 30 minutes Your myerson HotShotElite can also be used to make temporary...
Page 3: ... AP 0203 Measuring Cup AP 0208 Elite Injector Stand EG 0203 Lockable Case AP 0200 Putty Tool EG 0208 Heat Resistant Gloves AP 0207 CDM Extra Hard Putty A B AP 0220 CDM Thermoplastic Model Separator 1oz MS 0200 TMS Swabs 10 MS 0202 TMS Trays 10 MS 0201 Variety Pack VP 0100 myerson VisiClear Single Shots 6 Pack VC 0201 Investing Stone 25 lb INVSTONE 25LB Large Injection Ring AP 0228 Small Injection ...
Page 4: ...r before being placed back into the lockable case See included appliance procedures section 4 basic operation To turn on device press the rocker switch located on the side of the device The control panel will illuminate indicating the device is on At this time the device begins to heat up Caution should be taken to avoid burns Heat resistant gloves should be used at all times while the device is o...
Page 5: ...ndheld clasp injector please call your myerson distributor nearest myerson office or go to www myersontooth com Do not attempt to repair this device Myerson LLC is not responsible for damage to the device or any injuries associated with attempting to repair this device section 7 declaration of conformity We declare under our sole responsibility that this product is in confor mity with standards or...
Page 6: ...ctor is for indoor use only Do not use outdoors or in wet or damp locations Never immerse device in water or other liquids Use only on a clean dry work surface Excessive dust and dirt will reduce the life of the device Use only recommended accessories and materials with this device Using materials other than those recommended by myerson LLC may result in accidental injury and permanent damage to t...
Page 7: ...rrespond to the tip of each clasp 5 Mix one scoop of CDM brand Extra Hard Putty A with one scoop of putty B Mix the putty until consistent Place the putty on the occlusal surface and work down over the buccal and lingual covering the clasp When the putty is in place observe the lines created in step 4 to estimate where the tip of the clasp is Using the Elite Putty Tool indent down to the base of t...
Page 8: ...ture Using enough putty is essential to ensure complete injections 6 Remove the putty and drill a sprue hole from outside to inside using a 8 2mm bur Drill your sprue hole in through the indention of the putty tool and out through the other side trying to come as close as possible to the tip of the clasp If you come out ahead of the clasp tip just make a channel from the hole to the tip of the cla...
Page 9: ...setting the Melt Temperature 10 Allow the device reach the set temperature before proceeding 11 If using DurAcetal from a 225g bottle measure out 8 grams of DurAcetal 10ml mark on the measuring cup If using a Single Shot pour the entire contents of the Single Shot into the Injection Sleeve Using the filler funnel pour the DurAcetal into the Injection Sleeve INJECTION SLEEVE MUST BE AT ROOM TEMPERA...
Page 10: ...ving and wear supplied safety gloves DO NOT ATTEMPT TO REUSE INJECTED MATERIAL This process is important to keep aerated material from becoming part of the final clasp or appliance 14 After priming the myerson HotShotElite for injection use the supplied gloves to clear off the tip of the injector with your finger If material bulges from tip after cleaning pull back on the injection rod about 3mm T...
Page 11: ...OLLOWING THIS SAME PROCEDURE 16 Expel the remaining material onto the Elite gun stand and remove the rod While wearing heat resistant gloves remove sleeve and nozzle from gun and place on metal stand to cool Refer to Section 5 for more information regarding cleaning of the sleeve and nozzle Let the model bench set for about 10 minutes or until the model is cool to the touch 17 Section the putty ma...
Page 12: ...nishing Bur Kit not included in any kit 19 See Section 14 for tips on finishing and polishing 20 Notice the size shape and tapering of the finished clasp To learn more about injecting DurAcetal go to www myersontooth com AP 0224 myerson HOTSHOTELITE MANUAL ENGLISH indd 12 3 23 10 9 54 43 AM ...
Page 13: ...tection and use proper air ventilation Avoid skin contact After the separator dries place the partial on the model 2 Mark where the clasp will connect to the partial Using a 8 round bur 2mm drill into the partial and exit the partial on the lingual side A counter angle will help the clasp lock into the partial 3 Wax the clasp and create the putty matrix as previously described in section 9 Next fo...
Page 14: ...icating on provisional crowns and bridges using your myerson HotShotElite go to www myersontooth com section 12 unilaterals For step by step instructions on fabricating on unilaterals using your myerson HotShotElite go to www myersontooth com 14 myerson HOTSHOTELITE MANUAL ENGLISH indd 14 3 23 10 9 54 47 AM ...
Page 15: ...void skin contact After the separator dries place the partial on the model 2 Create the clasp using 12 gauge sprue wax Place the wax down at the gingival Using a hot spatula seal the sprue wax to the model and extend the wax down onto the tissue This will give the clasp stability Once you are done waxing make surethe clasps are 2mm by 2mm Wax connection to framework incorporating two or three squa...
Page 16: ...y matrix is set as not to move or warp it 5 Remove the putty and drill a sprue hole from outside to inside using a 8 2mm bur Drill your sprue hole in through the indention of the putty tool and out through the other side trying to come as close as possible to the tip of the clasp If you come out ahead of the clasp tip make a channel from the hole to the tip of the clasp Make sure the channel is 2m...
Page 17: ... down keys simultaneously will return the display to the process temperature See Section 4 for more information about setting the Melt Temperature 9 Allow the device to reach the set temperature before proceeding 10 Using the filler funnel pour the entire Single Shot of myerson VisiClear or myerson DuraFlex into the Injection Sleeve we recommend you use silver Injection Sleeve with VisiClear and t...
Page 18: ...to Elite injector stand only The material will not stick and is easily removed once cooled Allow the material to fully cool before removing and wear supplied safety gloves DO NOT ATTEMPT TO REUSE INJECTED MATERIAL Note This process is important to keep aerated material from becoming part of the final clasp or appliance 13 After priming the myerson HotShotElite for injection use the supplied gloves...
Page 19: ...the Elite injector stand and remove the injection rod While wearing heat resistant gloves remove sleeve and nozzle from injector and place on metal stand to cool Refer to Section 5 for more information regarding cleaning of the sleeve and nozzle Let the model bench set for about 10 minutes or until the model is cool to the touch 16 Section the putty matrix using a thin bladed knife Cut a section o...
Page 20: ...sed cone bur and diamond saucer bur can be used for fine details the other burs can t create The Polishing Kit was designed to decrease the time it takes get an appliance ready for try in Working from yellow to red to blue to green the appliance will become increasingly smooth Finish off the appliance with the rag wheel and a small amount of Fine Scratch Remover for that high shine See our current...
Page 21: ...yerson Section 16 technical data Power Supply 120v model 120VAC 50 60Hz 2 0A 230v model 230VAC 50 60Hz 2 0A Max Melting Temp 460 F 237 C Weight 12lbs 7 26 kg Mains Fuse rating 2A 250V 5x20mm Fast Acting section 17 troubleshooting Symptom Possible Cause Solution Unit does not turn on Fuse is blown Replace fuse with 2A 250V 5x20mm Power cord not fully inserted Check to ensure power cord is properly ...
Page 22: ...section 18 notes 22 myerson HOTSHOTELITE MANUAL ENGLISH indd 22 3 23 10 9 55 04 AM ...
Page 23: ...e treatment of sleep related breath ing disorders EMA s patented design uses interchangeable elastic straps attached to pressure formed custom upper and lower trays which allow the gradual advancement of the mandible until treatment is successful EMA is available to medical and dental profession als through authorized dental laboratories more to myerson than teeth www myersontooth com english fran...
Page 24: ...3 USA toll free phone 800 423 2683 toll free fax 800 424 2928 telephone 312 432 8200 facsimile 312 563 9535 EUROPEAN REPRESENTATIVE myerson limited 8 crystal way harrow middx HA1 2HP united kingdom telephone 44 0 20 8863 9044 facsimile 44 0 20 8861 3091 more to myerson than teeth www myersontooth com 3 2010 ENGLISH 50 myerson HOTSHOTELITE MANUAL ENGLISH indd 24 3 23 10 9 55 09 AM ...