background image

page 9

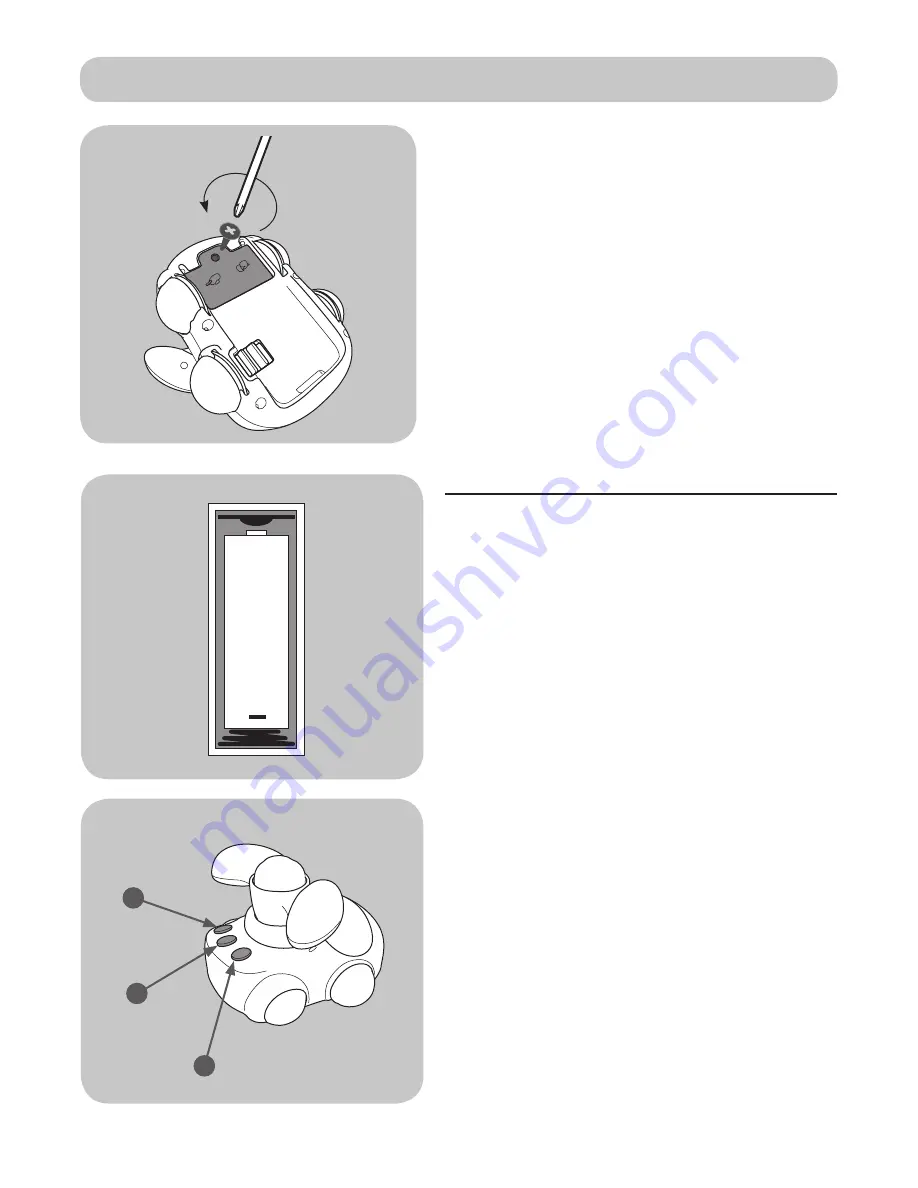
Electronic toy car

15. Using a Phillips screwdriver, unscrew 

the battery cover on the underside of the 

electronic toy car. 

Insert 2 x 1.5V AA batteries (not supplied) 

ensuring the correct battery orientation is 

observed and then reattach the cover,

replacing the screw, being careful to avoid 

overtightening.

Top Tip

16. Some brands of batteries will have 

slightly different lengths than others. If you 

find the electric toy car is not working with 

fresh batteries then this may be because 

the positive terminal is not making proper 

contact. To rectify this, first re-insert the 

batteries. If this does not work, try a different 

brand. Finally if the toy car still fails to work, 

please contact MyChild customer service.

+

17. The electronic toy car has three buttons:

(A) Cycles through the stored musical 

sounds.

(B) Cycles through the different light settings.

(C) Adjust the volume to one of three 

settings.

A

B

C

Summary of Contents for F1 Ace Sport

Page 1: ...m for future reference The child may be hurt if you do not follow these instructions BS EN 1273 2005 This baby walking frame is intended to be used by children who can sit up unaided approximately fro...

Page 2: ...lity there s always a small chance of a hiccup Our promise is to repair replace or refund a MyChild product that has an identified manufacturing defect from the date of purchase for a full 3 years the...

Page 3: ...water with a household soap or a mild detergent Allow it to dry fully preferably away from direct sunlight If the wheels squeak use a silicon based spray ensuring it penetrates the wheel and axle asse...

Page 4: ...not discard any packaging until you are sure that you have all the parts WARNING Assembly by an adult Keep away from children until fully assembled Keep children clear during assembly as pack contain...

Page 5: ...ght first ensure block A is unlocked B then pull block A forward and lower the upper part When at the desired height turn the lock to the locked position C WARNING NEVER adjust the height when your ch...

Page 6: ...ith the baby walker still upside down and fully folded down place the anti fall blocks around the walker as shown inserting the two plastic stems on each block into the holes on the walker s underside...

Page 7: ...d work your way around Grip the back of the seat unit as low down and close to the plastic clip as possible see Fig 2 and ensuring the clip is lined up with it s hole push the clip in If a clip is not...

Page 8: ...body Pull the spoiler upwards to check it is firmly attached it should not come off Attaching the rear view mirror and flexi toy WARNING Assembly by an adult 11 Insert the rear view mirror into the ho...

Page 9: ...e buttons A at each end of the walker base and at the same time turn the base upward 90 degrees until it clicks into place Repeat the process on the opposite side To convert the rocker back to a walke...

Page 10: ...l have slightly different lengths than others If you find the electric toy car is not working with fresh batteries then this may be because the positive terminal is not making proper contact To rectif...

Page 11: ...into the smaller recess 19 Place the assembled play tray D into the recess on top of the car body To remove Whilst standing behind the walker slide your fingers between the toy tray and the top of the...

Page 12: ...Customerservice kooltrade co uk Imported by MyChild M34 3QA www mychildonline co uk Tel 0161 335 2508...

Reviews: