B. TO CHARGE THE BATTERY PACK WHILE
THE BATTERY PACK ATTACHED TO THIS
PORTABLE DVD PLAYER
STEP 1.
Please align this portable DVD player’s battery
connectors with the battery pack’s battery
connectors. Then attach the battery pack to this
Portable DVD player. (as figure (B) shown)
Note:
1.
Please turn Power off when attaching or removing the
battery pack.
2.
If you want to remove the battery pack, press battery
release button, then slowly remove it from this Portable
DVD player.
STEP 2.
Connect the AC adapter(12V, 1.25A) to the DC IN
jack on the left side of this Portable DVD player
and a household power outlet. (as figure (C) shown)
STEP 3.
The battery charge indicator will turn red and start
charging.
STEP 4.
When the battery pack is fully charged, the battery
charge indicator will turn green.
Note:
1.
The battery pack is not charged while this Portable DVD
player is turned on.
2.
Please use the specific power adapter (12V, 1.25A) to charge
the battery pack.
(B)
Before using the battery pack, make sure to charge it.
You could choose to charge the battery pack directly or
charge it while the battery pack attached to this Portable
DVD player.
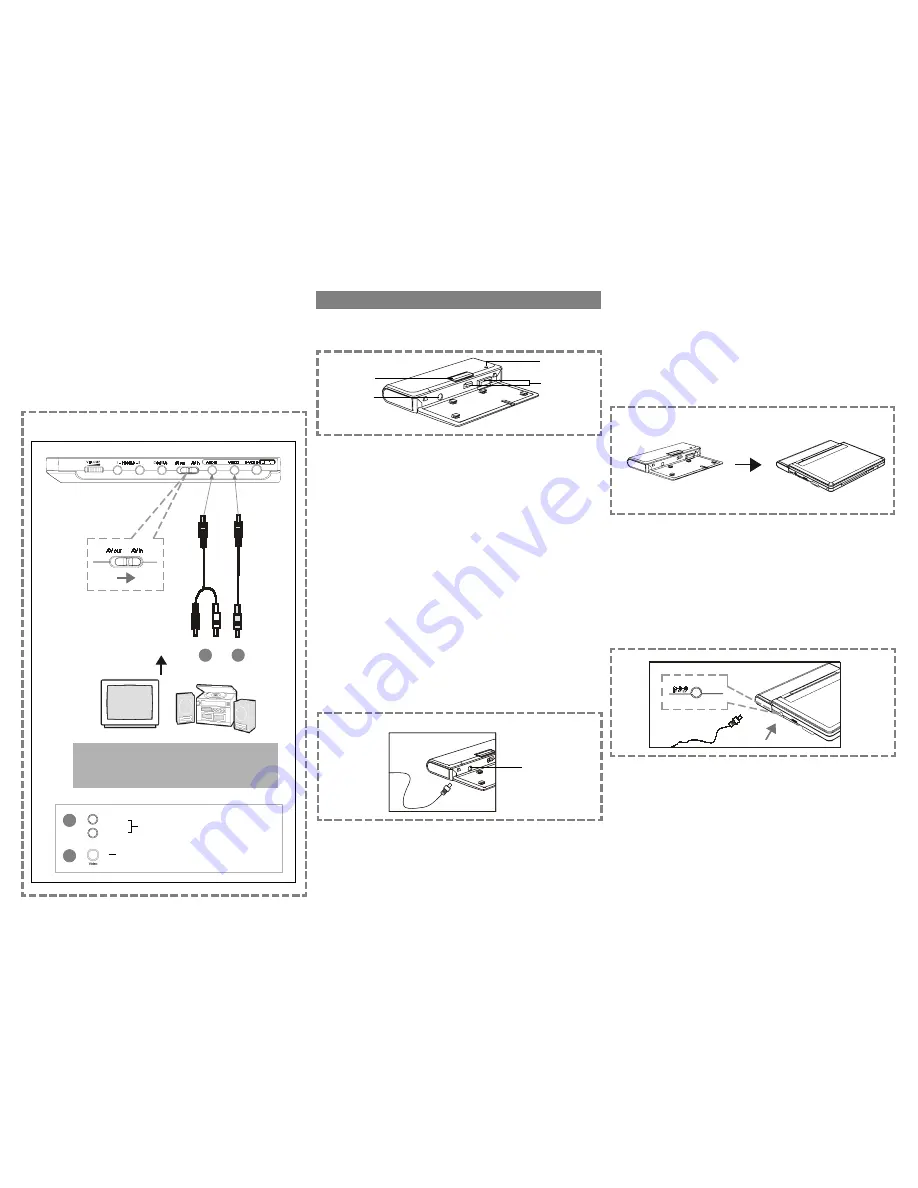
INPUT FROM EXTERNAL EQUIPMENT
You could input images and sounds from external equip-
ment by connecting this Portable DVD player to external
equipment with Audio cable or Video cable.(F)
Note:
Make sure to slide AV OUT/IN switch to AV IN.
Using the Battery Pack
(F)
(White)
(Red)
(Yellow)
1
2
A. TO CHARGE THE BATTERY PACK
DIRECTLY
STEP 1.
Connect the AC adapter(12V, 1.25A) to the DC IN
jack on the left side of the battery pack and a
household power outlet. (as figure (A) shown)
STEP 2.
The battery charge indicator will turn red and start
charging.
STEP 3.
When the battery pack is fully charged, the battery
charge indicator will turn green.
(A)
DC IN jack
“The shape of the following battery pack is only for reference; the actual shape
differs from the battery packs of different specifications.”
TV
Video output
2
Audio output
(White)
L
R
(Red)
1
Back/front panel of external equipments
Note: Make sure the external equipment supports
the audio/video output feature.
External
equipments with external output jack
(example: audio output and video output)
(C)
Battery release
button
Battery charge
indicator
DC IN jack
Battery
connectors


