background image

52

F-040735L

LAWN TRACTOR ACCESSORIES

Make your Lawn Tractor do more than you ever imagined.

The accessories shown on this page can be used on your Lawn Tractor. See the Store or Dealer where
you purchased your Lawn Tractor. If you are unable to obtain the necessary information, contact the
Central Parts Distribution Center for your area as listed in your Repair Parts Book.

Î

Î

LAWN SWEEPER
Model No. 24720

SNOW BLADE
Model No. 24478

SNOW THROWER
Model No. 24583

Made in U.S.A.

38” MULCHER KIT
Model No. 24750

40” MULCHER KIT
Model No. 24755

42” MULCHER KIT
Model No. 24758

TIRE CHAINS
Model No. 24530

(For 18x8.5 inch tire)

Model No. 24538

(For 18x9.5 inch tires)

Model No. 24525

(For 20x8 inch tire)

Model No. 24515

(For 20x10 inch tire)

Model No. 24539

(For 23x9.5 inch tire)

GRASS BAGGER
Model No. 24767
9 Bushel Capacity

(For 42” and 46”)

REAR WHEEL WEIGHTS

Model No. 24003

(For 18x9.5 inch tires)
(For 20x8 inch tires)

Model No. 24630

(For 23 inch tires)

GARDEN TILLER
Model No. 13460

GRASS BAGGER
Model No. 24744
7 Bushel Capacity

(For 38”, 40”, and 42”)

Summary of Contents for 405000x8C

Page 1: ... state laws and other laws are followed PRODUCT INFORMATION This Instruction Book contains information for several models Read and keep this book for future reference This book contains important information on SAFETY PREPARATION OPERATION AND MAINTENANCE RECORD THE FOLLOWING INFORMATION ABOUT YOUR UNIT THIS INFORMATION IS NECESSARY WHEN ORDERING PARTS OR IN CASE OF LOSS OR THEFT F 040735L BUILT I...

Page 2: ...the terms and conditions noted in this Limited Warranty we shall at our option repair or replace at no cost to the original purchaser any part covered by this Limited Warranty during the applicable warranty period In the event the battery proves defective within ninety 90 days from the date of purchase we will replace it without charge If the battery proves defective after 90 days but within one h...

Page 3: ...ompletely full D Drain fuel for off season storage D Use only unleaded gasoline D Service the air cleaner regularly D Change oil regularly Use 10W 30 oil in summer D Tune up the engine regularly D Keep equipment in efficient operating condition D Dispose of used engine oil properly SAFETY RULES Safe Operation Practices for Ride on Mowers WARNING This cutting machine is capable of amputating hands ...

Page 4: ...he watchful care of another responsible adult 2 Be alert and turn the engine off if children enter the area 3 Before and when backing look behind and down for small children 4 Never carry children or any passengers even with the blades off They may fall off and be seriously injured or interfere with the safe operation of the machine 5 Never allow children to operate the machine Instruct children i...

Page 5: ...son Never let another person ride with you on the unit or on any accessories A passenger will make the unit harder to control block the visibility or distract the operator and is dangerous to the operator the passenger and the equipment Without a passenger seat the passenger can fall from the mower or contact dangerous parts A mower is not a toy for showing off or for giving rides Never cut a wet ...

Page 6: ...the mower is not correctly assembled not operated correctly or not regularly serviced the mower can be dangerous The most important rule to follow is always use good judgement and common sense Mow safely and carefully Your mower will easily cut thick grass Fingers feet and other parts can also be cut by the blade Injuries occur when the operator does not think and reaches into the chute opening Al...

Page 7: ...y the grass bagger always stop the engine Before each use of the grass bagger check for cracks wear or deterioration Before you use the grass bagger replace a damaged part with a replacement part approved by the factory For you to have a good green lawn follow the mowing procedures below Do not cut the grass too short If you cut the grass too short you can cause the grass to become yellow or make ...

Page 8: ...stments or repairs without stopping the engine Disconnect the spark plug wire F On or near roads watch out for traffic Direct discharge away from roads F When mowing avoid areas where traction is unsure Look back before changing direction of travel F In heavy grass raise the cutting height Cut slower Stop the engine to remove clogged grass from the mower F Never remove any safety related parts F D...

Page 9: ...ystanders Away Read User Instructions Before Operating This Machine 8 WARNING Do Not Use This Machine On Slopes Greater Than 15 Degrees 9 DANGER Keep People Especially Children Away From Unit 10 DANGER No Step 11 DANGER Keep Feet And Hands Away From Rotating Blade 12 DANGER Keep Hands Away From Rotating Blade 13 DANGER Disconnect Spark Plug Wire Before Servicing Unit 14 WARNING Hot Surface 15 WARN...

Page 10: ...uction book left and right describe the loca tion of a part with the operator on the seat WARNING Before doing any assembly or mainte nance to the mower remove the wire from the spark plug PARTS BAG CONTENTS The fasteners and other loose parts are shown below The fasteners are shown full size The quantity is shown in brackets 2x82 2 Carriage Bolt 14x79 2 Wing Nut 17x47 2 Washer 1001054 2 Knob 25x3...

Page 11: ...be adjusted loosen the two wing bolts Slide the seat forward or backward along the seat adjusting holes as shown Tighten the wing bolts A Figure 1 Seat Seat Adjusting Hole Seat Hinge A B HOW TO ASSEMBLE THE STEERING WHEEL Attach the steering wheel as follows A 25x3 C 17x146 1 Make sure the front wheels point forward 2 Slide the cover over the steering post Figure 2 3 Slide the steering wheel onto ...

Page 12: ... an explosion 1 Remove the battery and battery tray 2 Remove the protective caps from the battery terminals 3 Use a 12 volt battery charger to charge the battery Charge at a rate of 6 amperes for one hour If you do not have a battery charger have an authorized service center charge the battery 4 Install the battery and battery tray Make sure the positive terminal is on the left side HOW TO INSTALL...

Page 13: ...ORTANT This unit is equipped with an internal combustion engine and must not be used on or near any unimproved forest covered brush covered or grass covered land unless the engine s exhaust system is equipped with a spark arrester meeting applicable local or state laws if any If a spark arrester is used it must be maintained in effective working order by the operator In the State of California the...

Page 14: ...HEADLIGHT SWITCH The headlight switch is the first part of the ignition switch To use the lights with the engine running turn the key to the position for the lights IGNITION SWITCH Use the ignition switch to start and stop the engine SHIFT LEVER Use the shift lever to change the speed of the unit LIFT LEVER Use the lift lever to change the height of cut PARKING BRAKE LEVER Use the parking brake le...

Page 15: ...ge Position Figure 5 1 Before you start the engine make sure the blade rotation con trol is in the DISENGAGE position 2 Move the blade rotation control to the ENGAGE position to rotate the blade s NOTE If the engine stops when you engage the blade s the seat switch is not activated Make sure you sit in the middle of the seat 3 Move the blade rotation control to the DISENGAGE position to stop the b...

Page 16: ...forward to lower the mower housing and back to raise the mower housing Figure 7 2 When you ride on a sidewalk or road move the lift lever to the highest position and move the blade rotation control to the DISENGAGE position Lift Lever Figure 7 HOW TO STOP THE UNIT 1 Completely push the clutch brake pedal forward to stop the unit Keep your foot on the pedal 2 Move the blade rotation control to the ...

Page 17: ...ease the clutch brake pedal 8 Move the throttle control to the FAST position If you need to go faster or slower stop the unit and move the shift lever to another speed setting 9 Make sure the level of cut is still correct After you mow a short distance look at the area that was cut If the mower housing does not cut level see the instructions on How To Level The Mower Housing in the Maintenance sec...

Page 18: ...manent damage can occur CARBURETOR The factory settings for the carburetor are for most conditions If the engine is operated under the following conditions you can adjust the carburetor mixture To adjust the carburetor see the engine manufacturer s instructions 1 The engine has a loss of power or does not run smooth 2 A change from summer to winter operation 3 A 40 degree change in the operation t...

Page 19: ...ck the blade If the blade is bent or damaged immediately replace the blade Also make sure the nut for the blade is tight 4 Keep the blade s sharpened Worn blades will cause the ends of the grass to turn brown 5 Do not cut or bag grass that is wet Wet grass will not discharge correctly Let the grass dry before cutting 6 Use the left side of the mower housing to trim near an object 7 Discharge the c...

Page 20: ...ion to keep the unit in good operat ing condition WARNING Before you make an inspection adjust ment or repair to the unit disconnect the wire to the spark plug Remove the wire from the spark plug to prevent the engine from starting by accident NOTE Torque is measured in foot pounds metric Nm This measurement describes how tight a nut or bolt must be The torque is measured with a torque wrench HOW ...

Page 21: ...cut correctly and can cause an accident 8 Fasten the blade with the original washers and nut Make sure the outside rim of the Belleville washer is against the blade Figure 10 WARNING Always keep the nut tight that holds the blade A loose nut or blade can cause an accident 9 Tighten the nut that holds the blade to a torque of 35 foot pounds 47 5 N m 10 Install the mower housing See How To Install T...

Page 22: ...replace the mower drive belt See How To Replace The Mower Drive Belt If replacing the belt does not correct the problem take the unit to an authorized service center 8 Move the blade rotation control to the DISENGAGE posi tion Stop the engine Disconnect the wire from the spark plug Check the operation of the blade brake Rotate the pulleys with your hand Make sure the brake pads are pressed tightly...

Page 23: ... slip when 1 going up a hill 2 pulling a heavy load or 3 the unit will not move forward Adjust the clutch as follows WARNING Before you make an inspection adjust ment or repair to the unit disconnect the wire to the spark plug Remove the wire from the spark plug to prevent the engine from starting by accident 1 Check the routing of the motion drive belt Make sure the belt is installed correctly an...

Page 24: ...h with water 1 Disconnect the black cable from the negative terminal Figure 18 2 Disconnect the red cable from the positive terminal 3 Lift the battery tray and the battery out of the unit HOW TO CLEAN THE BATTERY 1 Remove the battery 2 Wash the battery with a solution of one gallon of water and four tablespoons of baking soda sodium bicarbonate Make sure the solution does not get into the battery...

Page 25: ...or the fuel line the fuel tank must be empty If the fuel filter is dirty the engine will run rough and have less performance Remove the old filter Figure 20 Replace the old filter with a new filter Use an original equipment part See an authorized service dealer in your area Fuel Line Clips Fuel Filter Figure 20 CHECK THE TIRES Check the air pressure in the tires Tires with too much air pressure wi...

Page 26: ...e mower drive belt is against the stack pulley Also make sure the mower drive belt is not twisted 3 Attach the front hanger to the axle support with the hanger rod Fasten with the fasteners as shown See illustration F 4 Make sure the mower drive belt is between the stack pulley and the two belt guides See illustration G 5 Attach the suspension links to the lifter assembly Fasten with the washers a...

Page 27: ... 6 Loosen the left and right adjuster knobs Figure 24 Push down on each side of the mower housing Make sure both sides of the mower housing are setting on a flat surface Also make sure the lift links are loose and can easily move up or down 7 Push down on the lift links and tighten the left and right adjust er knobs Figure 24 Make sure the adjuster knobs are tight If necessary use a wrench to tigh...

Page 28: ...et Figure 28 Pull the motion drive belt over the shifter bracket Adjuster Nut Hair Pin Shift Link Shifter Bracket Motion Drive Belt Figure 28 8 To remove the motion drive belt from the stack pulley pull the front end of the belt under the stack pulley and then back between the stack pulley and the steering plate Figure 29 Motion Drive Belt Figure 29 FRONT Stack Pulley Steering Plate Belt Guides 9 ...

Page 29: ...so make sure the belt is not twisted 6 Make sure the motion drive belt is inside all the belt guides Figure 26 Figure 27 7 Attach the adjuster nut and shift link to the adjuster bracket with a hair pin Figure 28 See How To Adjust The Shift Lever 8 Attach the steering shaft assembly to the steering plate with two screws Figure 30 9 Attach the access panel Figure 30 10 Check the routing of the motio...

Page 30: ...drive belt Pull the belt retainer away from the right mandrel pulley Put the belt around the right mandrel pulley 6 Pull the belt retainer away from the left mandrel pulley Put the belt around the left mandrel pulley 7 Pull the belt retainer away from the idler pulley Put the flat side of the mower drive belt around the idler pulley 8 Make sure the V side of the mower drive belt is against the man...

Page 31: ...ake sure the washer hold the hub caps in place Rear Wheel 1 Install the washers and spacer onto the axle as shown in Figure 34 2 Mount the square key in the key slot See Figure 34 3 Make sure the valve stem is to the outside of the tractor Align the slot in the rear wheel with the square key Slide the rear wheel on the axle 4 Fasten the rear wheel with washer and e ring 5 If your model has hub cap...

Page 32: ...the lever for the blade rotation control to the DISENGAGE position 4 Again clean the top of the mower housing 5 After you cut the grass clean the bottom of the mower housing STORAGE over 30 days At the end of each year prepare the unit for storage as follows THE ENGINE For storage information see the the engine manufacturer s instructions THE BATTERY 1 Remove the battery 2 Clean the battery termin...

Page 33: ...l tank Clean the fuel line Replace the fuel filter PROBLEM A hot engine causes a decrease in power 1 Clean the air screen 2 Check the oil 3 Adjust the carburetor 4 Replace the fuel filter PROBLEM Excessive vibration 1 Replace the blade 2 Check for loose engine bolts 3 Decrease the air pressure in the tires 4 Adjust the carburetor 5 Check for a damaged belt or damaged pulley Replace the damaged par...

Page 34: ... Montana counties Flathead Lake Lincoln Mineral Missoulo Ravalli Sanders Oregon Washington CPT CANADA POWER TECHNOLOGY LIMITED Mississauga 161 Watline Avenue Mississauga Ontario L4Z 1P2 905 890 6900 1 800 861 9559 Edmonton 101 10411 178th Street Edmonton Alberta T5S 1R5 780 453 5791 1 800 861 9559 Ville St Laurent 234 Migneron Street Ville St Laurent Quebec H4T 1Y7 514 731 3559 1 800 861 9559 Cana...

Page 35: ...NOTES 35 F 040735L ...

Page 36: ...x8C 36 F 040735L CHASSIS HOOD 58 58 57 1 2 3 4 5 6 7 8 9 10 11 12 13 14 15 16 17 18 19 20 24 21 22 23 25 26 27 30 29 28 51 31 32 33 34 35 31 36 37 38 16 39 40 41 42 49 16 16 43 44 45 16 46 47 16 16 2 50 70 53 54 52 16 48 59 55 ...

Page 37: ...sing Left Headlamp 29 1001545 Lens Right 30 1001543E700 Housing Right Headlamp 31 26x270 Screw 32 26x238 Screw 33 1001491 Bearing Steering 34 1001584E701 Dash 35 26x201 Screw 36 093007E701 Panel Access 37 095318E701 Support Dash 38 1001270E701 Bracket Rear Hanger 39 094085E700 Support Left Grille 40 094007E701 Axle Hanger 41 094084E700 Support Right Grille 42 009x58 Bolt Shoulder 43 1001268E701 Fr...

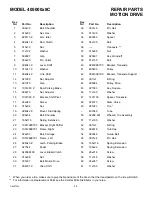
Page 38: ...x8C 38 F 040735L MOTION DRIVE 1 2 3 4 5 6 7 8 9 10 12 11 13 14 15 16 60 18 19 20 17 21 6 55 22 23 25 26 27 28 30 31 32 33 35 17 41 29 17 40 39 40 38 45 37 46 49 48 50 53 51 52 47 36 8 61 43 56 44 54 54 5 5 57 34 59 42 58 37 24 ...

Page 39: ... 28 94038E700 Lever Brake Clutch 29 015x98 Nut 30 037x87 Belt Motion Drive 31 094031 Z Yoke Shift 32 0031x6 Pin Hair 33 017x38 Washer 34 690369 Spacer 35 06x105 Bolt 36 Transaxle 37 015x88 Nut 38 020697 Key Woodruff 39 01x155 Bolt 40 094008E700 Bracket Transaxle 41 690409 Pulley 42 094433E700 Bracket Transaxle Support 43 0011x7 E Ring 44 095094 Pulley Drive 45 021553 Key Square 46 17x160 Washer 47...

Page 40: ...R PARTS MODEL 405000x8C 40 F 040735L STEERING 1 2 4 5 6 7 8 9 10 11 12 15 6 13 30 30 30 17 18 30 14 30 19 16 26 24 21 22 23 25 27 24 25 22 23 28 29 25 25 30 33 35 36 19 31 31 32 38 20 20 37 40 39 34 3 41 43 ...

Page 41: ...lt 19 030x49 Pin Cotter 20 690150 Bearing 21 094576E701 Spindle Assembly Left 22 01x111 Bolt 23 17x104 Washer 24 017x53 Z Washer 25 015x84 Nut Flange 26 690210E701 Axle Assembly 27 095329E701 Drag Link Left 28 094575E701 Spindle Assembly Right 29 095328E701 Drag Link Right 30 26x249 Screw 31 091334 Bearing Wheel 32 024373 Stem Valve 33 091912 Tire 407924 Tube 34 094578 601 Wheel and Tire Assembly ...

Page 42: ...8C 42 F 040735L MOWER HOUSING SUSPENSION 1 2 3 4 5 6 7 8 14 14 9 10 11 12 12 11 13 14 15 16 17 18 19 20 20 21 22 22 23 24 24 24 25 25 11 15 27 26 26 24 25 15 33 34 36 37 32 32 38 31 24 30 25 41 43 15 30 31 44 42 24 7 40 39 39 45 ...

Page 43: ...701 Bracket PTO 18 165x119 Spring 19 690394E701 Crank PTO 20 690212E701 Link Lift 21 690122E701 Link Lift Handle 22 17x168 Washer 23 017x57 Washer 24 0031x4 Pin Hair 25 017x91 Z Washer 26 002x85 Bolt Carriage 27 1001111E701 Lever Assembly Lift 30 094067 Pin 31 094055E701 Bracket Rear Suspension 32 690151 Spacer Lifter 33 009x53 Bolt Shoulder 34 094015E700 Bracket Pivot 36 17x191 Washer 37 015x84 N...

Page 44: ... 25 24 12 8 22 20 19 9 5 47 10 13 14 11 15 16 17 51 18 5 22 22 21 23 22 17 33 50 53 14 22 26 5 28 5 48 23 22 17 22 22 6 27 24 26 10 11 8 20 21 5 23 22 30 29 17 14 13 47 15 9 5 19 31 32 33 44 43 42 33 33 34 41 36 42 37 38 39 40 38 39 40 35 37 36 34 33 33 33 5 23 32 45 17 46 17 53 ...

Page 45: ... Bolt Shoulder 25 690408E701 Arm Idler 26 166x41 Spring 27 094047E701 Pad Assembly Right Brake 28 094145E701 Bracket Assembly Brake 29 166x42 Spring 30 094142E700 Bracket Suspension 31 091770E700 Plate 32 015x88 Nut Flange 33 002x53 Bolt Carriage 34 1001200 Mandrell Includes Key No 6 35 690539E701 Bracket Suspension 36 690411 Adapter Blade 37 095103E701 Blade 38 17x166 Washer 39 17x165 Washer 40 1...

Page 46: ...REPAIR PARTS MODEL 405000x8C 46 F 040735L ENGINE MOUNT 1 6 7 8 9 10 11 12 13 14 15 15 21 22 22 21 2 3 4 5 26 30 31 9f 9a 9d 9b 9b 9c 23 23 9e 32 ...

Page 47: ...9 Gasket Muffler 9c 1001737 Adapter Muffler 9d 06x103 Screw Adapter 9e 009x59 Bolt Muffler 9f 092378 Lock Screw 10 0025x7 Bolt Engine Mount 11 690439 Z Stack Pulley Assembly 12 019x35 Lockwasher 13 01x140 Bolt Hex 14 17x170 Washer 15 26x249 Screw 21 094384 Guide Belt 22 015x79 Z Nut Flange 23 094066 Guide Belt 26 26x253 Screw 30 1001744 Shield Heat 31 26x263 Screw 32 06x104 Screw For information o...

Page 48: ...REPAIR PARTS MODEL 405000x8C 48 F 040735L ELECTRICAL SYSTEM 24x32 94159 24x31 92556 94613 21075 94136 94136 MAIN HARNESS 250x117 REAR HARNESS 250X67 LIGHT HARNESS 250X92 1 3 4 5 6 8 9 7 10 11 2 ...

Page 49: ...witch Ignition 020729 Key Ignition 091489 Nut Hex 091488 Cap Ignition 4 094136 Switch Limit 5 302031 Fuse 407078 Holder Fuse 6 094613 Solenoid 26x229 Screw Mounting 15x116 Locknut 7 024x32 Cable Battery Ground 26x213 Screw Ground Cable 8 021075 Battery 002x82 Bolt Carriage 014x79 Wingnut 690604 Boot Battery Positive 9 250x67 Harness Seat Switch Wire 10 094159 Switch Seat Sensor 11 024x31 Cable ...

Page 50: ...50 F 040735L ...

Page 51: ... Control 22 Clutch 23 Drive Brake 23 Filter Fuel 25 Fuse 32 Headlight 32 Install Wheels 31 Lubrication 25 Mower Housing Clean 32 Install 26 Level 27 Remove 26 Muffler 20 Storage 32 Maintenance Chart 20 Motion Drive Belt Adjust 23 Replace 28 Mower Drive Belt Adjust 22 Replace 30 Mower Housing Clean 32 Cutting Height 16 Install 26 Level Adjustment 27 Operation 17 Remove 26 Muffler 20 Spark Arrester ...

Page 52: ...NOW BLADE Model No 24478 SNOW THROWER Model No 24583 Made in U S A 38 MULCHER KIT Model No 24750 40 MULCHER KIT Model No 24755 42 MULCHER KIT Model No 24758 TIRE CHAINS Model No 24530 For 18x8 5 inch tire Model No 24538 For 18x9 5 inch tires Model No 24525 For 20x8 inch tire Model No 24515 For 20x10 inch tire Model No 24539 For 23x9 5 inch tire GRASS BAGGER Model No 24767 9 Bushel Capacity For 42 ...

Reviews: