OPERATION
19
BEFORE OPERATING SNOWTHROWER
Check the fasteners. Make sure all fasteners are tight.
On electric start models, the unit was shipped with the
starter cord plugged into the engine. Before operating,
unplug the starter cord from the engine.
NOTE: This snowthrower was shipped WITH OIL in the
engine. See
Check the Oil (Before Starting Engine)
instructions in this section before starting engine.
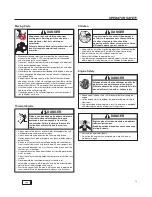
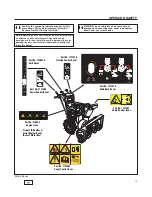
DANGER: The discharge chute contains a rotating
impeller to throw snow. Never clear or unclog the
discharge chute with your hands. Fingers can quickly
become caught and traumatic amputation or severe
laceration will result. Always use a clean-out tool to
clear or unclog the discharge chute.
SNOWTHROWER SAFETY TESTS
Test 1 - Auger/Impeller
• Release auger control (right-hand).
• Auger/impeller stops in less than 5 seconds.
Test 2 - Traction Drive
• Release traction control (left-hand).
• Snowthrower forward/reverse motion stops.
Test 3 - Free-Hand Control (if equipped)
• Engage auger control and traction control.
• Release auger control immediately followed by the traction
control (a) stops auger/impeller in less than 5 seconds, and (b)
stops forward/reverse motion of snowthrower.
WARNING:
• Hand contact with the rotating impeller inside the
discharge chute is the most common cause of
injury associated with snowthrowers.
• This snowthrower is capable of amputating hands
and feet, and throwing objects. Read and observe
all the safety instructions in this manual. Failure to
do so will result in death or serious injury.
OPERATE THE SNOWTHROWER
CAUTION: Operation with a Snow Cab. Wind may blow
exhaust gasses back towards the operator. If you notice
the smell of exhaust, change direction of operation.
NOTE: Always release the traction control lever before mov-
ing the speed select lever.
4. Fully press and hold the auger control lever (
B
, Figure 7) to
engage the auger rotation. Releasing the auger control lever
will disengage the auger - unless the Free-Hand™ control is
activated.
5. Fully press and hold the traction/Free-Hand™ control lever
(
C
) to engage the traction drive and begin moving the snow
thrower. To disengage the traction drive, completely release
the lever.
6. When BOTH levers are pressed, the Free-Hand™ control is
activated. This allows you to release the auger control lever to
use the other controls. The auger will continue to rotate until
the traction/Free-Hand™ control lever is released.
NOTICE: Do not throw snow toward a building as hidden
objects could be thrown with sufficient force to cause
damage.
1. Start the engine.
Start the Engine
in this section.
2. Turn the chute rotation crank (
A
, Figure 7) to set the direction
(left or right) of the discharge chute. See
Discharge Chute
and Deflector
in this section.
3. Loosen the wing nut (
A
, Figure 8) on the side of the discharge
chute to set angle (up or down) the snow is thrown. See
Dis-
charge Chute and Deflector
in this section.
CAUTION: Before operating, make sure the area in
front of the snowthrower is clear of bystanders or
obstacles.
Summary of Contents for 1695859
Page 2: ...2...
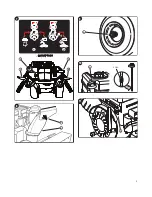
Page 3: ...B 1 2 A B C 4 E A B D C 3 4 A 3 5 A B...
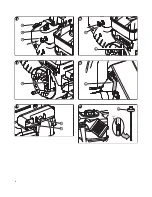
Page 4: ...3 1 1 2 x 2 7 16 6 7 5B 5A 2 17 lb ft 23 Nm 4 8 12 13 15 lb ft 20 Nm 11 10 9 4 6...
Page 5: ...5 8 B FULL 10 A A 11 A 1 2 Free HandTM Control 7 B A D C 9 A...
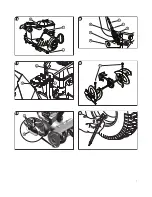
Page 6: ...16 A Full 17 A 6 12 A B C 13 14 15 A A B A B...
Page 7: ...7 20 B A 19 A B C 18 A B C 1 32 0 8mm 21 D E A C B F 22 A 23...
Page 8: ...8...
Page 30: ...www murray com 30...
Page 52: ...www murray com 30...
Page 74: ...30 www murray com...

