MAINTENANCE
17
F-031306L
SPARK PLUG
Check the spark plug every 25 hours. Re-
place the spark plug if the electrodes are
pitted or burned or if the porcelain is
cracked.
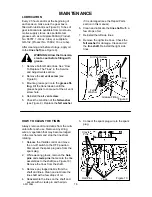
1.
Make sure the spark plug is clean.
Clean the spark plug by carefully scrap-
ing the electrodes (do not sand blast or
use a wire brush).
2.
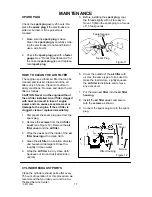
Check the spark plug gap with a feeler
gauge. See “Product Specifications” for
the correct spark plug gap and replace-
ment spark plug.
3.
Before installing the spark plug, coat
the threads lightly with oil for easy re-
moval. Tighten the spark plug to a torque
of 15 foot-pounds.
Figure 11
Spark Plug
Feeler Gauge
0.035”
HOW TO CLEAN THE AIR FILTER
The engine uses a foam air filter that can be
cleaned and reused. Clean and oil the air
filter every 25 hours. Clean more often in
dusty conditions. Remove and clean the air
filter as follows:
CAUTION: Never run the engine without
the air filter installed. An air filter clogged
with dust can result in loss of engine
power and can cause excessive wear or
damage to the engine. If the air filter is
clogged, clean or replace immediately.
1.
Disconnect the spark plug wire from the
spark plug.
2.
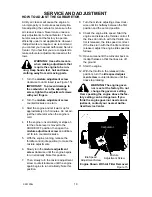
Remove the screws from the air filter
cover (see Figure 12). Remove the air
filter cover and the air filter.
3.
Wipe the cover and the inside of the air
filter housing with a clean cloth.
4.
Clean the air filter in a solution of water
and household detergent. Rinse tho-
roughtly in clean water.
5.
Wrap the air filter in a dry clean cloth.
Squeeze out (do not twist) all solution
until dry.
6.
Cover the outside of the air filter with
oil. Use the same type of oil as used to
make the fuel mixture. Lightly squeeze
the air filter to distribute and remove
any excess oil.
7.
Put the clean air filter into the air filter
housing.
8.
Install the air filter cover and secure
with the screws as shown.
9.
Connect the spark plug wire to the spark
plug.
Figure 12
Air Filter
Cover
Screw
Filter Housing
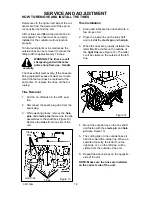
CYLINDER EXHAUST PORTS
Clean the cylinder exhaust ports after every
75 hours of operation. For this procedure, we
recommend that you take your unit to a Au-
thorized Service Center.
Summary of Contents for 11052x4D
Page 28: ...NOTES 28 F 031306L...
Page 50: ...NOTES 50 F 031306L...
Page 71: ...NOTA 71 F 031306L...


