


Chapter 2 – Installing the Modem
13
MT9234ZBA-USB User Guide
Installing the Modem Driver for use with Windows Vista
1.
Power up your computer.
2.
If you have not already done so, connect the modem’s USB cable to a USB port on the computer and connect the phone
line between the modem and a telephone wall jack.
3.
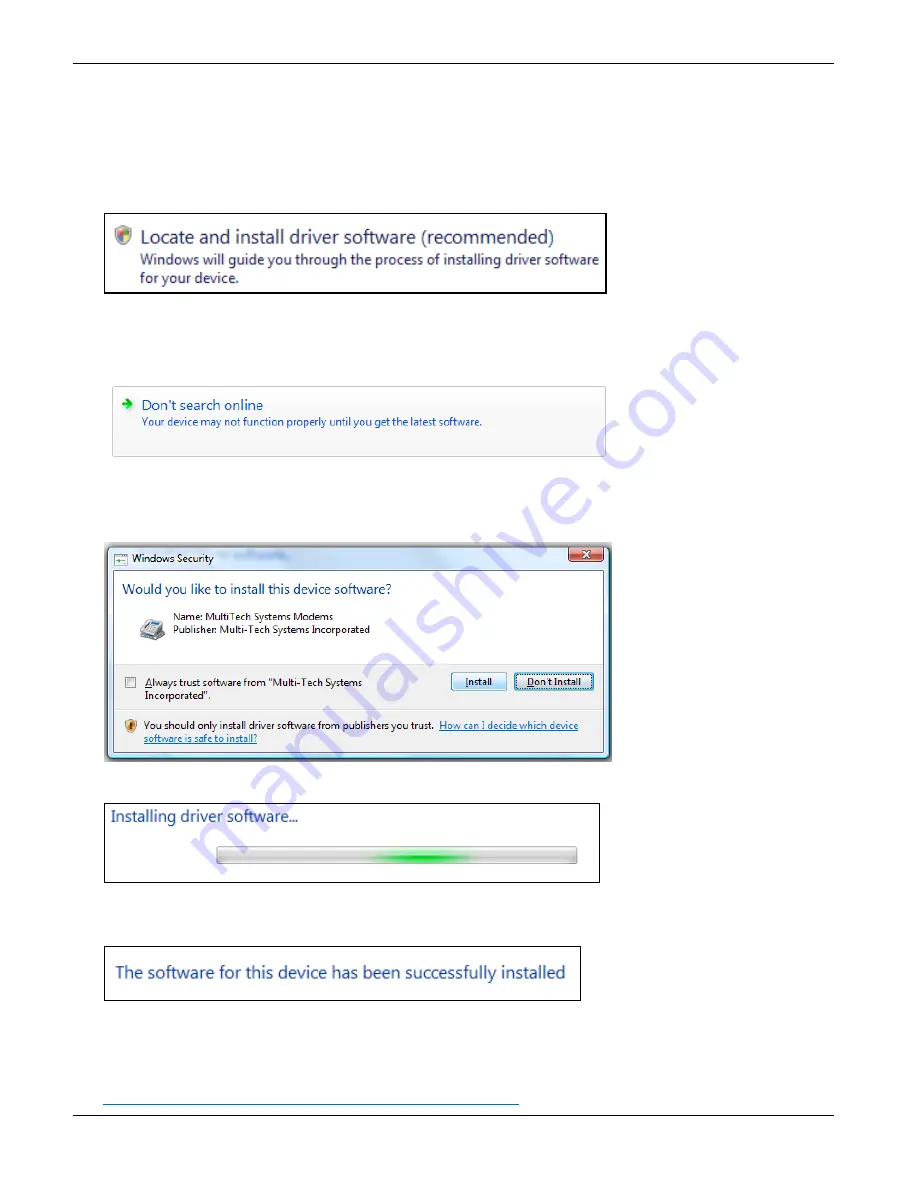
Windows detects that the new modem is present and start the New Hardware wizard. Select the ‘
Locate and install
driver software (recommended)
’ option.
Note:
As you install the product Vista may present you with the ‘User Account Control’ (hereafter referred to as the
UAC). If so, click
Continue
to go on with the installation.
4.
The New Hardware wizard asks if you want to search online for drivers, select ‘
Don’t search online
.’
5.
Navigate to the location where you stored the driver file that you downloaded from the Multi-Tech website. Click
Next
.
6.
After finding the necessary file, a pop-up window for Windows Security asks if you want to install the device software
from Multi-Tech Systems Incorporated. Click
Install
.
7.
Windows installs the components for the modem.
8.
When the message “The software for this device has been successfully installed” message appears, Windows installed
the driver software for this device: MultiMobile MT9234ZBA-CDC.
9.
Click
Close
.
After you install the modem and set up Internet access, ensure the MT9234ZBA-CDC works by registering the modem. To
do so, go to the following website and follow the instructions there:
http://www.multitech.com/en_US/TOOLS/Forms/register/warranty.asp


