background image

Customer Service Center

Decatur, Illinois

800.798.3131

www.muellercompany.com/hydro-guard

[email protected]

The content of this manual is the sole and exclusive property of Mueller Co. 

Unauthorized distribution or reproduction strictly prohibited.

      WARNING:


Platform weight is approximately 60 lbs. Use proper lifting tools and 

techniques when loading and/or unloading device and lowering flushing 

components into housing to avoid accidental drops and subsequent 

damage to the device. 

1. Each person involved in the assembly, installation and/or maintenance 

of the Hydro-Guard Automatic Flushing Device must read this manual 

carefully and follow all instructions prior to performing any installation or 

maintenance procedures involving the Unit.

2. Verify the drainage path prior to installation to ensure that pedestrian 

and vehicular hazards will not be created by the installation and use of the 

Hydro-Guard Automatic Flushing Device (In areas in which freezing may 

occur, special attention should be given to this procedure).

3. 

Never

 assemble, disassemble, or perform Hydro-Guard maintenance 

unless the influent supply valve has been closed, verified and secured, 

and internal piping pressure has been relieved.

4. Always use all necessary safety equipment and follow all recommended

procedures when installing, operating and maintaining the Hydro-Guard

Automatic Flushing Device.

5. Perform annual safety inspections and replace worn or defective parts.

6. Operate the Hydro-Guard Automatic Flushing Device only when fully 

installed and correctly assembled.

      cAutIoN:

The recommended optimal operating pressure for a Hydro-Guard

®


Automatic Flushing System is between 20psi and 120psi. In the event 

pressure may exceed 120psi it is recommended that a Pressure Regulating 

Valve be installed ahead of the Hydro-Guard flushing system.

!

Reliable Connections

TM

HG-8

Warm Climate 

Flushing

System

o p e r at i n g   i n s t r u c t i o n s   m a n u a l


TAblE OF COnTEnTS   PAGE


Installation Instructions 

2-3


Programming Unit 

3-6


Assembly, Disassembly &  


Maintenance Instructions 

7


Troubleshooting 8


Upgrades & Battery Replacement 

9


Parts 10


Notes 11


HYDRO-GUARD

®

!

Summary of Contents for HYDRO-GUARD HG-8

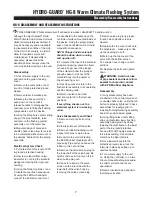
Page 1: ...may occur special attention should be given to this procedure 3 Never assemble disassemble or perform Hydro Guard maintenance unless the influent supply valve has been closed verified and secured and...

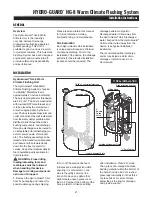
Page 2: ...limate Flushing Unit The Hydro Guard HG 8 Warm Climate Flushing System is housed in a Mueller Meter Box that is approximately 21 inches in diameter The bury depth options for this design are 36 or 42...

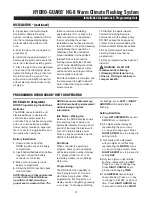
Page 3: ...r on rear half of the NODE lines up with front half ensuring a proper seal is created Also The not flashing press LEFT or RIGHT ARROWS until desired item is flashing Setting Date Time 1 Press RETURN E...

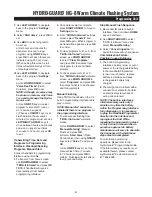
Page 4: ...The START TIME will be displayed flashing along with the program letter A B or C and start time number 1 2 3 or 4 in the upper left Up to 4 different start times can be set for each program 3 Use or k...

Page 5: ...built in programming interface NOTE In that the handheld was designed by its manufacturer to program irrigation systems many displays use irrigation terminology In the following instructions in such c...

Page 6: ...en only Valve 1 is used to manage the Hydro Guard unit b Use ON OFF keys to select program A B and or C one or more can be assigned c Then use ON OFF keys to set Flush duration hours and or minutes fo...

Page 7: ...e foam insulation pad 4 Backup to stress point then push down on the camlock release handles to disengage the camlocks prior to lifting the flushing components out of the device 5 Using the lifting ho...

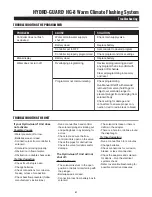
Page 8: ...debris in the adapter There is a hole in or debris around the diaphragm Try this Correction Run a manual flush for 2 minutes Change batteries Check connections for corrosion breaks or lack of connecti...

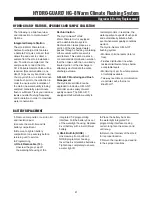
Page 9: ...minute flush is sufficient Track your residual levels and alter flushing frequency and or duration in order to maximize water conservation remotely monitor in real time the water quality at a specific...

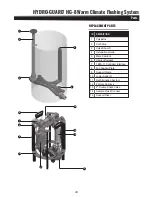
Page 10: ...15 ID Description 1 Valve Box 2 Curb Stop 3 Valve Shut off 4 Installation Guide 5 Male Camlock 6 Camlock Release 7 TB0S 11 Controller Interface 8 Top Support Plate 9 Support Frame 10 Lower Support 11...

Page 11: ...hydro guard HG 8 Warm Climate Flushing System Notes 11...

Page 12: ...Co LLC its affiliates or other third parties Products marked with a section symbol are subject to patents or patent applications For details visit www mwppat com These products are intended for use in...

Reviews: