


20
21
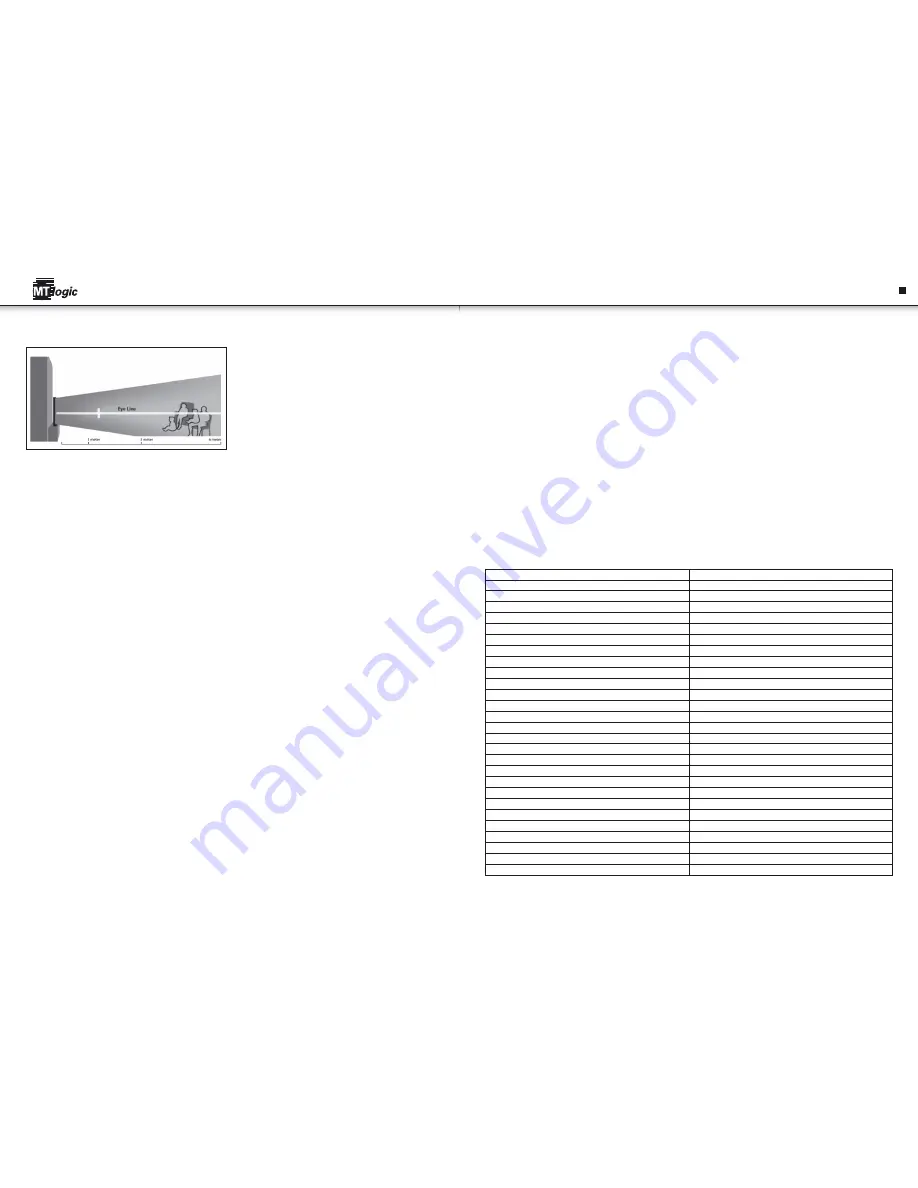
In this example, the viewers are sitting at a good distance. They are viewing the TV straight-on, close to the ideal eye line. They will experience
good 3D quality.
In this example, the viewers have mounted the TV on a Tilt Mount. They are at the correct distance and they are viewing the TV straight-on, close
to the ideal eye line. They will experience good 3D picture quality.
troubleshootIng & technIcal support
the tV displays "no signal".
• Press the source button on the remote control to select a different source.
• If you are using cable TV, satellite, or antenna connected directly to the TV, scan for channels. See "Connecting your devices".
there is no power.
• Ensure the TV is plugged into a working electrical outlet.
• Ensure the power cable is securely attached to the TV.
• Press the Power/Standby button on the remote or press the Power button on the side of the TV to turn the TV on.
the power is on, but there is no image on the screen.
• Ensure all cables are securely attached to the TV.
• Ensure all devices are connected correctly. Devices differ; see your device's user manual for details.
• Adjust Brightness, Contrast, or Backlight. See Adjusting the Picture Settings on page 15.
• Press the source button on the remote to select a different source.
there is no sound.
• Press Volume Up on the remote control.
• Press the MUTE button on the remote to ensure mute is off.
• Check the audio settings. See Adjusting the Audio Settings on page 18. Ensure the speakers are set to On.
• Ensure no headphones are connected to the TV.
• Check the audio connections of external devices (Blu-ray player, game console, cable/satellite box) that are connected to the TV.
• If you are using an antenna, the signal strength of the channel may be low. Ensure your antenna is connected securely to the TV and move the
antenna around the room or close to a window for the best signal.
the colours on the tV don't look right.
• Adjust the Colour and Tint settings in the Picture menu. See Adjusting the Picture Settings on page 15.
• Reset the picture settings.
• Check all cables to ensure they are securely attached.
the buttons on the remote aren't working.
• Ensure you are only pressing one button at a time.
• Point the remote directly at the TV when pressing a button.
• Replace the remote batteries with new ones. See "Replacing the batteries".
the image quality is not good.
• For the best image quality, view high-definition programs using digital sources. Connect your devices with HDMI cables.
• If you are using an antenna, the signal strength of the channel may be low. Ensure your antenna is connected securely to the TV and move the
antenna around the room or close to a window for the best signal.
the picture is distorted.
• Nearby electrical devices may be interfering with the TV. Separate the TV from electrical appliances, cars, or fluorescent lights.
• Ensure all cables are securely attached.
the display image does not cover the entire screen.
• If you are in RGB mode (computer), ensure that H-Size and V-Position in the on-screen menu are set correctly.
• If you are using TV, AV or Component with 480i input, press the WIDE button on the remote to change the screen mode.
the tV has pixels (dots) that are always dark or always lit.
• Your HDTV is precision-manufactured using an extremely high level of technology. However, sometimes pixels may not display correctly. These
types of occurrences are inherent to this type of product and do not constitute a defective product.
I see "noise" or static on the screen.
• When your TV's digital capabilities exceed a digital broadcast signal, the signal is up-converted (improved) to match your V's display
capabilities. This up-converting can sometimes cause irregularities in the image.
• If you are using an antenna, the signal strength of the channel may be low. Ensure your antenna is connected securely to the TV and move the
antenna around the room or close to a window for the best signal.
When I change source, the volume changes.
• The TV remembers the volume level on each input source. If the volume level on the new input source is higher or lower than the level on the
source you switch from, the difference may be noticeable.
• Use the Volume Up/Down buttons on the remote to adjust the volume.
When I change source, the display image changes size.
• The TV remembers the viewing mode on each input source. If the viewing mode on the new source differs from the one on the input source
you switch from, the difference may be noticeable.
technIcal specIfIcatIon
Screen Size:
42"
Dimensions w/ Stand:
1014 x 624 x 50 mm
Dimensions w/o Stand:
1014 x677 x 256 mm
Weight w/ Stand:
16,7 Kg
Weight w/o Stand:
14,1 Kg
TV Type:
LCD with LED Backlight
Refresh Rate:
60 Hz
Maximum Resolution:
1920x1080
Pixel Pitch:
0.4845 x 0.4845mm
Dynamic Contrast Ratio:
50,000:1
Response Time:
6 ms
Brightness:
360 cd/m2
2D Viewing Angle:
178° (H) x 178° (V)
HDMI Inputs:
3
Component Video Inputs:
1
S-Video Inputs:
1
RF/Coaxial Input:
1
USB Ports:(Support MPEG 4)
3 (1+2 SMART TV)
RGB Inputs:
1
OSD Language:
English, Dutch, German, French, Spanish, Portuguese
Number of Speakers
2
Watts/Channel
10 W
DTV :
DVB-T / DVB-C
Voltage Range:
100~240 VAC @ 50/60Hz
Power Consumption:
100 W
Standby Power Consumption:
<1 W
Ethernet Ports:
1
Wireless (WiFi):
802.11n
en
Instruction Manual
Instruction Manual


