background image

Overview

1-4

1-5

Wind Top Series

Overview

1-4

1-5

Wind Top Series

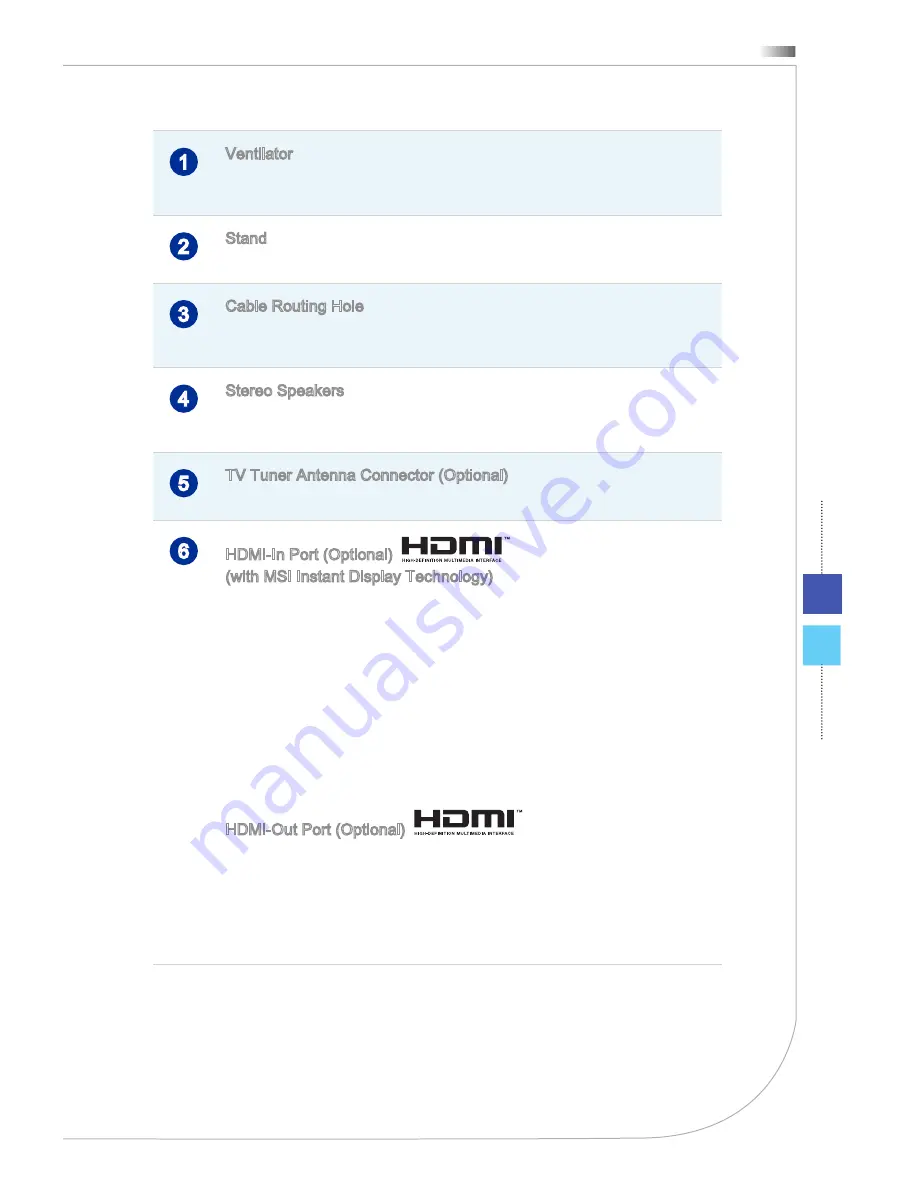
1

Ventilator

The ventilator on the enclosure is used for air convection and to prevent the 

equipment from overheating. Do not cover the ventilator.

2

Stand

Use this stand to position your system on a flat and stable surface.

3

Cable Routing Hole

Route the cables through the cable routing hole to avoid cable spaghetti when 

connecting devices.

4

Stereo Speakers

The built-in stereo speakers deliver high quality sound blaster with stereo sys-

tem.

5

TV Tuner Antenna Connector (Optional)

This connector is provided for digital TV tuner antenna.

6

HDMI-In Port (Optional)  

(with MSI Instant Display Technology)

The High-Definition Multimedia Interface (HDMI) is an all-digital au-

dio/video  interface  capable  of  transmitting  uncompressed  streams. 

HDMI supports all TV format, including standard, enhanced, or high-

definition video, plus multi-channel digital audio on a single cable.

With  MSI  Instant  Display  Technology,  when  you  connect  power  to 

the AIO PC successfully, the monitor will automatically enter “stand 

by” mode without pressing the power button. When devices are con-

nected to the HDMI-in port, the monitor will be turn on immediately. 

You can also switch the modes through the Monitor Power / Mode 

Button on the side panel if you have already turned on your AIO PC. 

This technology helps to save more energy for your system.

HDMI-Out Port (Optional)  

The High-Definition Multimedia Interface (HDMI) is an all-digital audio/video in-

terface capable of transmitting uncompressed streams. HDMI supports all TV 

format, including standard, enhanced, or high-definition video, plus multi-chan-

nel digital audio on a single cable.

Please refer to the printed icon on the chassis for the exact position of HDMI-

In Port and HDMI-Out Port.

Summary of Contents for Wind Top AE2212 Series

Page 1: ...Wind Top AE2212 Series All in One AIO PC MS AC91 92 System G52 AC911X1 ...

Page 2: ...ew 1 3 System Specifications 1 10 Component Replacement Upgrade 1 12 2 Getting Started 2 1 Safety Comfort Tips 2 2 Hardware Setup 2 3 3 System Operations Windows 7 3 1 System Booting Setup for the first time 3 2 Network Connection under Windows 3 3 THX TruStudio PRO Optional 3 8 On Screen Display OSD 3 11 Power Management 3 14 System Recovery Tool 3 16 4 System Operations Windows 8 4 1 System Boot...

Page 3: ...e reserve the right to make changes without notice Trademarks All trademarks are the properties of their respective owners MSI is a registered trademark of Micro Star Int l Co Ltd Intel is a registered trademark of Intel Corporation Realtek is a registered trademark of Realtek Semiconductor Corporation Windows is a registered trademark of Microsoft Corporation THX and THX TruStudio PRO are tradema...

Page 4: ...y the manu facturer within 5 years at most since the product has been discontinued depending on the official regulations declared at the time Please contact the manufacturer via http support msi com for the detailed information about the acquisition of spare parts Technical Support If a problem arises with your system and no solution can be obtained from the user s manual please contact your place...

Page 5: ...ean Parliament and the Council MSI provides the information of chemical substances in products at http www msi com html popup csr evmtprtt_pcm html Battery Information European Union Batteries battery packs and accumulators should not be disposed of as unsorted household waste Please use the public collection system to return recycle or treat them in compliance with the local regulations Taiwan Fo...

Page 6: ...ower outlet Do not disable the protective earth pin from the plug The equipment must be connected to an earthed mains socket outlet Always unplug the AC power cord before installing any add on card or module to the equipment Always disconnect the AC power cord or switch the wall socket off if the equipment would be left unused for a certain time to achieve zero energy consumption The ventilator on...

Page 7: ...ec tion 820 93 Grounding of Outer Conductive Shield of a Coaxial Cable Always keep the strong magnetic or electrical objects away from the equipment If any of the following situations arises get the equipment checked by service personnel The power cord or plug is damaged Liquid has penetrated into the equipment The equipment has been exposed to moisture The equipment does not work well or you can ...

Page 8: ...o or television reception which can be determined by turning the equipment off and on the user is encouraged to try to correct the interference by one or more of the measures listed below Reorient or relocate the receiving antenna Increase the separation between the equipment and receiver Connect the equipment into an outlet on a circuit different from that to which the receiver is connected Consu...

Page 9: ...oductos al termino de su período de vida Italian Italiano In base alla Direttiva dell Unione Europea EU sullo Smaltimento dei Materiali Elettrici ed Elettronici Direttiva 2002 96 EC in vigore dal 13 Agosto 2005 prodotti appartenenti alla categoria dei Materiali Elettrici ed Elettronici non possono più essere eliminati come rifiuti municipali i produttori di detti materiali saranno obbligati a riti...

Page 10: ...fied Chinese 简体中文 欧盟已制订有关废电机电子设备法令 亦即自2005年8月 13日生效的2002 96 EC 明文规定 电机电子设备产品 不可再以都市废弃物处理 且所 有相关电子设备制造商 均须在产品使用寿命结束后进行回收 Japanese 日本語 2005年8月13日以降にEU加盟国を流通する電気 電子製品には WEEE指令によりゴミ箱に 印のリサイクルマークの表示が義務づけられており 廃棄 物として捨てることの禁止とリサイクルが義務づけられています Korean 한국어 2005년 8월 13일자로 시행된 폐전기전자제품에 대한 유럽연합 EU 지 침 지침 2002 96 EC에 의거하여 전기전자제품 은 일반 쓰레기로 폐기할 수 없으며 제품 의 수명이 다하면 해당 전자제품의 제조업체가 이러한 제품을 회수할 책임이 있습니다 Vietnam Tieng...

Page 11: ...ktiv Waste Electrical and Electronic Equipment Direktiv 2002 96 EC vilket trädde i kraft 13 augusti 2005 kan inte produkter från elektriska och elektroniska utrustningar kastas i den vanliga hush ållssoporna längre och tillverkare av inbyggd elektronisk utrustning kommer att tvingas att ta tillbaka sådan produkter när de är förbrukade Finnish Suomi Euroopan unionin EU 13 8 2005 voimaan tulleen säh...

Page 12: ...и производителите на такова оборудване са задължени да приемат обратно съответните продукти в края на експлоатационния им период Croatian Hrvatski U okviru Direktive Europske Unije EU o Otpadnim električnim i elektroničkim uređajima Direktiva 2002 96 EC koja je na snazi od 13 kolovoza 2005 električni i elektronički uređaji se ne smiju više bacati zajedno s kućnim otpadom i proizvođači su obvezni z...

Page 13: ... a mirror screen which displays the sim plicity of modern individualism and the comfort of home With a touchscreen display flawless audio video capa bilities and intuitive user interface it blends technology with life making computers easier and more fun to use suitable for the whole family ...

Page 14: ...lay Wiper Driver Utility Disk User Manual Quick Guide Keyboard Optional Mouse Optional Stylus Optional Please contact us immediately if any of the items is damaged or missing The illustrations are for reference only and your packing contents may slightly vary depending on the model you purchased ...

Page 15: ...e can be used for picture taking video recoding online conferencing and any other interactive applications 3 LCD Display The 21 5 inch TFT LCD display is with an optimal resolution of 1920 X 1080 pixels and standard proportion of 16 9 widescreen 4 Stereo Speakers The built in stereo speakers deliver high quality sound blaster with stereo sys tem Tear off the protective membrane 3 1 2 4 4 ...

Page 16: ...w 1 4 Overview 1 4 Rear View Important We suggest that you connect the AC DC adapter to your AIO PC first and then connect the AC power cord to the socket outlet for safety concerns 3 1 1 2 1 4 4 5 7 8 9 10 6 ...

Page 17: ...HDMI supports all TV format including standard enhanced or high definition video plus multi channel digital audio on a single cable With MSI Instant Display Technology when you connect power to the AIO PC successfully the monitor will automatically enter stand by mode without pressing the power button When devices are con nected to the HDMI in port the monitor will be turn on immediately You can a...

Page 18: ...You can connect a network cable to it Yellow Green Orange LED Color LED State Condition Left Yellow Off LAN link is not established On steady state LAN link is established On brighter pulsing The computer is communicating with another computer on the LAN Right Green Off 10 Mbit sec data rate is selected On 100 Mbit sec data rate is selected Orange On 1000 Mbit sec data rate is selected 9 Microphon...

Page 19: ...in S4 Suspend to Disk mode 2 Monitor Power LED The power LED glows when the monitor is turned on and goes off when the monitor is shut down 3 Hard Disk Drive LED This indicator shows the activity status of the HDD It flashes when the sys tem is accessing data on the HDD and remains off when no disk activity is detected 4 System Power Button Press the system power button to turn the system on or of...

Page 20: ...ransfer rate 10 USB 3 0 Port with MSI Super Charger Technology Optional The USB 3 0 port is backward compatible with USB 2 0 devices It supports up to 5Gbit s SuperSpeed data transfer rate With MSI Super Charger Technology not only does it function as normal USB 3 0 port but it also enables users to charge USB devices even when the system is turned off Users will no longer need to power on the sys...

Page 21: ...15 Eject Button Press the eject button to open the optical disk drive 16 Ventilator The ventilator on the enclosure is used for air convection and to prevent the equipment from overheating Do not cover the ventilator Important High speed devices are recommended for USB 3 0 ports whereas low speed devices such as mouse or keyboard are suggested to be plugged into the USB 2 0 ports on the rear panel...

Page 22: ...ally supported through Mini PCI E WLAN module Audio HDA Codec by Realtek ALC887 Compliant with Azalia 1 0 specs Graphics Optional NVIDIA GeForce series VRAM DDR3 up to 2GB Display 21 5 inch full HD display with backlight LED An optimal resolution of 1920 x 1080 pixels Standard proportion of 16 9 widescreen Rear Input Output 1 TV antenna connector optional 1 HDMI In port optional 1 HDMI Out port op...

Page 23: ...ker 2 stereo speakers WebCam Support webCam with microphone Power Supply Option 1 90 Watt AC DC adapter with active PFC Input 100 240V 1 5A 50 60Hz Output 19V 4 74A Option 2 120 Watt AC DC adapter with active PFC Input 100 240V 2 0A 50 60Hz Output 19V 6 32A Option 3 150 Watt AC DC adapter with active PFC Input 100 240V 2 0A 50 60Hz Output 19V 7 9A Option 4 180 Watt AC DC adapter with active PFC In...

Page 24: ...mitation please refer to the specifications in the User s Manual For any further information on the product users purchased please contact the local dealer Do not attempt to upgrade or replace any component of the product if you are not an authorized dealer or service center since it may cause the warranty void It is strongly recommended that you contact the authorized dealer or service center for...

Page 25: ...ng Started This chapter provides you with the information on hard ware setup procedures While connecting peripheral devices be careful in holding the devices and use a grounded wrist strap to avoid static electricity ...

Page 26: ...chair sit straight and keep a good posture Adjust the chair s back if available to support your back comfortably Place you feet flat and naturally on the floor so that your knees and elbows have the proper position about 90 degree when operating Put your hands on the desk naturally to support your wrists Adjust the angle position of the AIO PC to have an optimal view Avoid using your PC in a place...

Page 27: ...on a flat and steady surface such as a table or desk 2 Pull the stand open and tilt the monitor To stabilize the system make sure that the stand has been pulled until the mark on its hinge aligns to the edge of the hinge cover Proper positioning helps to reduce your eye strain muscle fatigue as well ...

Page 28: ... and the AC power cord 2 Plug the DC end of the adapter to the AIO PC 3 Plug the male end of the AC power cord to the electrical outlet Important We suggest that you connect the AC DC adapter to your AIO PC first and then connect the AC power cord to the socket outlet for safety concerns 3 2 1 ...

Page 29: ...2 5 Wind Top Series 2 5 Wind Top Series Powering on the System Press the power button to power on the system ...

Page 30: ......

Page 31: ...Chapter 3 System Operations Windows 7 This chapter provides you with essential information on system operations Important All information is subject to change without prior notice ...

Page 32: ... I accept the license terms box and click Next to continue 7 Select Use recommended settings for Help protect your computer and improve Windows automatically 8 Review your time and date settings Click Next to continue 9 Please choose a wireless network you intend to join from the provided WLAN list Click Next to continue You may also click Skip to skip this step and set up the WLAN later 10 Option...

Page 33: ...3 3 Wind Top Series 3 3 Wind Top Series Network Connection under Windows Wired LAN 1 Go to Start Control Panel 2 Select Connect to the Internet under Network and Internet ...

Page 34: ...tem Operations Windows 7 3 4 3 Select Broadband PPPoE to connect using DSL or cable that requires a user name and password 4 Type the information from your Internet Service Provider ISP and click Connect to establish your LAN connection ...

Page 35: ...3 5 Wind Top Series 3 5 Wind Top Series Wireless LAN 1 Go to Start Control Panel 2 Select Connect to the Internet under Network and Internet ...

Page 36: ...a wireless router or a wireless network 4 A list of available WLAN connections pops up Choose a connection from the list or click Open Network and Sharing Center to establish a new connection 5 To establish a new WLAN connection select Set up a new connection or net work in Network and Sharing Center ...

Page 37: ...y connect to a wireless network and click Next to continue 7 Enter information for the wireless network you intend to add and click Next to proceed 8 A new WLAN connection has been made Click Close to exit or select Change connection settings to modify the WLAN settings ...

Page 38: ...er the fullest audio experience for music movies and games while remaining true to the source and intention of the artists who created it Using the THX TruStudio PRO 1 To launch the THX TruStudio PRO open its control panel from Start Program Creative THX TruStudio PRO or double click the THX tray icon at the system tray 2 Click the Menu Button Enter Settings and Audio Device Selection to select an...

Page 39: ...ic movies and games Instructions Select Surround Drag the slider left or right Changes can be heard when adjusting the slid er Click the triangle under the slider to confirm the adjustment Play an audio file 1 2 3 4 Crystalizer enhances music and movies to make them sound livelier Instructions Select Crystalizer Drag the slider left or right Changes can be heard when adjusting the slid er Click th...

Page 40: ...eaker configurations 1 2 3 4 Smart Volume adjusts the loudness of your audio playback automatically to minimize sudden volume changes Instructions Select Smart Volume Drag the slider left or right Changes can be heard when adjusting the slid er Click the triangle under the slider to confirm the adjustment Play an audio file 1 2 3 4 Dialog Plus enhances the voice in movies for clearer dialogs Instr...

Page 41: ...Menu button to launch the OSD main menu Use the Up and Down buttons to select the desired function menu and press the Menu button to enter Use the Up and Down buttons to select or tune the values to suit your personal preferences After the settings are done press the Mode button to exit Adjusting contrast and brightness Adjusting color System Power Menu Enter Down Volume Down Up Volume Up Mode Mon...

Page 42: ... Operations Windows 7 3 12 System Operations Windows 7 3 12 Adjusting phase focus clock pitch Adjusting screen position Adjusting signal source Adjusting OSD position timeout Specifying language Scenery mode ...

Page 43: ...t the system volume 3 Press the Mode button to view the signal source Press it again to select PC HDMI monitor off mode Important Whenever any error takes place and incurs abnormal display or volume malfunction enter the OSD menu and reset your monitor to restore all settings to manufacturer default for optimal performance ...

Page 44: ...ergy efficient turn off your display or set your PC to sleep mode after a period of user inactivity Power Management in Windows OS Power Options in Windows OS allow you to control the power management features of your display hard drive and battery Go to Start Control Panel System and Security Then click on the Power Options link Select a power plan that suits your personal needs You may also fine...

Page 45: ...as been preset to behave in the following ways when the system is operating on AC power Turn off the display after 15 minutes Initiate Sleep after 30 minutes Waking the System Up The computer shall be able to wake up from power saving mode in response to a com mand from any of the following the power button the network Wake On LAN the mouse the keyboard Energy Saving Tips Turn off the monitor by p...

Page 46: ...y When you want to install the OS with other built in languages Before using the Recovery Tool please back up the important data saved on your sys tem drive to other storage devices If the following solution fails to recover your system please contact the authorized local distributor or service center for further assistance Recovering the System with the F3 Hotkey If the system encounters non reco...

Page 47: ...re System and Recover to factory default System Backup It is highly recommended that users back up the system as the solution in the event of a catastrophic disk failure or other accidents Follow the instructions below to continue 1 Select Backup System to enter Alternatively select X or press Esc on the key board to exit ...

Page 48: ...ons Windows 7 3 18 2 Select BACKUP to start the system backup immediately The Initial Backup The initial backup may take a while Please let it complete without interruption Subsequent Backups Subsequent backups will replace the previous backup files ...

Page 49: ...ogress Please note that it may take a while Do not switch off the power or it may cause unknown damage to the system 4 Alternatively select CANCEL to stop the system backup immediately Please do not switch off the power while the system backup cancellation is in progress ...

Page 50: ...e This tool helps to return the system to a previous state with the backup files that users created and saved in the hard disk drive beforehand If no backup files are available the system will be restored to the default setup Follow the instructions below to continue 1 Select Restore System to enter Alternatively select X or press Esc on the key board to exit ...

Page 51: ...so that the system can recover to the previous backup or de fault setup Alternatively select CANCEL to stop the system restore immediately With backup files restoring the system to the previous backup Without backup files restoring the system to the default setup ...

Page 52: ...ake a while Do not switch off the power or it may cause unknown damage to the system 4 The following message indicates a successful system restore Press OK to finish Restart the system and access the Windows operating system as usual If the restore process fails or is interrupted please start the whole procedure all over again ...

Page 53: ... settings will be restored to factory default Follow the instructions below to continue 1 Select Recover to factory default to enter Alternatively select X or press Esc on the keyboard to exit 2 The system will be recovered to factory settings All data will be gone Make sure all important data have been backed up Select NEXT to continue Alter natively select CANCEL to stop ...

Page 54: ... Operations Windows 7 3 24 3 Please select OK so that the system can recover its default setup 4 The system recovery is in progress Please note that it may take a while Do not switch off the power or it may cause unknown damage to the system ...

Page 55: ... The following message indicates a successful system recovery Press OK to fin ish Restart the system and access the Windows operating system as usual If the recovery process fails or is interrupted please start the whole procedure all over again ...

Page 56: ......

Page 57: ...Chapter 4 System Operations Windows 8 This chapter provides you with essential information on system operations Important All information is subject to change without prior notice ...

Page 58: ...wireless network you intend to join from the provided WLAN list Click Connect to continue You may also click Connect to a wireless network later to set up the wireless network later Enter the password for this network and click Connect to continue By choosing the express settings this PC will occasionally send info to Microsoft to help make things run more smoothly in Windows Click Use express set...

Page 59: ...4 3 Wind Top Series 4 3 Wind Top Series Network Connection under Windows Wired LAN Go to Start Control Panel 1 Select View network status and tasks under Network and Internet 2 ...

Page 60: ...stem Operations Windows 8 4 4 System Operations Windows 8 4 4 To establish a new connection select Network and Sharing Center 3 Select Set up a new connection or network 4 Choose Connect to the Internet 5 ...

Page 61: ... Wind Top Series Select Broadband PPPoE to connect using DSL or cable that requires a user name and password 6 Type the information from your Internet Service Provider ISP and click Connect to establish your LAN connection 7 ...

Page 62: ...ns Windows 8 4 6 System Operations Windows 8 4 6 Wireless LAN Select Settings on Desktop locate a wireless icon with available network A list of available WLAN connections pops up Choose a connection from the list 1 2 ...

Page 63: ...To establish a new connection select Network and Sharing Center under Net work and Internet in Control Panel 3 Select Set up a new connection or network 4 Followingly choose Manually connect to a wireless network and click Next to continue 5 ...

Page 64: ...m Operations Windows 8 4 8 Enter information for the wireless network you intend to add and click Next to proceed 6 A new WLAN connection has been made Click Close to exit or select Change connection settings to modify the WLAN settings 7 ...

Page 65: ...st audio experience for music movies and games while remaining true to the source and intention of the artists who created it Using the THX TruStudio PRO 1 To launch the THX TruStudio PRO open its control panel from Start Program Creative THX TruStudio PRO or double click the THX tray icon at the system tray 2 Click the Menu Button Enter Settings and Audio Device Selection to select and con figure...

Page 66: ...er sion in music movies and games Instructions Select Surround Drag the slider left or right Changes can be heard when adjusting the slid er Click the triangle under the slider to confirm the adjustment Play an audio file 1 2 3 4 Crystalizer enhances music and movies to make them sound livelier Instructions Select Crystalizer Drag the slider left or right Changes can be heard when adjusting the sl...

Page 67: ...urations 1 2 3 4 Smart Volume adjusts the loudness of your audio playback automatically to minimize sudden volume changes Instructions Select Smart Volume Drag the slider left or right Changes can be heard when adjusting the slid er Click the triangle under the slider to confirm the adjustment Play an audio file 1 2 3 4 Dialog Plus enhances the voice in movies for clearer dialogs Instructions Sele...

Page 68: ...1 Press the Menu button to launch the OSD main menu Use the Up and Down buttons to select the desired function menu and press the Menu button to enter Use the Up and Down buttons to select or tune the values to suit your personal preferences After the settings are done press the Mode button to exit Adjusting contrast and brightness Adjusting color System Power Menu Enter Down Volume Down Up Volume...

Page 69: ...4 13 Wind Top Series 4 13 Wind Top Series Adjusting phase focus clock pitch Adjusting screen position Adjusting signal source Adjusting OSD position timeout Specifying language Scenery mode ...

Page 70: ...ns to adjust the system volume 3 Press the Mode button to view the signal source Press it again to select PC HDMI monitor off mode Important Whenever any error takes place and incurs abnormal display or volume malfunc tion enter the OSD menu and reset your monitor to restore all settings to manufac turer default for optimal performance ...

Page 71: ...nt turn off your display or set your PC to sleep mode after a period of user inactivity Power Management in Windows OS Power Options in Windows OS allow you to control the power management features of your display hard drive and battery Go to Start Control Panel System and Security Then click on the Power Options link Select a power plan that suits your personal needs You may also fine tune the se...

Page 72: ...nt feature has been preset to behave in the following ways when the system is operating on AC power Turn off the display after 15 minutes Initiate Sleep after 30 minutes Waking the System Up The computer shall be able to wake up from power saving mode in response to a com mand from any of the following the power button the network Wake On LAN the mouse the keyboard Energy Saving Tips Turn off the ...

Page 73: ...phic disk failure or other accidents Before moving forward please make sure your system booting setup is complete and go over the following procedures to get it done 1 Double click the BurnRecovery icon on the desktop to launch the Recovery Disc Creation Tool Please note that it may take a while for the operating system to prepare recovery files 2 Click Next to start the image creation of the reco...

Page 74: ...erations Windows 8 4 18 3 Select Create and burn a recovery disc and click Next to continue Alternatively choose Advanced to bring forth advanced options 4 The image of recovery disc is being created It takes some time to finish the processing ...

Page 75: ...en instructions to prepare enough number of blank DVD discs Insert the blank DVD disc into the optical disc drive and click Next to continue 6 The Windows Disc Image Burner pops up Click Burn to start the burning progress It takes a while to finish the processing ...

Page 76: ...8 4 20 7 On completion of the disc creation click Close to exit and take out the disc Fol low the on screen instructions to create all recovery discs 8 All recovery discs have been successfully created Please store the discs carefully and click Next to continue ...

Page 77: ...4 21 Wind Top Series 4 21 Wind Top Series 9 Check the following box if you want to remove the temporary files Click Finish to complete recovery disc creation ...

Page 78: ...f original manufacturer s default settings When some errors have occurred to the operating system in use When the operating system is affected by virus and is not able to work normally When you want to install the OS with other built in languages Before using the System Recovery Function please backup the important data saved on your system drive to other storage devices If the following solution ...

Page 79: ...cs that you created beforehand Follow the instructions below to continue Insert the recovery disc into the optical disc drive Select Settings on Desktop then Change PC settings to enter PC set tings main page General Advanced startup and click Restart now to restart the system 1 2 After booting up following screen will pop up select the Use a device to con tinue 3 ...

Page 80: ...the boot device 4 The Windows OS starts loading files The system recovery menu pops up Hard Disk Recovery will format the whole HDD All data on the HDD will be erased while all settings will be restored to manufacturer default Select Hard Disk Recovery only when your HDD is infected with fatal viruses and no solution can be found except a clear cleanup of the HDD 6 ...

Page 81: ...S to continue click NO to stop the system recovery 7 System Partition Recovery will format the C drive only Only the C drive will be restored to manufacturer default Other drives will not be affected It is highly recommended that users select System Partition Recovery to restore the system Click YES again to reconfirm click NO to stop the system recovery ...

Page 82: ...system recovery function or it may cause unknown damage to the system 8 The following message indicates successful system recovery Press OK to restart the system and access the Windows operating system as usual 9 If the recovery process is interrupted or failed please repeat the recovery proce dures from the beginning 10 ...

Page 83: ...ine or not on finding issues with Windows files it will attempt to repair your PC If your PC isn t running well you can refresh it without losing your personal files Select Settings on Desktop then Change PC settings to enter PC set tings main page General Refresh your PC without affecting your files and click Get started 1 It will show the changes which will be made during the process click Next ...

Page 84: ...dows 8 4 28 A message indicates that your PC is ready to be refreshed click refresh to start This might take a while 3 After the refresh process ends you will be back to Windows Start Screen where you can find all default Windows 8 utilities and widgets 4 ...

Page 85: ...g the system back to original factory settings Select Settings on Desktop then Change PC settings to enter PC settings main page General Remove everything and reinstall Windows and click Get started 1 It will show the changes to be made during the process click Next to continue 2 ...

Page 86: ...8 4 30 System Operations Windows 8 4 30 You will be prompted to choose which drive you want to clean for a hard disk with multiple partitions 3 Now select either to remove files or to fully clean drives according to your needs 4 ...

Page 87: ...4 31 Wind Top Series 4 31 Wind Top Series It is now ready to reset your PC click Reset and follow the on screen instructions to restart your PC 5 ...

Page 88: ...Appendix A Troubleshooting ...

Page 89: ... choose one of the following steps 1 Press Ctrl Alt Del keys then choose Shut Down 2 Press and hold the power button till the system is off 3 Unplug the power cable from the system My microphone does not work 1 For built in microphone please go to Start Control Panel Sounds and Audio Devices Audio to check if it is muted 2 If you are using an external microphone check that the microphone is plugge...

Page 90: ... If you see video but cannot hear audio check the media player Also make sure the speakers and the master volume setting in the Audio Mixer are not muted 5 Check if the drivers are installed properly Click Start Control Panel System Device Manager 6 A dirty or scratched disc may cause the computer to hang when it is trying to read the disc If necessary reboot the computer remove the disc and check...

Reviews: